
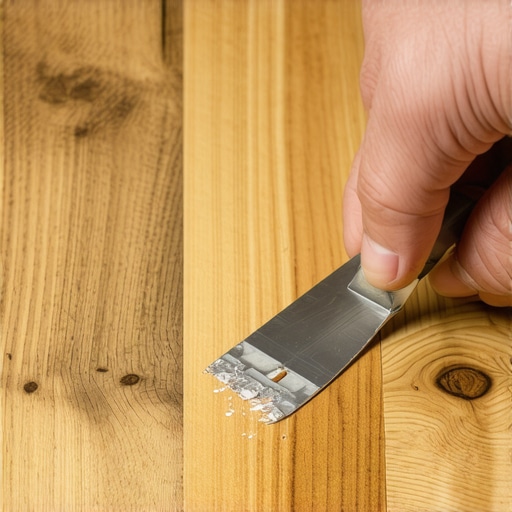
The Putty Knife Trick for Fixing Gouges in Engineered Hardwood
It happens in slow motion. You’re moving a piece of furniture, or perhaps a heavy cast-iron skillet slips from your hand in the kitchen. The resulting “thud” is followed by that sinking feeling in your stomach as you look down to see a jagged, raw gouge staring back at you from your beautiful floor. For homeowners with engineered wood, the panic is often doubled. Unlike solid planks, you can’t simply sand away your problems indefinitely. When you’re dealing with a limited wear layer, traditional sanding and refinishing hardwood floors isn’t always an option for a single localized accident.
As a veteran in hardwood floor refinishing in Kansas City, I’ve seen thousands of these “oops” moments. While a deep hole might look like a permanent scar, there is a professional secret we use to make these eyesores disappear without a full-scale renovation. It’s called the “Putty Knife Trick.” This method is the gold standard for hardwood floor repair when you need to bridge the gap between a DIY fix and calling in the refinishing hardwood floor contractors. In this guide, I’m going to pull back the curtain and show you exactly how to execute this repair like a pro.
Why Engineered Hardwood Requires a Different Approach
Before you grab a belt sander (please, put the sander down!), you need to understand the anatomy of what’s under your feet. Engineered hardwood isn’t a solid block of oak or hickory. It’s a sandwich of high-quality plywood or HDF (high-density fiberboard) topped with a thin veneer of real wood. If you aren’t sure what you’re standing on, you can learn how to tell if your hardwood is solid or engineered in seconds. This distinction is critical because the “wear layer” – the part you actually see – might only be 2mm to 4mm thick.
Because of this thin top layer, a deep gouge often penetrates through the precious hardwood and into the core material. If you attempt to sand the area smooth, you risk “sanding through” the veneer, exposing the plywood underneath – a mistake that usually requires a full board replacement. Furthermore, for those living with hardwood flooring in Kansas City, our wild swings in humidity mean that these gouges can trap moisture or expand and contract, eventually leading to finish peeling around the wound. A hardwood floor patch using the putty knife trick creates a stable, flexible seal that moves with the wood while hiding the damage.
While luxury vinyl plank installers deal with waterproof materials that can sometimes be swapped out easily, wood is a living, breathing material. It requires a repair that mimics its natural texture and color. This is why a topical filler, applied correctly, is often superior to a structural intervention for engineered products.
The Essential Toolkit: What You’ll Need
To perform the putty knife trick correctly, you need the right tools. Using the wrong equipment – like a metal scraper – can actually cause more scratch repair hardwood floors issues than you started with. Here is your professional-grade shopping list:
- Plastic Putty Knife: This is the most important tool. A metal knife can scratch the delicate aluminum oxide finish on engineered wood. Plastic provides the flex and safety needed for a flush finish.
- Hard Fill Burn-in Sticks or High-Quality Wood Putty: For deep gouges, I recommend hard fill sticks (wax-based) which require a heat tool. For shallower repairs, a prefinished wood putty that matches your floor’s stain is sufficient.
- Painter’s Tape: To protect the surrounding healthy boards.
- White Cotton Cloth: To buff the area and remove “ghosting” from the filler.
- Heat Source: If you are using professional burn-in sticks, a small butane or battery-operated melting tool is necessary.
- Mineral Spirits: For cleaning the area before you begin.
If you find that the hole is particularly large or structural, you might need to supplement this list. In those cases, I often recommend the wood glue and sanding dust trick for making hardwood patches invisible, though that is typically reserved for unfinished or site-finished floors.
Step-by-Step: Executing the Putty Knife Trick
Now, let’s get into the mechanics of the repair. The goal is to fill the void so perfectly that the eye passes right over it. Follow these steps precisely.
Step 1: Preparation
The biggest enemy of a hardwood floor repair is dust. If there is any grit inside the gouge, the putty won’t bond, and it will eventually pop out. Use a vacuum with a hose attachment to suck out any splinters or dirt. Follow up with a white cloth dampened with a tiny amount of mineral spirits to de-grease the area. This is especially important in kitchens where floor wax or cooking oils might be present.
Step 2: The Tape Shield
Even the best refinish hardwood floors Kansas City experts don’t trust their hands perfectly. Surround the gouge with painter’s tape, leaving only about an 1/8th of an inch of “good” floor visible around the hole. This prevents the filler from getting into the natural grain of the surrounding boards, which is a nightmare to clean up later.
Step 3: The Fill (The “Overfill” Rule)
Whether you are using a putty or a melted burn-in stick, you must overfill the gouge. Putties contain moisture or solvents that evaporate as they cure, causing the material to shrink. If you fill it flush while wet, it will be concave once dry. Scoop a small amount of filler and press it firmly into the gouge, ensuring it reaches the very bottom. You want a slight mound of material sitting above the floor level.
Step 4: The Putty Knife Leveling (The “Trick”)
This is where the magic happens. Hold your plastic putty knife at a 45-degree angle to the floor. In one smooth, firm motion, scrape across the top of the overfilled gouge. The angle is vital; if the knife is too flat, it will pull the putty out of the hole. If it’s too vertical, it won’t cut the top off cleanly. Because you’re using plastic, you don’t have to worry about creating new scratches. This action shears off the excess filler while leaving the repair perfectly level with the surface of the wood. This is a trade secret that saves hours of sanding and refinishing hardwood floors.
Step 5: Buffing and Curing
Wait for the filler to “flash off” (start to dry on the surface). This usually takes 5 to 10 minutes. Take your clean, dry cotton cloth and gently buff the edges of the repair. This removes any hazy residue (ghosting) left by the putty. Once it looks right, remove the tape and let it cure for at least 24 hours before allowing foot traffic or furniture to touch the spot.
Color Matching Like a Kansas City Pro
The “trick” works mechanically, but the repair will only be invisible if the color is right. Matching hardwood flooring in Kansas City can be tricky because our local light – especially in those sun-drenched Great Rooms – changes how we perceive color.
Professional refinishing hardwood floor contractors rarely use just one color of putty. We often mix a “field” color (the main tone of the wood) with a “grain” color (a darker streak). If your floor has a lot of character, try mixing two different shades of putty on a piece of cardboard before applying them to the floor.
Always aim for a shade that is slightly darker than the floor. Why? Because a light-colored patch looks like a piece of chewing gum, whereas a dark patch looks like a natural knot or grain line in the wood. If you’re working with a dark wood like Walnut or Espresso Oak and don’t have putty on hand, you can even try the coffee grounds hack for hiding scratches in dark oak as a temporary measure until you can get the right materials.
When the Putty Knife Isn’t Enough: Identifying Major Damage
As much as I love the putty knife trick, it isn’t a magic wand for every problem. There are times when a DIY hardwood floor patch is like putting a band-aid on a broken leg. You need to know when to put down the putty knife and call for wood floor refinishing in Kansas City.
Water Damage
If your floor is “cupping” (the edges of the boards are higher than the center) or “crowning” (the center is higher), you likely have hardwood floor water damage repair needs. Putty will not fix this; it’s a structural issue caused by moisture underneath the planks. In these cases, the entire area may need to be replaced or professionally dried and sanded.
Failing Finish
If you notice the finish is flaking off in large areas, not just where the gouge is, your floor’s protective layer may be reaching the end of its life. You can perform the tape test for deciding if your Kansas City hardwood needs a full sanding or a simple screen and coat. If the tape pulls up more finish, the putty knife trick won’t save you – you need a professional refinish of your hardwood floors.
Extensive Wear
Sometimes, an old hardwood floor restoration is the only way to bring back the home’s value. If the gouges are everywhere, it might be time to consider whether you want to replace carpet with hardwood in adjacent rooms and do a total house refinish to ensure everything matches. This is where hardwood floor refinishing Kansas City experts really shine, using dustless sanding tips to keep your home clean while they work.
Maintenance Tips to Prevent Future Gouges
Once you’ve mastered the putty knife trick, the best strategy is to never have to use it again. Engineered hardwood is durable, but it isn’t invincible. Here are a few tips to keep your floors pristine:
- Felt Everything: Every chair leg, table base, and sofa foot should have high-quality felt pads. In Kansas City, where we move from heavy boots in the winter to bare feet in the summer, we drag a lot of grit into the house. Felt pads prevent that grit from becoming sandpaper under your furniture.
- Humidity Control: Aim to keep your home between 35% and 55% humidity. This prevents the wood from shrinking and becoming brittle, which makes it more prone to splintering and gouging.
- Rug Placement: High-traffic zones (like the path from the garage to the kitchen) should have runners. Even luxury vinyl plank installers will tell you that rugs are the best defense against long-term wear.
Conclusion & Call to Action
Repairing your engineered hardwood doesn’t have to be a daunting, expensive project. By using the plastic putty knife trick, you can level out gouges, protect your floor’s core, and restore the visual beauty of your home in just a few minutes of active work. It’s about having the right tools, the right angle, and a little bit of patience with color matching.
However, if your floors are showing signs of widespread wear, water damage, or if you’re ready for a total old hardwood floor restoration, don’t go it alone. Ready for a professional transformation? Contact Premium Flooring Co. today for a consultation on your next hardwood flooring Kansas City project. We specialize in making old floors look brand new, whether you need a simple repair or a full sanding and refinishing of hardwood floors.