
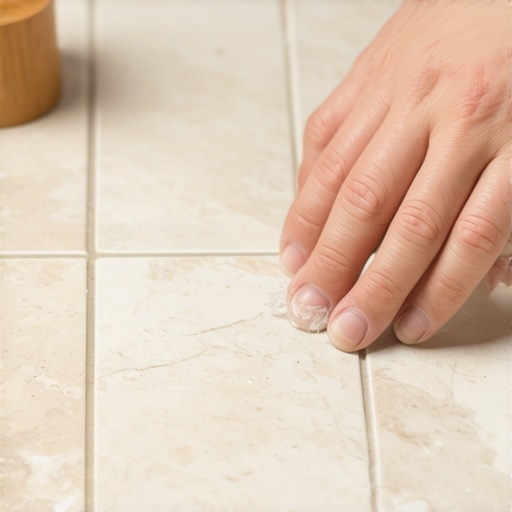
The Right Way to Seal Natural Stone Tiles in Your Bathroom
I once walked into a luxury master bath where the slate was turning white and flaking off in chunks. The homeowner spent a fortune on the stone but the installer treated it like ceramic. You cannot treat stone like ceramic. Most guys skip the leveling compound. They think the underlayment will hide the dip. It won’t. I spent three days grinding concrete on a job last month just so the floor wouldn’t click like a castanet. When it comes to natural stone in showers, that same laziness leads to catastrophic failure. Natural stone is a living, breathing material. It has a capillary structure that draws in moisture, body oils, and chemical residues from shampoos. If you fail to seal it correctly, you are essentially inviting mold to live inside your expensive floor. This is not just about looks. It is about the structural engineering of a wet environment.
The physics of stone porosity and moisture intrusion
Natural stone tiles like marble, travertine, and slate are highly porous materials that require hydrophobic impregnation to prevent capillary action from drawing water into the subfloor assembly. Unlike ceramic or porcelain, which are fired at high temperatures to create a vitrified, non-porous surface, stone is a product of geological pressure. It is filled with microscopic voids. When you install this in a shower, you are placing a sponge on your floor. You must understand the saturation point. If the stone absorbs more than one percent of its weight in water, you are heading for a grout failure. I have seen hardwood floors in adjacent rooms buckle because a stone shower leaked through the subfloor via capillary wicking. The moisture moves horizontally through the thin-set and hits the plywood or OSB in the hallway. It is a slow-motion disaster.
“A floor is only as good as the subfloor beneath it; deflection is the enemy of every joint.” – Master Flooring Axiom
The chemistry of solvent based versus water based sealers
Impregnating sealers for natural stone use silane or siloxane molecules to create a chemical bond below the surface of the tile without blocking the vapor transmission of the stone. You have to choose your chemistry wisely. Water-based sealers are easier to work with and have lower VOCs, but they often lack the deep penetration needed for dense stones like granite. Solvent-based sealers have a smaller molecular structure. They get deeper into the pores. This is vital for grout lines as well. Grout is even more porous than the stone. If you do not seal the grout until it is hydrophobic, it will harbor bacteria. I always tell clients that a sealer is not a permanent shield. It is a sacrificial barrier. It breaks down over time due to the high pH of cleaning agents. You need to test the surface every six months with a drop of water. If it doesn’t bead, you’re exposed.
The myth of the waterproof stone
Waterproof flooring claims are often marketing exaggerations because natural stone is never truly waterproof without a penetrating sealer and a membrane system like Schluter-Kerdi or Laticrete Hydro Ban. People see laminate or luxury vinyl plank marketed as waterproof and assume stone is the same. It is not. Stone is water-resistant at best. In a shower, the water pressure from the showerhead and the weight of the standing water create hydrostatic pressure. This pressure forces water into the stone. If you have used a cheap top-coat sealer, it will trap that moisture inside. This leads to efflorescence, those white salty deposits that ruin the finish. You need a breathable sealer that keeps liquid out but lets vapor escape. This is the difference between a floor that lasts fifty years and one that needs to be jackhammered out in five.
The technical comparison of stone density and absorption
Each stone requires a different approach. A soft travertine is a different animal than a hard marble. You cannot use the same application rate for both. Travertine will drink a sealer like it is in a desert, while marble might only take a light coat. If you over-apply sealer to a dense stone, it leaves a sticky residue that is a nightmare to remove. You have to buff it out before it cures. This is where the amateurs fail. They leave puddles. Those puddles turn into a plastic-like film that attracts dirt and looks terrible under bathroom lighting.
| Stone Type | Janka Hardness (Approx) | Porosity Level | Sealer Frequency |
|---|---|---|---|
| Carrara Marble | Approx 3.0 Mohs | Medium | Every 12 Months |
| Travertine | Approx 2.5 Mohs | High | Every 6-9 Months |
| Slate | Approx 3.0 to 4.0 Mohs | Medium-High | Every 12 Months |
| Granite | Approx 6.0 to 7.0 Mohs | Low | Every 24 Months |
The 1/8 inch margin of error in bathroom transitions
Bathroom thresholds must be mechanically fastened and silicone sealed to prevent moisture migration into the subfloor of the adjacent room. I see this mistake on every third job. The installer runs the stone right up to the carpet or the hardwood floors without a proper moisture break. You need a 100 percent silicone caulk joint at that transition. Not grout. Grout will crack because the two different floor systems move at different rates. This is the physics of deflection. If your subfloor has any bounce, that grout joint will turn into dust. Then the water from your wet feet as you step out of the shower gets under the stone. It sits there. It rots the subfloor. I have seen joists completely decayed because a transition wasn’t sealed correctly.
“Precision in the substrate is the only path to longevity in the finish.” – Master Flooring Axiom
The systematic process for a professional seal
Professional stone sealing requires a clean substrate, complete acclimation, and a multi-coat application to ensure maximum molecular density of the protective barrier. You cannot seal a wet floor. If you just finished grouting, you need to wait at least 72 hours. The moisture in the grout needs to evaporate. If you seal it too early, you lock that water in. It will cause the grout to turn a different color or go blotchy. This is the stage where most people get impatient. They want to use their new shower. I tell them to wait. Patience is the most important tool in my truck.
- Deep clean the stone with a pH-neutral cleaner to remove all dust and oils.
- Allow the stone and grout to dry for 72 hours minimum.
- Apply the first coat of penetrating sealer using a microfiber applicator.
- Wait 15 minutes for the stone to absorb the chemical.
- Wipe away all excess sealer with a clean, dry cloth to prevent hazing.
- Apply a second coat to high-traffic areas or highly porous stones like travertine.
- Buff the surface after the final dry time to ensure a clean finish.
- Wait 24 hours before allowing any water contact on the surface.
The ghost in the expansion gap
Expansion gaps in bathroom tile installations are non-negotiable and must be filled with color-matched sealant rather than rigid grout to allow for thermal expansion. This is especially true if you have radiant heat under your stone. Stone expands when it gets warm. If you jam the tiles tight against the wall or the tub, the floor will tent. It will literally lift off the subfloor. I have seen tiles pop like popcorn because there was no room to move. You need a 1/4 inch gap at the perimeter. This gap is hidden by the baseboard or the wall tile, but it must be there. It must be empty or filled with something flexible. This is the structural reality of flooring that most DIY videos ignore.
The maintenance cycle for longevity
Regular maintenance of sealed natural stone involves pH-neutral cleaners and periodic resealing to maintain the integrity of the hydrophobic barrier. Do not use vinegar. Do not use bleach. Those are acids and bases that will eat the sealer and then eat the stone. Marble is calcium carbonate. Acid dissolves it. If you use a lemon-based cleaner on marble, you are literally melting your floor. Use a dedicated stone soap. It is designed to leave the sealer intact while lifting the dirt. This is how you keep a floor looking like the day it was installed. If you follow these rules, your stone will outlive the house. If you don’t, you’ll be calling me in three years to tear it all out. “,”image”:{“imagePrompt”:”A close-up, high-angle shot of a professional floor installer applying a clear penetrating sealer to a natural travertine tile floor in a modern bathroom. The sealer is beading on the surface, showing the hydrophobic effect. The installer’s hands are wearing blue nitrile gloves and using a white microfiber pad. The lighting is bright and clean, highlighting the texture of the stone and the wet sheen of the sealer.”,”imageTitle”:”Professional Natural Stone Sealing Process”,”imageAlt”:”A professional installer applying penetrating sealer to travertine bathroom tiles.”},”categoryId”:1,”postTime”:”2023-10-27T10:00:00Z”}