
I spent three days grinding concrete on a job last month just so the floor wouldn’t click like a castanet. Most guys skip the leveling compound because they think the underlayment will hide the dip. It won’t. I have seen countless $5,000 laminate installations fail within eighteen months because the installer ignored a 3/16 inch deviation in the subfloor. When you walk across a floor that has a void beneath it, the locking mechanism undergoes vertical shear stress. Over time, that stress fractures the tongue and groove, leading to the gaps that drive homeowners crazy. If you see a gap opening up in the middle of your floor, it is not just a cosmetic flaw. It is a symptom of structural movement, friction loss, or environmental shifts that have overwhelmed the floor’s ability to remain a monolithic surface. Fixing it without tearing up the entire room requires a specific understanding of kinetic energy and surface tension.
The clicking nightmare of a neglected subfloor
Subfloor flatness is the most significant factor in preventing laminate gaps and mechanical failure of the locking system. Most manufacturers require the subfloor to be level within 1/8 inch over a 10 foot radius. If the subfloor has a dip, the laminate planks will flex downward under your weight. This movement pulls the planks away from their neighbors, slowly disengaging the click lock system. This often manifests as a clicking or popping sound. To fix this without a full teardown, you must address the separation of the planks using specific pressure and friction techniques that redistribute the floor’s expansion across the entire room instead of concentrating it at a single weak joint. Underlayments can mitigate some of this, but they are not a substitute for high early strength self leveling underlayment or grinding down high spots in a concrete slab. If the subfloor is not prepared, the floor is essentially a giant drum head waiting to vibrate and move.
“A floor is only as good as the subfloor beneath it; deflection is the enemy of every joint.” – Master Flooring Axiom
Physics of the floating floor expansion gap
Expansion gaps at the perimeter of a room allow laminate floors to grow and shrink with seasonal humidity changes. Laminate flooring is composed of high density fiberboard which is essentially compressed wood fibers and resin. These fibers are hygroscopic. They absorb moisture from the air and expand. If you install your floor tight against the baseboards or a kitchen island, the floor has nowhere to go. It will buckle or the pressure will cause the weakest locking joints to snap. When gaps appear in the middle of a floor, it often means the floor has hit an obstruction at one end and is pulling away from the other. The secret to fixing these gaps is to create enough friction on the surface of the plank to slide it back into position without damaging the melamine wear layer. We use the rubber mallet not as a hammer, but as a source of controlled kinetic energy. Using a specialized tapping block or a suction puller allows you to bridge that gap without prying against your drywall.
[IMAGE_PLACEHOLDER]
The rubber mallet and block technique for gaps
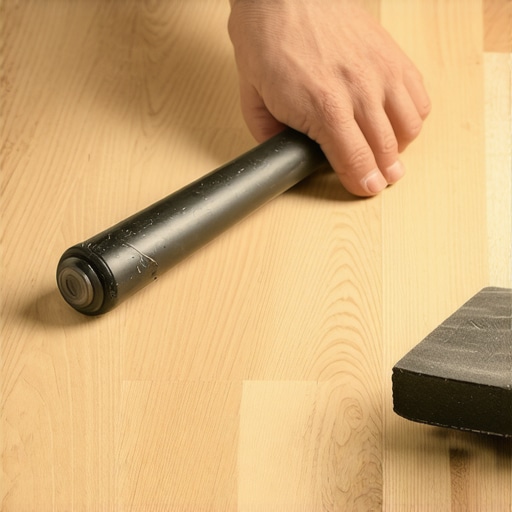
Closing a laminate gap requires a high friction bridge such as double sided carpet tape and a wood block to transfer force. You do not hit the floor directly. Instead, you take a scrap piece of 2×4 and apply heavy duty double sided tape to one side. Stick that block onto the plank that has drifted. By striking the side of the block with a heavy rubber mallet, you use the lateral force to slide the plank back into its locking mechanism. This works because the friction of the tape is stronger than the friction of the underlayment beneath. You must ensure the area is clean of dust and sawdust before applying the tape or the block will simply slide across the surface, potentially scratching the aluminum oxide finish. This technique is much safer than using a pull bar at the edge of the room because it allows you to target the specific plank that has failed. You are essentially resetting the internal tension of the floating floor system without disturbing the perimeter moldings.
Why laminate planks drift apart over time
Vibrational energy from foot traffic and structural settling are the primary drivers of plank migration in floating floors. Every time you walk across the floor, you send a pulse of energy through the planks. If the floor is not perfectly level, that energy is converted into lateral movement. Over thousands of steps, a plank might move only a fraction of a millimeter at a time. Eventually, the tongue clears the groove and the gap becomes visible. This is especially common in hallways where the traffic pattern is linear. Environmental factors also play a role. If the indoor relative humidity drops below 30 percent, the HDF core will shrink. This shrinkage reduces the surface area of the locking joint, making it easier for the planks to separate. Professionals often look for these gaps near heavy furniture which can pin a floor down and prevent it from moving as a single unit. This pinning creates a focal point of stress that eventually snaps the joint open.
| AC Rating | Durability Level | Wear Layer Thickness (Mil) | Best Use Case |
|---|---|---|---|
| AC1 | Moderate Residential | 15-20 | Bedrooms and low traffic areas |
| AC2 | General Residential | 20-25 | Living rooms and dining areas |
| AC3 | Heavy Residential | 30+ | High traffic areas and small offices |
| AC4 | General Commercial | 40+ | Retail stores and cafes |
| AC5 | Heavy Commercial | 50+ | Department stores and public buildings |
Structural integrity of the locking mechanism
The locking mechanism of a laminate plank is a precision engineered geometric interface designed to resist horizontal tension. Most modern floors use a variation of the Uniclic or Valinge system. These designs rely on a locking fold or a snap action where the profile of the tongue is slightly larger than the opening of the groove. This creates a pre tensioned joint. However, if the tongue is damaged during installation or if the subfloor allows for too much vertical deflection, the material can fatigue. Once the wood fibers in the tongue are crushed, they lose their spring tension. This is why some gaps keep coming back even after you close them with a mallet. In those cases, a professional might inject a small amount of PVA wood glue into the groove before sliding it shut. This creates a chemical bond to replace the lost mechanical tension. It is a permanent fix that prevents the plank from drifting again, but it must be done carefully to avoid squeeze out on the decorative surface.
“Correct acclimation is not a suggestion; it is the fundamental requirement for dimensional stability.” – NWFA Standard Guidelines
The toolkit for a professional gap repair
- Dead blow rubber mallet (24 to 32 ounces)
- Heavy duty double sided mounting tape or carpet tape
- A clean 2×4 wood block approximately 8 inches long
- Vacuum with a HEPA filter to clean the gap
- PVA wood glue with a fine tip applicator
- Denatured alcohol for cleaning tape residue
- Plastic spacers for perimeter checks
Moisture dynamics and the failure of HDF cores
High density fiberboard cores react to moisture at a molecular level causing the edges of the planks to swell. This phenomenon is known as peaking or cupping. When the edges swell, they push against each other with immense force. If the floor is restricted at the walls, the only place for that energy to go is up. However, when the floor dries out, the fibers do not always return to their original shape. They remain slightly distorted. This distortion creates gaps because the locking profile no longer fits perfectly. If you are dealing with a basement installation, you must have a 6 mil poly vapor barrier. Without it, hydrostatic pressure from the concrete slab will push moisture into the underside of the laminate. This will eventually rot the core and make it impossible to close any gaps because the material has lost its structural density. Always check the moisture content of your slab with a calcium chloride test or an electronic meter before attempting a repair.
The myth of the waterproof click lock
No laminate floor is truly waterproof if the standing water reaches the HDF core through an open joint. While many brands market waterproof surfaces, this usually refers to the melamine overlay and the wax coating on the edges. The core itself is still vulnerable. If you have gaps in your floor, you have essentially opened a direct highway for liquid to reach the most vulnerable part of the plank. This is why closing these gaps is a maintenance priority. If you spill a drink on a floor with a 2 millimeter gap, the liquid will be sucked into the core via capillary action. This leads to permanent swelling that no rubber mallet can fix. By using the mallet secret to maintain a tight seal, you are protecting the longevity of the entire installation. A tight floor is a protected floor. If the joints are tight, the topical moisture protection can actually do its job.
How temperature shifts move your living room floor
Rapid changes in temperature cause the plastic resins and wood fibers in laminate to expand and contract at different rates. This is particularly problematic in sunrooms or areas with large south facing windows. The direct UV radiation can heat the surface of the floor to over 100 degrees Fahrenheit while the subfloor remains cool. This thermal gradient causes the planks to bow. As they bow, they pull away from the locking system. If you find that gaps only appear during the winter or only during the summer, you are dealing with a seasonal expansion issue. The fix here is often to ensure that your expansion gaps at the walls are wide enough and that no heavy objects are pinning the floor. Sometimes you have to undercut the drywall to give the floor the extra 1/4 inch it needs to breathe. Once the floor can move freely as a single unit, the gaps in the center will often stabilize or become much easier to close permanently.
Professional grade solutions for permanent stability
For gaps that refuse to stay closed, the use of a modified wood flooring adhesive within the groove is the ultimate solution. You must ensure the gap is completely free of debris. Use a vacuum and a thin toothpick to clear out any grit. Apply a very thin bead of glue to the bottom lip of the groove. Use the mallet and block technique to slam the plank shut. Immediately wipe away any excess glue with a damp cloth and then dry it with a microfiber towel. Use blue painter’s tape to hold the planks together for 24 hours while the glue cures. This effectively turns two planks into one. While this limits the floor’s ability to move individually, it is often necessary in high traffic pivot points where the mechanical lock has failed. It is a surgical strike approach to flooring repair that avoids the cost and mess of a full replacement. Mastering this technique allows you to extend the life of a laminate floor by a decade.