
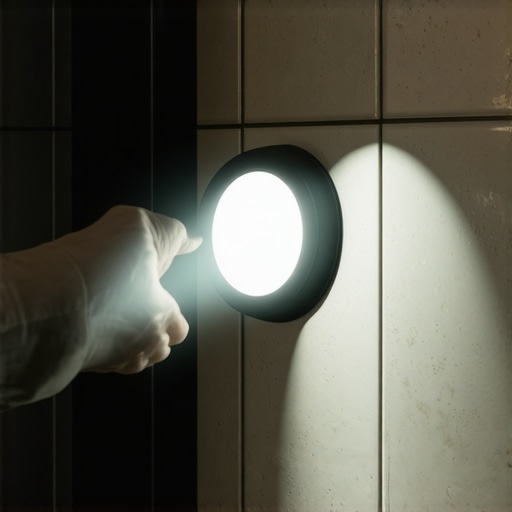
Most guys skip the leveling compound. They think the underlayment will hide the dip. It won’t. I spent three days grinding concrete on a job last month just so the floor wouldn’t click like a castanet. That is the reality of the trade. If the foundation is a lie, the finish is a failure. I have seen fifteen thousand dollar wide-plank walnut floors turn into potato chips because a guy did not want to crawl into a humid crawlspace with a moisture meter. Shower waterproofing is the same game but with higher stakes. If you mess up a living room floor, it squeaks. If you mess up a shower, you rot the floor joists and invite black mold to live in your walls. I do not care how pretty your tile is if the pan is leaking into the subfloor. You have to be a forensic analyst before you are an artist. You have to look for the things that the average homeowner ignores. This is where the flashlight tactic comes into play. It is a simple tool for a complex problem. You are looking for shadows. You are looking for the tiny voids where water, driven by gravity and capillary action, will find a way to escape the enclosure. We are going to talk about the physics of that water and the chemistry of the barriers meant to stop it.
The shadow that reveals the leak
The flashlight tactic involves placing a high-lumen light source directly against the wall or floor of a shower to cast long shadows across the surface. This technique highlights voids in grout and pinholes in membranes that are invisible under normal lighting, allowing for the immediate correction of potential leak points. When you hold a flashlight flush against a tiled wall, the light travels parallel to the plane. Any tiny protrusion or recession becomes a mountain or a canyon in the shadow. I have used this to find gaps in the transition between the wall membrane and the drain flange. These are areas where the bond often fails due to improper thin-set coverage. In the world of the Tile Council of North America, coverage is king. For wet areas, you need ninety-five percent contact. If you have ridges in your mortar, you have channels for water to travel. The flashlight tactic exposes these channels before you ever turn on the shower head. You should be looking at the internal corners specifically. These are the most common points of failure because the waterproof fabric or liquid membrane has to be folded or layered perfectly. If there is a pucker in the fabric, you have a gap. Use a light with at least five hundred lumens. Turn off the overhead lights. Move the beam slowly. If you see a dark spot where the light should be smooth, you have a void that needs a surgical injection of sealant or grout.
Why your subfloor is lying to you
A subfloor may appear flat to the naked eye but often contains micro-deviations that compromise the integrity of the waterproofing layer and the finished tile. Identifying these dips through mechanical leveling is mandatory to prevent the deflection that leads to cracked grout joints and eventual water penetration. You cannot trust a concrete slab just because it looks grey and solid. Concrete is a sponge. It holds moisture and it moves. If your slab has a high moisture vapor emission rate, it will push against your waterproofing from the underside. This is why I always use a calcium chloride test or an in-situ probe before I even think about thin-set. If you are installing over a wood subfloor, deflection is your greatest enemy. Deflection is the amount of flex in the floor when weight is applied. If your joists are spaced too far apart or your plywood is too thin, the floor will bounce. Tile does not bounce. Grout does not bounce. They crack. When they crack, the waterproofing membrane underneath is the only thing saving your house. But if that membrane is stretched to its limit by a bouncy floor, it will eventually tear at the seams. I have seen guys try to put hardwood floors right up to a shower curb without a transition. That is a disaster waiting to happen. Wood expands and contracts at a different rate than tile. You need a movement joint. You need to understand that the subfloor is a living, moving entity that wants to destroy your work.
“A floor is only as good as the subfloor beneath it; deflection is the enemy of every joint.” – Master Flooring Axiom
The chemistry of the impenetrable barrier
Modern shower waterproofing relies on advanced polymer-modified membranes that create a monolithic shield against moisture. These materials must be applied at a specific mil thickness to ensure they can withstand the hydrostatic pressure of standing water without allowing any molecular migration through the substrate. We are talking about the difference between water-resistant and waterproof. Many people think grout is waterproof. It is not. Grout is a porous cementitious product. It slows water down but it does not stop it. The real work happens behind the tile. You have liquid-applied membranes and sheet membranes. Liquid membranes are like a heavy paint that dries into a rubbery skin. You have to measure the thickness with a wet-film gauge. If it is too thin, it is useless. If it is too thick, it can skin over and trap moisture inside, leading to a gummy mess that never cures. Sheet membranes are made of polyethylene with a fleece webbing on both sides. The fleece is there so the thin-set can grab onto it. This creates a mechanical bond. When you use the flashlight tactic on a sheet membrane before the tile goes up, you are looking for air bubbles. An air bubble is a point of no contact. It is a weak spot. If that bubble is at a seam, you are in trouble. You need to use a flat trowel to work those bubbles out to the edges. It is tedious work but it is what separates a pro from a handyman.
Comparing waterproofing systems for longevity
Choosing the right waterproofing system requires an understanding of the specific environment and the materials being used for the finish. Different systems offer varying levels of crack isolation and moisture protection based on their chemical composition and the method of installation required for the project.
| System Type | Application Method | Best For | Drying Time |
|---|---|---|---|
| Liquid Membrane | Roller or Brush | Complex Geometries | 12 to 24 Hours |
| Sheet Membrane | Thin-set Mortar | Large Flat Surfaces | Immediate |
| Foam Backer Board | Mechanical Fasteners | Total Renovation | Immediate |
| Traditional Mud Bed | Tamped Mortar | Custom Slopes | 72 Hours |
Each of these has a place. I prefer foam backer boards for walls because they are light and perfectly flat. They eliminate the need for a vapor barrier behind the board because the board itself is the barrier. However, you still have to treat the joints. The joints are where the flashlight tactic is most effective. You shine the light down the seam to see if the sealant is flush. If the sealant is recessed, water will pool in that tiny canyon. Over years, that pooling leads to the degradation of the adhesive bond. You have to think in decades, not days. I always tell my apprentices that we are building a submarine, not a box.
The 1/8 inch that ruins everything
Precision in the expansion gaps and the thickness of the mortar bed is what determines the success of a shower installation. A deviation of even one-eighth of an inch in the slope to the drain can cause standing water which eventually breaks down the sealants and grout. Gravity is the most consistent force on a job site. If your floor does not have a quarter-inch per foot slope toward the drain, water will sit. Standing water is the enemy of every flooring type, especially laminate or hardwood floors that might be in the adjacent room. I have seen water wick through the grout, travel under the bathroom door, and ruin a laminate floor in the hallway. Laminate is essentially pressed sawdust with a picture of wood on top. Once the edges get wet, they swell and the floor is ruined. This is why the transition at the shower curb is vital. You need a solid piece of stone or a perfectly sealed tile cap. Use your light to check the underside of the curb. If there is a gap between the curb and the floor tile, water will find it. I use a high-quality 100 percent silicone sealant for all change-of-plane joints. Do not use caulk that is a mix of latex and silicone. It will shrink. Pure silicone stays flexible and keeps the water where it belongs.
Why hardwood floors belong nowhere near your shower
Hardwood floors are organic materials that react violently to the high humidity and direct water contact common in bathroom environments. The Janka Hardness Scale measures the durability of the wood against dents, but it does not account for the dimensional instability caused by moisture absorption. I love a good oak floor. I love the smell of the sawdust and the way a site-finished floor looks under a satin poly. But I will never install solid hardwood in a bathroom with a shower. The humidity alone will cause the wood to expand. If the boards are tight, they will cup. This means the edges of the board rise higher than the center. In extreme cases, they will buckle and pull right off the subfloor. If you absolutely must have the look of wood, you go with a porcelain tile that looks like wood. You get the aesthetic without the rot. Even engineered hardwood, which is more stable than solid wood, is a risk. The plywood core can still delaminate if water gets into the tongue and groove. If you are a homeowner insisting on wood in the bathroom, you are signing a death warrant for that floor. I have seen people try to seal hardwood with boat varnish to make it waterproof. It does not work. The wood moves, the varnish cracks, and the water gets in anyway. Stick to tile in the wet zones.
The checklist for a leakproof enclosure
Following a rigorous inspection protocol is the only way to ensure that a shower will remain watertight for the life of the home. This checklist covers the critical phases of the installation where errors are most likely to occur and where the flashlight tactic should be applied.
- Check subfloor deflection to ensure it meets L/360 standards for ceramic tile or L/720 for natural stone.
- Verify that the pre-slope under the membrane is a consistent quarter-inch per foot toward the drain.
- Perform a twenty-four hour flood test by plugging the drain and filling the pan with water to the top of the curb.
- Use a flashlight to inspect all vertical and horizontal corners for pinholes in the membrane or sealant.
- Ensure thin-set coverage is at least ninety-five percent on the back of every tile to eliminate hollow spots.
- Confirm that all transition points between different materials are sealed with 100 percent silicone.
- Check that the weep holes in the drain assembly are clear of mortar or debris.
If you skip the flood test, you are not a professional. You are a gambler. I have seen pans that looked perfect leak like a sieve during a flood test. It is better to find the leak now than after you have installed five thousand dollars worth of Italian marble.
The myth of the waterproof grout
Grout is designed to fill the spaces between tiles and provide structural stability to the installation, but it is not a primary waterproofing layer. Even the highest quality epoxy grouts can fail if the underlying substrate is not properly prepared and the joints are not completely filled. There are guys out there who will tell you that epoxy grout is all you need. They are wrong. Epoxy grout is great. It is stain-resistant and much stronger than standard cement grout. It is nearly impervious to water. But if the house settles and the tile moves, even epoxy grout can hairline crack. Once you have a crack, capillary action takes over. Capillary action is the ability of a liquid to flow in narrow spaces without the assistance of, or even in opposition to, external forces like gravity. It will pull water through that tiny crack and trap it behind the tile. If you do not have a waterproof membrane behind that tile, the water will rot the studs. The flashlight tactic is great here too. After you grout, shine the light. Any pinhole in the grout will cast a shadow. Fill those holes immediately. A single pinhole is an open door for water.
“Waterproofing is not a product; it is a process of redundant layers working in harmony.” – Tile Installation Manual
Physics of the weep hole
The weep holes in a traditional three-piece shower drain are essential for allowing moisture that has permeated the grout and mortar bed to escape into the drainage system. If these holes become clogged with thin-set or debris, the mortar bed will become saturated and lead to a foul-smelling, failing floor. This is the part most people ignore. In a traditional mud bed shower, the water goes through the grout, through the sand and cement bed, hits the liner, and then flows down to the drain. The drain has tiny holes called weep holes. If you are sloppy with your mortar, you plug those holes. Now the water has nowhere to go. It sits in the sand bed and gets stagnant. This is why some showers smell like a swamp. It is not the tile that is dirty. It is the rotting water underneath. I always put a bit of crushed stone or specialized plastic spacers around the weep holes before I dump my mud. It keeps the path clear. It is a five-cent solution to a five-thousand-dollar problem. You have to respect the physics of water. It always wants to go down and it always wants to find a hole. Your job is to make sure the only hole it finds is the one connected to the sewer pipe.
Every floor I have ever laid is a testament to the prep work. If you rush the subfloor, the finish will fail. If you ignore the shadows, the leaks will find you. Use the light. Check your slopes. Test your pans. This is not just about making things look good. it is about building something that lasts longer than you do. Do not let the simplicity of the flashlight tactic fool you. It is the most honest tool in my bag. It does not lie and it does not care about your feelings. It only shows you the truth of your work. Fix the gaps now or pay for them later. That is the only rule that matters in this trade.