
Why your subfloor is lying to you
Most guys skip the leveling compound. They think the underlayment will hide the dip. It won’t. I spent three days grinding concrete on a job last month just so the floor wouldn’t click like a castanet. That clicking is the sound of your locking mechanisms dying slowly. If your subfloor has a deviation of more than 1/8 inch over a 10 foot span, you are setting yourself up for structural failure. The air pockets beneath the laminate act as a bellows, pumping dust into the room and straining the fragile tongues of the planks. Every step you take forces that tongue into a downward arc it was never designed to handle. Eventually, the friction between the tongue and the groove creates a microscopic fracture. This is why you must invest time in the preparation phase. A level subfloor is the only foundation for a silent floor.
“A floor is only as good as the subfloor beneath it; deflection is the enemy of every joint.” – Master Flooring Axiom
The physics of the score and snap technique
Cutting laminate flooring without a table saw is actually the preferred method for high-end residential installers who want to maintain a dust-free environment. You can achieve factory-grade edges using a heavy-duty utility knife, a laminate shear, or a jigsaw with a downward-stroke blade. This approach prevents the splintering of the aluminum oxide wear layer and keeps the HDF core intact. When you use a high-speed table saw, you generate friction heat that can actually melt the edge of the melamine. This localized heating causes the protective layer to slightly delaminate before you even lay the plank. A score and snap method relies on the brittle nature of the top wear layer. By creating a shallow incision through the protective coating and the decorative print layer, you create a fault line. When pressure is applied to the HDF core, the material fractures cleanly along this line of least resistance. This is identical to the physics used in glass cutting. It ensures that the integrity of the core remains uncompromised by the vibrational stress of a circular blade.
The danger of excessive underlayment compression
Homeowners always ask for the thickest underlayment available, thinking it will make the floor feel soft. This is a catastrophic mistake. Too much cushion causes the locking mechanisms on LVP and laminate to snap under pressure because the floor deflects too far downward. You want an underlayment with high density and a low Shore A hardness rating. Ideally, you are looking for something that provides thermal resistance and sound dampening without exceeding 3mm in thickness. When the underlayment is too squishy, the vertical movement of the planks during foot traffic puts immense shear stress on the click-lock joints. These joints are only a few millimeters thick. If they move more than the engineered tolerance, the lock will fail. This creates gaps that collect moisture and dirt, leading to premature wear and potential mold growth in the core material. [IMAGE_PLACEHOLDER]
The 1/8 inch that ruins everything
Every professional knows the perimeter expansion gap is non-negotiable for floating floors. If you pinch the floor against a door casing or a wall, the entire field will hump up in the center of the room during a humidity spike. Laminate floors are hygroscopic, meaning they absorb moisture from the air. Even though the core is treated with resins, it will still expand and contract based on the ambient relative humidity. In a place like the humid Southeast, a floor can grow significantly across a 20 foot run. Without a gap of at least 1/4 to 3/8 inch around the entire perimeter, the floor has nowhere to go but up. This pressure can be so intense that it actually rips the baseboards off the wall or causes the planks to peak at the seams. I always use plastic spacers to ensure that this gap remains consistent throughout the installation. Do not trust your eye. Use a gauge.
Tools that replace the table saw in small spaces
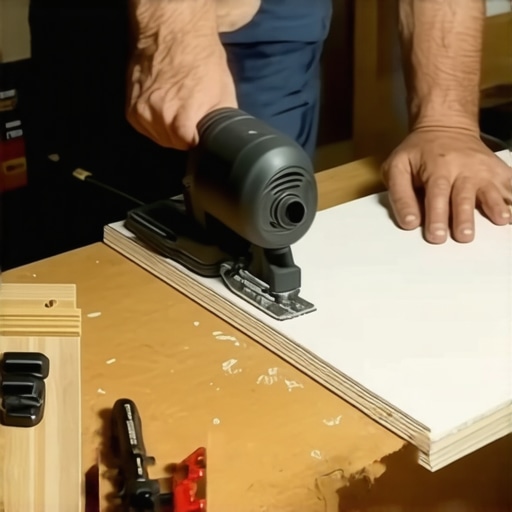
A manual laminate shear is the undisputed king of the job site when you are working in a finished home. These tools operate like a large paper cutter, using a heavy steel blade to press through the plank without producing any sawdust. This allows you to work directly in the room where you are installing, rather than walking back and forth to a garage or driveway. For complex cuts around door jambs or plumbing fixtures, an oscillating multi-tool is far superior to a saw. It allows for plunge cuts that are surgical in their precision. If you must use a jigsaw, always use a T-shank blade with downward-pointing teeth. This ensures that the cutting action happens on the downstroke, which prevents the teeth from chipping the decorative surface of the laminate.
Navigating the wet zones of showers and kitchens
While modern laminate is often marketed as waterproof, the joints are still the weak point in any wet area. In kitchens or near showers, you must seal the perimeter expansion gap with 100 percent silicone caulk rather than leaving it open. This prevents standing water from seeping under the baseboards and reaching the unprotected edges of the HDF core. If water gets into the core, the wood fibers will swell. Unlike solid hardwood, which can sometimes be sanded and refinished after a leak, laminate is a one-way street. Once the core swells, the decorative layer will peel back and the floor is ruined. You should also consider using a joint sealant during the installation process in these areas. This is a clear wax-based liquid that you apply to the tongue before clicking the planks together. It creates a secondary moisture barrier that keeps spills on the surface where they belong.
“Waterproof laminate is a system, not a material; every perimeter and penetration must be sealed to protect the subfloor.” – Modern Installation Standards
The engineering of the laminate core
To understand why manual cutting works so well, you have to look at the Janka Hardness Scale and the density of High-Density Fiberboard. Laminate cores are typically rated much higher than traditional softwoods, often exceeding the density of oak or maple. This density provides the floor with its impact resistance. However, density also means brittleness. A clean, slow cut from a shear or a sharp utility knife is often cleaner than the tearing action of a high-RPM blade.
Installation Readiness Checklist
- Verify subfloor moisture is below 12 percent for wood or 3 percent for concrete.
- Acclimate the flooring in the room for at least 48 hours at 65 to 75 degrees Fahrenheit.
- Check the flatness of the subfloor using a 10 foot straight edge.
- Plan your layout to ensure no end-joint slivers are shorter than 8 inches.
- Set your spacers to maintain a minimum 1/4 inch expansion gap.
- Ensure the vapor barrier is taped at all seams with moisture-resistant tape.
Method Comparison Table
| Method | Precision Level | Dust Production | Best Use Case |
|---|---|---|---|
| Manual Shear | High | Zero | Straight cross-cuts |
| Jigsaw | Medium | Moderate | Notches and curves |
| Oscillating Tool | High | Low | Door jamb undercuts |
| Score and Snap | Low | Zero | Hidden edge cuts |