
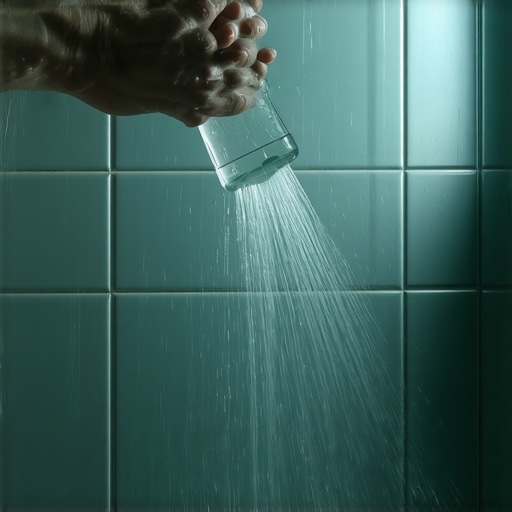
I spent three days grinding concrete on a job last month just so the floor wouldn’t click like a castanet. Most guys skip the leveling compound. They think the underlayment will hide the dip. It won’t. I’m sitting here with sawdust under my nails and the smell of WD-40 on my shirt because I just finished fixing a waterproof shower that was anything but. When you spend twenty five years on your knees with a moisture meter, you stop seeing a bathroom as a spa. You see it as a containment vessel for a highly corrosive liquid. Homeowners obsess over the color of the ceramic. I obsess over the deflection of the joists and the hydrophobic properties of the sealant. A floor is a performance surface. If the surface tension is wrong, the system fails. That brings me to the $10 spray. People think it is magic. It is not magic. It is chemistry. It is a polymer based hydrophobic barrier that changes the contact angle of water droplets. If you apply it to a surface that is structurally sound, it works. If you apply it to grout that is already crumbling from subfloor movement, you are just painting a sinking ship.
The molecular reality of grout porosity
Grout is a cementitious product that remains fundamentally porous at a microscopic level regardless of the pigment used. These pores act as tiny straws that pull moisture, body oils, and minerals into the structure of the tile assembly. When we talk about soap scum, we are talking about a chemical reaction between fatty acids and calcium carbonate. This residue does not just sit on top. It anchors itself into the open pores of the grout line. This is why a standard scrub brush often fails to move the needle. You need to create a barrier that prevents the anchor from ever taking hold. The $10 spray functions by filling these microscopic voids with a fluoropolymer or silicone based resin. This reduces the surface energy. Water beads up. Soap cannot find a purchase. It slides off the surface and goes down the drain where it belongs.
“A floor is only as good as the subfloor beneath it; deflection is the enemy of every joint.” – Master Flooring Axiom
The 1/8 inch that ruins everything
Precision in floor leveling is the difference between a lifetime of service and a catastrophic failure of the waterproof membrane. If your subfloor has a dip of more than 1/8 inch over a 10 foot span, your tiles will flex. When tiles flex, the grout cracks. Once the grout cracks, the $10 spray is useless. Water gets behind the tile. It feeds the mold. It rots the studs. I have seen million dollar homes with floors that felt like trampolines. They used the right spray. They used the expensive tile. They ignored the plywood thickness. You cannot build a solid house on a soft foundation. You cannot keep a shower clean if the grout is constantly moving and opening new pores for bacteria to colonize. Every installation must adhere to the Tile Council of North America standards for substrate preparation.
Why your subfloor is lying to you
Concrete slabs look solid but they are actually massive sponges that hold onto moisture for months after the initial pour. I always use a calcium chloride test or an in situ probe before I even think about laying thin-set. If the vapor emission rate is too high, the bond will fail. The moisture pushes up from the bottom. It carries mineral salts. This is called efflorescence. It looks like white powder on your grout. People try to clean it with a spray. You cannot clean away a structural moisture problem. You have to block it at the source. This is why a high quality moisture barrier is mandatory for any ground floor installation involving hardwood floors or laminate. Laminate is especially vulnerable. It is essentially compressed sawdust. If the humidity from the crawlspace hits that HDF core, it will buckle. It will swell at the edges. No amount of cleaning spray will fix a peaked seam.
| Surface Type | Porosity Level | Required Maintenance | Janka Rating (if applicable) |
|---|---|---|---|
| Porcelain Tile | Low (0.5% or less) | Hydrophobic Spray | N/A |
| Natural Marble | High | Penetrating Sealer | N/A |
| White Oak | Medium | Polyurethane Finish | 1360 |
| Laminate | Zero (Surface Only) | Dry Mop Only | N/A |
The ghost in the expansion gap
Every floor needs room to breathe at the perimeter to account for thermal expansion and contraction cycles. When you lock a floor tight against a wall, it has nowhere to go. It will lift in the middle. I have seen LVP floors pop like a blister because the installer did not leave the required 1/4 inch gap under the baseboards. This is the structural zooming I talk about. You have to look at the molecules. When the temperature rises, the molecules move faster. They need space. If you do not give it to them, they will take it. This applies to your shower too. The transition between the floor and the wall must be caulked, not grouted. Grout is rigid. Caulk is flexible. If you grout that joint, it will crack within six months. That crack is a highway for water.
The physics of the hydrophobic barrier
Applying a hydrophobic spray creates a high contact angle that prevents liquid from flattening out and wetting the surface. This is the same principle as a waxed car. In a shower, this means the minerals in your water cannot deposit themselves as easily. You are fighting a battle against hard water. If you live in a region with high mineral content, your shower is a limestone cave in the making. The spray is your shield. But it is a temporary shield. You have to reapply it every few months. This is a maintenance task, not a permanent fix. People want a set it and forget it solution. In the world of flooring, that does not exist. Everything degrades. The goal is to slow down the degradation through engineering and proper chemistry.
- Check subfloor levelness with a 10 foot straight edge before installation.
- Verify moisture content of wood subfloors is within 2 percent of the flooring material.
- Use only 100 percent silicone caulk for all change of plane joints in wet areas.
- Apply the hydrophobic spray to clean, dry grout only.
- Avoid using heavy steam mops on laminate floors as they can melt the glue in the core.
Hardwood floors and the humidity trap
Solid hardwood is a living product that reacts to the moisture levels in your home with mechanical force. If you live in a place like Houston, the humidity is your enemy. If you live in Phoenix, the dry air is your enemy. I have seen oak planks shrink so much in the desert that you could drop a nickel between the boards. In the swamp, those same boards will cup. The edges rise. The center stays low. You can sand it flat, but if you do not fix the air quality, it will just happen again. This is why acclimation is the most ignored step in flooring. You cannot take wood from a warehouse and nail it down the same day. It needs to sit. It needs to reach equilibrium with the room. If you skip this, you are asking for a heartbreak. A $15,000 floor can be ruined in a single season by a lack of patience.
“Wood flooring will perform best when the environment is controlled to stay within a relative humidity range of 30 to 50 percent.” – NWFA Technical Guidelines
The mistake of thick underlayment
While most people want the thickest underlayment for comfort, too much cushion actually causes the locking mechanisms on LVP to snap under pressure. This is a contrarian point that many big box store employees get wrong. They sell you the thick foam. They tell you it will feel like walking on a cloud. It will feel like walking on a broken floor. If the underlayment is too soft, the joint is unsupported. Every time you step, the tongue and groove bend. Eventually, the plastic fatigues. It breaks. Now you have a gap. Now water can get in. You want a high density, low compression underlayment. It should be thin. It should be firm. Its job is to provide a vapor barrier and minor sound dampening, not to act as a mattress for your floor. If you want soft, buy a rug. Do not compromise the structural integrity of your floor for a bit of squish.
The truth about waterproof laminate
There is no such thing as a truly waterproof wood based floor because the core material remains hygroscopic by nature. They call it waterproof because the top layer is plastic and the joints are tight. But if water sits there long enough, it will find a way. It always does. The $10 spray we use for shower tiles can actually be used on the seams of laminate for a bit of extra insurance, but it is not a silver bullet. If your dishwasher leaks and you are not home, that floor is toast. The only truly waterproof floor is one made of inorganic material. Porcelain. Rigid core VSPC. Everything else is just water resistant. Do not let the marketing brochures fool you. They are selling an aesthetic. I am selling a structure. I have seen the rot that hides under a waterproof floor that was not installed with a perimeter seal. It is not pretty. It smells like a damp basement and costs twice as much to fix as it did to install.
The maintenance routine that saves the system
A consistent cleaning schedule using pH neutral cleaners is the only way to preserve the chemical bond of your sealants. If you use harsh acids or heavy bleach on your shower tiles, you are stripping the hydrophobic spray. You are opening the pores of the grout. You are inviting the soap scum back in. Use the $10 spray. Wipe it down after every shower. Keep the moisture out of the subfloor. That is how you win. Flooring is an engineering challenge. It is about managing forces. Gravity. Moisture. Expansion. If you respect the physics, the floor will last a hundred years. If you ignore the physics, you will be calling someone like me to tear it all out in five. I prefer the first option. It is less dusty. It is better for your wallet. It is the mark of a master architect to build something that lasts. Article Schema: {“@context”:”https://schema.org”,”@type”:”Article”,”headline”:”The $10 Spray That Makes Soap Scum Slide Off Shower Tiles”,”author”:{“@type”:”Person”,”name”:”Master Flooring Architect”},”description”:”An expert guide to shower maintenance and flooring structural integrity from a professional installer’s perspective.”} HowTo Schema: {“@context”:”https://schema.org”,”@type”:”HowTo”,”name”:”Apply Hydrophobic Spray to Shower Tiles”,”step”:[{“@type”:”HowToStep”,”text”:”Clean the grout lines thoroughly to remove existing soap scum.”},{“@type”:”HowToStep”,”text”:”Ensure the surface is completely dry for at least 24 hours.”},{“@type”:”HowToStep”,”text”:”Apply the spray evenly across tiles and grout.”},{“@type”:”HowToStep”,”text”:”Buff the surface with a microfiber cloth after 5 minutes.”}]}