
The Technical Path to a Flawless Surface with Self Leveling Underlayment
I spent three days grinding concrete on a job last month just so the floor wouldn’t click like a castanet. Most guys skip the leveling compound. They think the underlayment will hide the dip. It won’t. I have seen it a thousand times. The homeowner buys a beautiful laminate or a high end engineered hardwood, but they go cheap on the prep. They treat the subfloor like an afterthought. That is a mistake that ends in cracked grout and separation. I can still smell the burnt diamond blade and the heavy oak dust from that job. It was a reminder that you cannot build a masterpiece on a broken foundation. Floor leveling is not a cosmetic upgrade, it is a structural necessity that requires precision and a deep understanding of hydraulic cement chemistry.
The hidden cost of an uneven subfloor
Self leveling underlayment creates a flat substrate for floor coverings like hardwood floors and tile by filling low spots and neutralizing high points. It is the primary defense against floor failure. When a subfloor is not flat, the locking mechanisms on laminate and luxury vinyl plank are under constant stress. Every time you walk across the room, those joints flex. Eventually, the plastic tongues snap. This leads to gaps, squeaks, and eventually the total destruction of the floor. For tile, an uneven surface means lippage, where one corner of a tile sits higher than the other. This is not just ugly, it is a tripping hazard and a guaranteed way to crack your grout lines. You must respect the 1/8 inch rule. If your floor deviates by more than 1/8 inch over a ten foot span, you are in the danger zone.
“A floor is only as good as the subfloor beneath it; deflection is the enemy of every joint.” – Master Flooring Axiom
Why your concrete slab is lying to you
Concrete slabs often contain hidden moisture and surface contaminants that prevent underlayment from bonding correctly. Just because a slab looks dry does not mean it is ready. You need to perform a calcium chloride test or use a pinless moisture meter. High moisture levels in the slab will push against the underlayment, causing it to delaminate. I have seen entire sections of floor pop up because the installer did not check for hydrostatic pressure. You also have to look for laitance. That is the weak, milky layer of cement dust on the surface of new concrete. If you pour your leveler on top of laitance, it will peel right off. You have to get down on your knees and scrape. You have to verify that the slab is porous enough to accept a primer. If water beads up on the surface, you have a sealer or oil that must be ground off before you even think about opening a bag of product.
The chemical necessity of high quality primer
Primer acts as a chemical bridge between the old substrate and the new leveling compound to ensure a permanent bond. This is the most skipped step in the industry, and it is the most common reason for failure. When you pour wet self leveling underlayment onto dry concrete, the concrete acts like a sponge. It sucks the water out of the mix before the cement has a chance to hydrate and level out. This results in pinholes, bubbles, and a surface that is as brittle as a cracker. A good acrylic primer seals the pores of the concrete. It keeps the water in the mix so the chemistry can do its job. I prefer to apply two coats. The first coat is diluted to soak in, and the second coat is full strength to create that sticky, tacky surface that grabs the leveler and never lets go. If the primer is not tacky to the touch, you are not ready to pour.
Mastering the water to powder ratio
Precise water measurement is the difference between a high strength floor and a dusty mess that will crumble under your feet. Every manufacturer has a specific ratio, usually around 5 to 6 quarts of water per 50 pound bag. If you add too much water, the polymers and sand will separate. The sand will sink to the bottom, and the polymers will float to the top, creating a weak white film on the surface. This film will never get hard enough to support hardwood floors or heavy furniture. If you use too little water, the material will not flow. It will sit in a heap, and you will be left with a floor that is even worse than when you started. I use a dedicated measuring bucket. I do not guess. I do not use a garden hose. I use a high speed drill at exactly 650 RPM to avoid whipping air into the mix. If you see bubbles in your bucket, you are spinning too fast.
The physical action of the spike roller
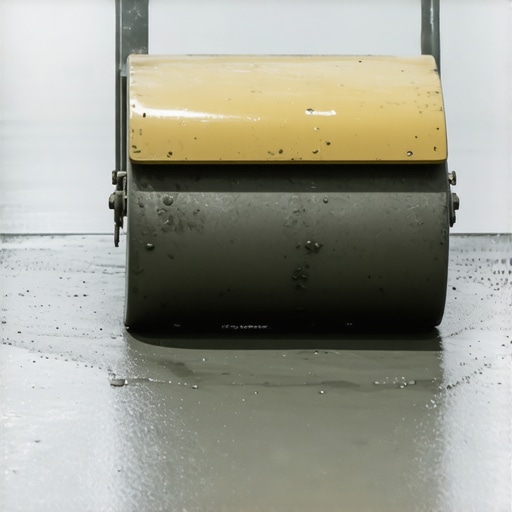
Spike rollers are specialized tools designed to release trapped air and help the leveling compound knit together for a glass like finish. Once the material is on the floor, gravity does about 80 percent of the work, but the other 20 percent is up to you. As you pour, the material overlaps. These overlap lines can remain visible if they are not worked together. The spike roller breaks the surface tension and allows the different pours to become one continuous sheet of stone. It also pulls out any air that was trapped during the mixing process. If you leave those air bubbles, they will pop and leave tiny craters. When you go to install your laminate or glue down your hardwood, those craters will create weak spots. Use a gauge rake to set the initial depth, then follow up immediately with the spike roller. It is a dance. You have to move fast because the pot life of these products is usually less than 20 minutes.
| Substrate Type | Required Prep | Recommended Primer | Max Thickness |
|---|---|---|---|
| Concrete Slab | Grinding / Shot blasting | Acrylic Latex | 1.5 inches |
| Plywood Subfloor | Screw down / Sand joints | Fiber Reinforced Primer | 0.5 inches |
| Old Ceramic Tile | Degloss / Clean | Non-porous Bond Coat | 1.0 inches |
Avoiding the failure point in showers and wet areas
Wet areas require specialized waterproof leveling compounds that can withstand constant moisture without losing structural integrity. If you are working in a bathroom or a shower, you cannot use standard gypsum based levelers. They will turn into mush the moment they get wet. You need a cement based product that is compatible with your waterproofing membrane. I always tell people that the grout is not waterproof. Water will get behind your tiles. If your underlayment cannot handle that moisture, your shower floor will fail within a year. You also have to consider the pitch. You cannot just let the leveler run wild in a shower; you have to maintain the slope toward the drain. This requires a different technique where you use a stiffening agent or a different type of mortar to create the necessary fall while still keeping the surface perfectly smooth for tile adhesion.
“Deflection is the silent killer of tile installations; if your subfloor moves, your grout will crack.” – Master Flooring Axiom
Preparation for hardwood floors and laminate
Hardwood floors and laminate require a flat surface to prevent clicking sounds and separation of the tongue and groove system. Most people think a thick foam underlayment will fix a bumpy floor. That is a lie. A thick underlayment actually makes the problem worse. It provides too much cushion, which allows the floor to bounce. That bounce puts immense pressure on the locking joints. I have seen expensive laminate floors literally pull themselves apart because the subfloor had a 1/4 inch dip. When I install solid hardwood, the subfloor must be flat so the planks sit flush against the substrate. If there is a void under the wood, it will act like a drum. Every footstep will echo. You spent $10,000 on wood, do not ruin it because you were too lazy to pour two bags of leveler. You need to ensure the leveler is fully cured. If you trap moisture under a wood floor, the boards will cup and warp until the room looks like the ocean.
The subfloor preparation checklist
- Remove all baseboards and door casings before starting.
- Vacuum the entire floor twice to remove every grain of dust.
- Seal every crack and hole in the subfloor with caulk to prevent leaks.
- Install foam perimeter strips to allow for building expansion.
- Mix the underlayment in a separate area to keep the install room clean.
- Have a helper ready to mix the next bag as you pour the first.
- Check the ambient temperature to ensure it is between 50 and 80 degrees.
The environmental variables of the job site
Temperature and humidity levels drastically affect the flow and drying time of self leveling products. If the room is too hot, the water will evaporate before the chemical reaction is complete. This leads to a chalky finish. If the room is too cold, the leveler will take days to dry, delaying the rest of the project. I have worked in houses where the HVAC was turned off, and the humidity was so high that the leveler stayed wet for 48 hours. That is a nightmare. You also have to watch out for drafts. A draft from an open window can cause the surface of the leveler to dry faster than the bottom. This creates surface tension cracks that look like a spider web. Keep the windows closed. Keep the temperature stable. This is a controlled laboratory experiment happening on your floor. Treat it with that level of respect. Once the pour is done, stay off it. Even if it looks dry, it is still soft. One footprint will ruin the entire finish.
Finishing the transitions and final checks
Transitions between different flooring types require the leveler to be feathered out to a zero edge for a seamless look. You do not want a big bump where the hardwood meets the tile. This is where the skill of a master installer shows. You can use a flat trowel to pull the wet material into a thin taper. This takes a steady hand and a sense of timing. Once the floor is dry, I always go back over it with a 100 grit sanding screen. This knocks down any tiny ridges or drips. It leaves the floor feeling like silk. If you are doing a glue down installation, this extra step is vital for the adhesive bond. You want that glue to have a clean, flat surface to bite into. A smooth floor is a quiet floor. It is a durable floor. It is the only way to do the job right. Don’t be the guy who cuts corners. Be the guy who builds something that lasts fifty years.