
The lie of the square corner
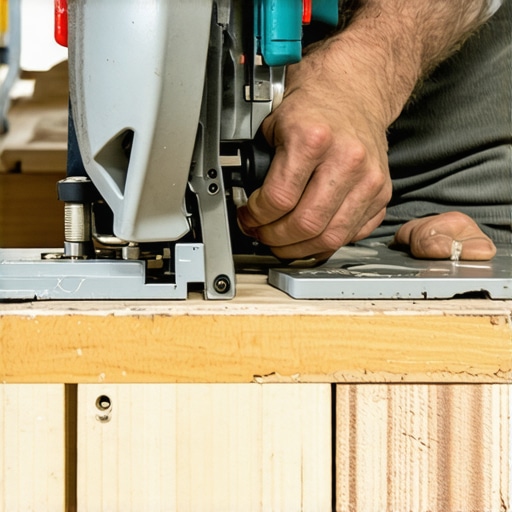
Perfect miter cuts on floor baseboards require a deep understanding of structural geometry and wall deflection. Every house is a moving organism that shifts over time, ensuring that ninety degree corners are a myth. You must use a digital protractor and an eighty tooth carbide blade to achieve professional results. Most guys skip the leveling compound. They think the underlayment will hide the dip. It won’t. I spent three days grinding concrete on a job last month just so the floor wouldn’t click like a castanet. That job taught me that if the subfloor is off by even a sixteenth of an inch, your baseboards will never sit flush. You can have the most expensive hardwood floors or high end laminate in the world, but if the trim is gapped, the whole project looks amateur. My hands smell like WD-40 and oak dust for a reason. I do not trust a factory edge and I certainly do not trust a framing square. Walls in modern construction are often bowed by excess drywall mud or slightly twisted studs. When you slap a baseboard against a corner that is actually ninety two degrees, a standard forty five degree cut leaves a gaping maw at the tip. You have to measure the actual angle, divide by two, and set your miter saw to that precise decimal. This is not about aesthetics, it is about engineering a seal that prevents moisture from reaching the subfloor edge. Showers and bathrooms are the worst offenders. If you do not get the baseboard tight against the tile or grout lines, humidity will creep behind the wood and start the slow rot of the bottom plate. Wood is a cellular material that breathes. It is not static. If you treat it like plastic, it will punish you. The physics of the cut involve more than just the angle. You have to account for blade deflection. A cheap thin kerf blade will flex when it hits a knot in solid oak, ruining the joint before you even pull the trigger. You need a stable, heavy duty saw with a calibrated fence.
“A floor is only as good as the subfloor beneath it; deflection is the enemy of every joint.” – Master Flooring Axiom
Why your subfloor is lying to you
Subfloor flatness is the primary determinant of baseboard alignment and joint longevity. If the floor has a dip within twelve inches of the wall, the baseboard will follow that curve, pulling the mitered corner apart at the top or bottom. You must check every linear foot with a straight edge. Most installers think they can just nail through the problem. They believe the force of the pneumatic nailer will bend the wood into submission. It might work for a week, but the internal tension of the wood will eventually pull the nails or crack the finish. When working with hardwood floors, you are dealing with a material that has a high Janka hardness rating. This means it is stubborn. If the subfloor is humped, the hardwood will bridge that gap, leaving a void. When you try to install baseboards over that void, you create a pressure point. This is why I spend so much time with a floor grinder and self leveling compound. I want a surface that is flat within an eighth of an inch over ten feet. The chemistry of the bond also matters. I often use a bead of high quality adhesive on the back of the baseboard in addition to nails. This creates a structural union between the trim and the wall studs. For laminate floors, the challenge is different. Laminate is a floating system, meaning it needs room to move. If you pin the baseboard too tight against the laminate, you lock the floor in place. When the humidity changes, the floor will buckle because it has nowhere to go. You have to leave a gap of at least a sixteenth of an inch between the bottom of the baseboard and the top of the laminate, or use a shoe molding to cover the expansion gap without putting downward pressure on the planks. This is the technical reality that big box retailers never tell you. They want you to think it is a weekend DIY project. It is actually a battle against physics.
| Material Type | Expansion Coefficient | Recommended Blade Tooth Count | Janka Hardness (Average) |
|---|---|---|---|
| Solid White Oak | High | 80-100 | 1360 |
| Engineered Maple | Medium | 80 | 1450 |
| MDF Baseboard | Low | 60-80 | N/A |
| Laminate Core | High (Moisture) | 90-100 | N/A |
The ghost in the expansion gap
The expansion gap is a mandatory structural void that allows for the natural movement of flooring materials due to atmospheric changes. Failing to respect this gap will result in floor failure, joint separation, and baseboard warping. You must maintain a minimum of one quarter inch at all vertical obstructions. People think waterproof LVP means they can ignore these rules. They are wrong. While the plastic itself might not absorb water, the floor still expands and contracts based on temperature. If you jam your baseboards tight against the floor in a sunroom in Phoenix, that floor will pop like a soda can in July. I always use spacers. I want to see that gap before the trim goes on. In areas near showers, the grout lines often provide a transition point. If the grout is too high, the baseboard will sit cockeyed. I take a chisel and knock down any high spots in the grout or thin set before I ever measure for a cut. This ensures the baseboard sits level. The secret to a perfect miter is the back cut. I set my saw to a slight bevel, maybe one or two degrees, so the front faces of the wood touch first. This allows the visible joint to be tight even if the wall behind it is messy. It is a trick of the trade that prevents the back of the wood from pushing the front open. You also have to consider the grain direction. If you are mitering oak, you want the grain to wrap around the corner. It creates a visual continuity that makes the joint disappear. This takes time. It takes patience. It takes a willingness to throw away a piece of wood that is a sixteenth of an inch too short. Most guys won’t do that. They use caulk to hide their sins. I hate caulk. Caulk is a sign of a failed cut. If the cut is perfect, you do not need a tube of white goop to make it look good.
“Wood is hygroscopic, meaning it will always attempt to reach equilibrium with its environment.” – NWFA Technical Manual
The 1/8 inch that ruins everything
Precision in baseboard installation is measured in increments of one thirty second of an inch. A cumulative error of one eighth of an inch across a room will result in miters that cannot be closed without structural deformation of the trim. You must use a laser measure for long runs. While most people want the thickest underlayment, too much cushion actually causes the locking mechanisms on LVP to snap under pressure. This same principle applies to baseboards. If there is too much flex in the floor, the baseboard will eventually pull away from the wall. This is a common issue in humid regions like Houston or New Orleans. The moisture in the air causes the wood studs to swell and the subfloor to expand. If you install your baseboards during a dry spell without accounting for this, the summer humidity will bow the wood. I always acclimate my trim for at least forty eight hours in the room where it will be installed. I set the moisture meter to the species setting and wait until it matches the subfloor. This is the difference between a floor that lasts fifty years and one that needs repair in five. My checklist for a perfect install is rigorous. I do not start until the site conditions are met. I do not care if the homeowner is in a hurry. Quality follows the calendar, not the clock.
- Check wall moisture levels before installation
- Verify subfloor flatness within 1/8 inch over 10 feet
- Acclimate baseboards to the room for 48-72 hours
- Use a digital angle finder on every single corner
- Back-cut miters by 1-2 degrees for tighter face joints
- Glue all mitered returns and outside corners
- Set pneumatic pressure to avoid blowing through MDF
- Match grain patterns at visible outside corners
- Leave proper expansion gaps for floating floors
- Vacuum all sawdust from the expansion channel before nailing
Regional humidity and the shrinking miter
Atmospheric moisture content dictates the rate of wood fiber contraction and expansion in various climates. In dry desert regions, miter joints will pull apart as the wood loses its internal moisture. In tropical climates, the wood will swell, potentially crushing the mitered tips. You have to understand the geography of your job site. A miter cut in the high desert of Nevada needs to be tight, almost under tension, because that wood is going to shrink the moment the air conditioning turns on. In the swampy humidity of Florida, solid wood is a death wish for baseboards unless they are sealed on all six sides. I have seen fifteen thousand dollar walnut floors cup until they looked like potato chips because the installer ignored the crawlspace humidity. The baseboards were the first thing to pop. They literally ripped the nails out of the studs. When you are installing over hardwood floors, you are working with a living product. It is constantly moving. The miter joint is the most vulnerable point of that movement. I often use a biscuit joiner or miter clips on large baseboards to keep the corners locked together. This mechanical bond is stronger than just nails and wood glue. It forces the two pieces of wood to move as a single unit. If the wall moves, the whole corner moves with it instead of opening up a gap that the homeowner will see every time they walk into the room. This is the level of detail required for a master finish. You are not just decorative trim. You are the final structural barrier. You are the transition between the engineered floor and the vertical architecture of the home. Treat it with the respect it deserves and your joints will stay tight for a lifetime. Article Schema JSON-LD: {“@context”: “https://schema.org”, “@type”: “TechArticle”, “headline”: “The Secret to Getting Perfect Miter Cuts on Floor Baseboards”, “author”: {“@type”: “Person”, “name”: “Master Flooring Architect”}, “description”: “Expert guide on achieving perfect miter cuts on baseboards focusing on subfloor physics, material chemistry, and structural alignment.”, “articleSection”: “Flooring Installation”}