
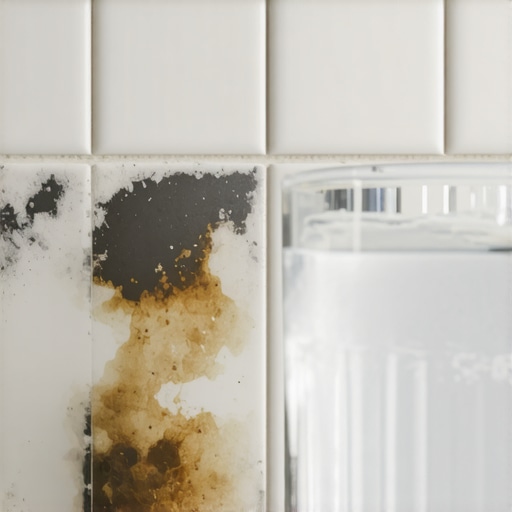
Why Your Grout is Bleaching Out and the Hard Water Culprit
I spent three days grinding concrete on a job last month just so the floor wouldn’t click like a castanet, but the real headache started when the client called me back two weeks later. They were convinced I used the wrong color grout in their custom walk-in shower. The deep charcoal had turned into a patchy, chalky mess that looked like it had been dusted with flour. It was not a mixing error. It was not a bad batch of sanded grout. It was a classic case of mineral migration and hard water chemistry reacting with the Portland cement base. I have seen this happen on thousand-dollar hardwood floors installations where moisture wicks up through the slab, and I have seen it ruin the aesthetic of the finest Italian porcelain. If you think grout is just a filler, you are wrong. It is a porous, hydraulic cement product that behaves like a sponge. When you understand the physics of the subfloor and the chemistry of the water you use to scrub it, you start to see why those white spots appear. Most installers just wipe it down and walk away, but a master knows that the battle against bleaching is won in the microscopic pores of the installation before the first tile is even set.
The chemical reality of grout efflorescence
Grout bleaching is often caused by efflorescence, which occurs when soluble salts and minerals migrate to the surface of the grout joint as moisture evaporates. These minerals, primarily calcium hydroxide, react with carbon dioxide in the air to form a white, chalky crust known as calcium carbonate. This is not a stain that you can simply scrub away with soap. It is a structural byproduct of the curing process. When you mix a bag of grout, you are initiating a complex chemical reaction. If you use too much water in the mix, or if the subfloor is holding onto excess humidity, that water has to go somewhere. As it travels through the capillary network of the cement, it carries minerals to the surface. I have walked onto jobs where the installer used a soaking wet sponge to clean the tile, which basically drowned the grout and pulled the pigment right out of the top layer. You are left with a bleached, weak surface that will crumble within a year. The physics do not lie. If the water-to-cement ratio is off by even a few percentage points, the structural integrity of the joint is compromised. This is why I always use a moisture meter on the subfloor before I even think about opening a bag of thin-set. If that slab is breathing out moisture, your grout color will never be consistent.
“A floor is only as good as the subfloor beneath it; deflection is the enemy of every joint.” – Master Flooring Axiom
The hard water culprit in your shower
Hard water contains high concentrations of dissolved minerals like calcium and magnesium which deposit on porous grout surfaces during every shower cycle. These minerals bond with the cementitious structure of the grout, creating a white film that mimics the appearance of bleached or faded pigment. You might think your grout is losing its color, but in reality, you are just looking at a layer of rock buildup. In regions with heavy limestone deposits in the groundwater, this happens fast. The water evaporates, leaving the minerals behind. Over months, these layers calcify. If you use an acidic cleaner to try and remove them, you might actually be dissolving the grout itself. Portland cement is alkaline. When you hit it with a harsh acid, you create a chemical burn that further lightens the color. It is a vicious cycle. I tell my clients that they need to treat their grout like a precision engine. You would not put swamp water in your radiator, so why would you let mineral-heavy water sit on your grout joints? The porous nature of standard sanded grout means these minerals are not just on the surface, they are embedded in the matrix. To fix this, you have to strip the minerals without destroying the cement bond, which is a delicate surgical operation that most homeowners get wrong.
How subfloor moisture ruins hardwood floors and tile alike
Subfloor moisture acts as a transport mechanism for alkaline salts that can bleach grout and cause hardwood floors to cup or crown. High hydrostatic pressure pushes water vapor through concrete slabs, carrying minerals that deposit at the interface of your flooring material and the air. This is why I am a stickler for vapor barriers. Whether you are laying down premium hardwood floors or a simple ceramic tile, the ground beneath you is a living, breathing source of moisture. In a shower, the problem is doubled because you have water coming from above and potential vapor from below if the liner is not installed correctly. I once saw a solid oak floor that looked like a series of half-pipes because the installer ignored the crawlspace humidity. The same thing happens to grout. If the mortar bed stays damp, it will constantly feed minerals to the grout line, causing that perpetual white haze. People blame the product, but they should be blaming the site conditions. You cannot fight physics with a bottle of cleaner. You have to seal the subfloor or use a high-quality uncoupling membrane that manages that vapor pressure. I have spent more time in my career looking at dirt and concrete than I have looking at the actual flooring, because that is where the failures start. If you ignore the subfloor, you are just building a house on sand.
| Material Type | Porosity Level | Mineral Resistance | Primary Failure Mode |
|---|---|---|---|
| Sanded Grout | High | Low | Efflorescence/Bleaching |
| Epoxy Grout | Zero | High | UV Yellowing |
| Hardwood Floors | Medium | Low | Cupping/Crowning |
| Laminate Flooring | Low (Surface) | Medium | Joint Swelling |
The structural failure of laminate in wet zones
Laminate flooring fails in wet environments because its fiberboard core is highly susceptible to moisture absorption, leading to edge swelling and delamination. While the wear layer is durable, the joints are the weak point where water and minerals can penetrate the structural core. Many people try to save money by putting laminate in a bathroom, thinking a little grout-colored caulk will save them. It won’t. I have seen the edges of laminate boards pop up like burnt toast because of a small leak behind a toilet. While we are talking about grout bleaching in showers, it is important to remember that moisture is the enemy of all finished surfaces. Laminate cannot handle the mineral-rich environment of a damp bathroom. The salts in the water can even crystallize inside the tongue-and-groove locking system, causing the floor to creak and eventually snap. While most people want the thickest underlayment, too much cushion actually causes the locking mechanisms on LVP or laminate to snap under pressure. You need a firm, flat base. A floor that moves is a floor that dies. If your grout is bleaching, it is a signal that moisture is moving through your system. If that same moisture hits a laminate or hardwood floor, the result is not just a color change, it is total structural collapse.
The master installer checklist for perfect grout
Preventing grout bleaching requires a strict adherence to chemical and physical protocols. If you skip a step, the minerals will find a way out. Follow this checklist to ensure your installation remains the intended color for years to come.
- Test the water pH and mineral content before mixing any cementitious products.
- Ensure the thin-set is fully cured for at least 24 to 48 hours before grouting to prevent moisture entrapment.
- Use distilled water for the final mix to eliminate the introduction of outside minerals.
- Wipe the tile with a damp, not dripping, sponge to avoid washing out the pigment.
- Seal the grout with a high-quality penetrating sealer after it has fully cured for 72 hours.
- Maintain a consistent humidity level in the room during the 24-hour initial set time.
The myth of the universal cleaner
Most commercial tile cleaners are too acidic for cement-based grout and will cause the color to bleach or fade over time by dissolving the calcium-rich binder. To maintain grout color, you must use a pH-neutral cleaner that lifts dirt without reacting with the alkaline minerals of the grout. I see people using vinegar and water on their floors all the time. It makes me cringe. Vinegar is an acid. It eats the lime in your grout. Every time you spray it, you are making the grout more porous, which allows more hard water minerals to move in. It is like trying to fix a hole in a boat by drilling another hole to let the water out. You need to use products specifically designed for the Janka hardness of your surface and the chemical makeup of your grout. If you have hardwood floors in the hallway leading to the bathroom, you have to be even more careful. Over-spraying acidic tile cleaner onto an oak transition will eat through the finish and stain the wood. I have made a career out of fixing these mistakes. I smell the vinegar the moment I walk into a house and I know exactly why the grout looks like a chalkboard. You have to respect the chemistry of the materials you are living on.
“Proper moisture testing of the concrete slab is not an option; it is a requirement for any successful installation.” – TCNA Technical Bulletin
The 1/8 inch gap that ruins everything
Expansion gaps and proper joint sizing are critical because they allow for the natural movement of the subfloor without putting stress on the grout or tile bond. A joint that is too narrow will often crack and allow moisture to penetrate deep into the setting bed, accelerating mineral bleaching. I have seen guys try to do 1/16 inch joints with sanded grout because the homeowner wanted a seamless look. It never works. The sand particles cannot even get into a gap that small, so you end up with a weak, superficial layer of cement that flakes off and turns white almost immediately. You need that 1/8 inch or 3/16 inch gap to get a structural plug of grout in there. This plug resists the movement of the house and the migration of minerals. It is the same reason we leave a gap at the perimeter of hardwood floors. Everything moves. If you do not give the materials room to breathe, they will find their own way to move, usually by cracking or heaving. When a grout joint cracks, it becomes a highway for hard water to get under the tile. Once that water is trapped, the bleaching becomes permanent. You cannot just patch it. You have to grind it out and start over, and I can tell you from experience, grinding grout is the worst job in the world. It is loud, it is dusty, and it is entirely avoidable if you just follow the physics from the start.