The physics of the hollow sound
Stopping the drum effect in upstairs laminate requires decoupling the floor from the subfloor using high-density rubber or mass-loaded vinyl. Most installers rely on cheap foam that collapses within two years, but true sound-dampening is achieved by breaking the vibration path between the laminate’s HDF core and the plywood or concrete below. I spent three days grinding concrete on a job last month just so the floor wouldn’t click like a castanet. The homeowner thought I was crazy, but after the floor went down, it felt as solid as a slab. Most guys skip the leveling compound. They think the underlayment will hide the dip. It won’t. If there is a 1/8 inch gap under that plank, every footstep becomes a percussion instrument that echoes through the floor joists and into the rooms below. I have spent twenty-five years on my knees with a moisture meter and a level. I know when a floor is lying to me. You can smell the oak dust and the WD-40 on my clothes after a ten-hour shift, and it has taught me that a floor is a performance surface, not a decoration. We are building a structural system here.
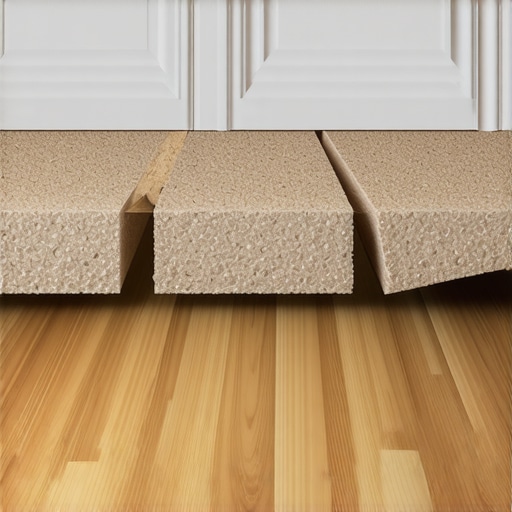
The 1/8 inch that ruins everything
The tolerance for a successful laminate installation is exactly one-eighth of an inch over a ten-foot radius to prevent joint failure. When the subfloor has a dip, the click-lock mechanism of the laminate acts as a bridge. As you walk over it, the joint flexes. This mechanical movement creates a friction sound and eventually snaps the tongue right off the groove. You might think a thicker underlayment solves this. It does the opposite. Too much cushion allows the floor to bounce too much, which is the primary cause of clicking and eventual floor failure. I have seen countless DIY jobs where people used two layers of cheap foam thinking they were being smart. Within six months, the floor felt like a trampoline and sounded like a bag of potato chips being crushed. You need a flat surface, not a soft one. This is why I carry a ten-foot straightedge on every job. If I see a valley, it gets filled with a high-compressive-strength Portland cement-based patch. If I see a hump, it gets ground down. There are no shortcuts when you are dealing with the physics of deflection.
“A floor is only as good as the subfloor beneath it; deflection is the enemy of every joint.” – Master Flooring Axiom
The perimeter isolation method for quiet living
Perimeter isolation involves leaving a 3/8 inch expansion gap and filling the vertical void with a non-hardening acoustic sealant to stop flanking noise. Sound is like water. It finds the easiest path to travel. In most upstairs installs, the laminate planks touch the drywall or the baseboards. This creates a bridge for sound vibrations to move from the floor into the wall studs and down to the first floor. I always use foam backer rods in the expansion gap before I install the baseboards. This keeps the floor floating and prevents it from becoming a giant speaker cone. I also insist on using a high-STC rated underlayment made of recycled rubber or heavy felt. These materials have a high density that absorbs the energy of an impact rather than reflecting it. When we talk about Sound Transmission Class and Impact Insulation Class, we are looking at the decibel reduction across the frequency spectrum. A high IIC rating is what keeps your kids’ footsteps from sounding like a herd of elephants to the person downstairs. It is about mass and density, not air and bubbles.
| Material Type | IIC Rating | Density (lb/ft3) | Compression Resistance |
|---|---|---|---|
| Standard Foam | 48 | 1.5 | Low |
| Felt Underlayment | 66 | 12.0 | High |
| Recycled Rubber | 72 | 60.0 | Maximum |
| Cork Underlayment | 55 | 11.0 | Moderate |
The ghost in the expansion gap
Laminate floors expand and contract at a rate of roughly 1/16 inch per ten feet depending on the humidity and temperature of the room. If you do not leave enough space at the walls, the floor will eventually hit the drywall and have nowhere to go. Then it starts to peak. I have walked into houses where the floor was rising two inches off the subfloor in the middle of the room because the installer didn’t understand acclimation. You have to let the boxes sit in the room for at least 48 hours. The moisture content of the HDF core needs to reach equilibrium with the air. If you take a cold, dry plank from a warehouse and install it in a humid upstairs bedroom, it is going to grow. I have seen wide-plank installs buckle so hard they popped the baseboards right off the wall. It is not a suggestion. It is a requirement. I also avoid the common mistake of installing heavy kitchen islands on top of floating floors. You cannot lock a floating floor in place with 500 pounds of cabinetry and expect it to move freely. It will buckle every single time.
- Check subfloor flatness to within 1/8 inch over 10 feet.
- Measure moisture levels in both the subfloor and the laminate.
- Use a 6-mil poly vapor barrier over concrete or crawlspaces.
- Leave a minimum 3/8 inch expansion gap at all vertical obstructions.
- Acclimate the flooring for 48 to 72 hours in the room of installation.
Moisture logic in the attic space
Upper floors often deal with different humidity levels than the basement, requiring a specific focus on the vapor retarder and the thermal envelope. In many homes, the upstairs is significantly warmer and more humid than the lower levels. This creates a vapor pressure differential. If you are installing over a bathroom or a kitchen, the moisture from the shower or the stove is rising into the floor joists. You need a underlayment that acts as a vapor barrier to protect the underside of your laminate. I have seen the bottom of laminate planks turn to mush because of the steam from a bathroom below. We look at the perm rating of the material. A perm rating of less than 1.0 is essential for protecting the core of the floor. I prefer using a cross-linked polyethylene foam because the cell structure is closed. This means moisture cannot penetrate the material, and it will not support the growth of mold or mildew. It is about protecting the investment from the inside out.
“Wood-based flooring is hygroscopic; it will change dimension as it gains or loses moisture from the environment.” – NWFA Technical Guidelines
The chemistry of the vapor barrier
The chemical composition of your underlayment determines its long term performance and its ability to resist the weight of heavy furniture. Many cheap underlayments are made of open-cell foam. These are basically just bubbles of air trapped in plastic. Over time, the weight of your bed, your dresser, and your own body weight will pop those bubbles. Once they are gone, you have no sound dampening and no support. I only use high-density, closed-cell products or felt. Felt is particularly interesting because it is made of recycled fibers that are needle-punched together. It provides a massive amount of surface area to absorb sound and it does not compress easily. It also has the added benefit of being able to wick away small amounts of incidental moisture and allow it to evaporate safely rather than trapping it against the subfloor. When you are choosing a product, don’t look at the pretty picture on the label. Look at the technical data sheet. Look at the PSI rating. If the material cannot handle at least 20 pounds per square inch, it does not belong under your floor. I don’t care how cheap it is. Cheap is expensive when you have to do the job twice.