
The mechanics of the perfect starter row
Most guys skip the leveling compound. They think the underlayment will hide the dip. It won’t. I spent three days grinding concrete on a job last month just so the floor wouldn’t click like a castanet. I have spent twenty five years on my knees with a moisture meter and a level. I have smelled enough oak dust and WD-40 to last three lifetimes. When you walk into a room to install laminate, you are not just laying down boards. You are managing a structural engineering puzzle. If your first row is off by even a sixteenth of an inch, your entire installation will fail by the time you reach the far wall. The floor is a performance surface. It reacts to humidity. It moves. If you lock it in place incorrectly, it will buckle. I once saw a fifteen thousand dollar wide plank walnut floor cup until it looked like a potato chip because the installer ignored the crawlspace humidity. Do not be that guy. Using a T-square to index your starter row is the only way to ensure the mechanical locking systems perform as designed.
The T-square hack for laser precision
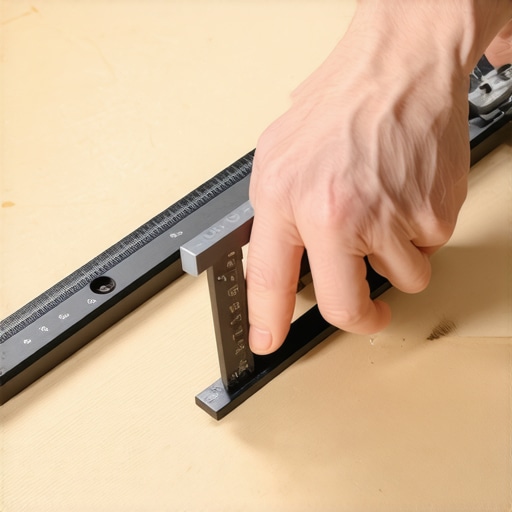
Laminate flooring requires a perfectly straight starter row to ensure the tongue and groove locking mechanisms engage without structural stress or mechanical failure. If you rely on a drywall edge, you are asking for trouble. Drywall is never straight. You take your T-square and you mark a reference line three feet out from the wall. You measure from that line back to the wall at both ends. This tells you if the wall is bowed. Most walls are bowed. You scribe your first row to follow the wall while keeping the leading edge perfectly parallel to your reference line. This ensures the rest of the floor runs true. If you don’t do this, the joints will eventually separate under the pressure of foot traffic.
“A floor is only as good as the subfloor beneath it; deflection is the enemy of every joint.” – Master Flooring Axiom
Why your subfloor is lying to you
Subfloor flatness must meet NWFA standards which dictate a maximum deviation of one eighth inch over a ten foot radius to prevent laminate plank deflection. Concrete slabs are rarely flat. They have humps and valleys. If you lay a click-lock floor over a valley, the joint will flex every time someone walks on it. Over six months, that plastic locking tab will fatigue and snap. You need to use a high-compression floor patch or a self-leveling underlayment with a minimum 3000 PSI rating. I see guys trying to use extra foam underlayment to fill the holes. That is a recipe for disaster. Too much cushion causes the locking mechanisms on LVP and laminate to snap under pressure. You want a firm, flat base. Nothing less.
| Metric | Residential Standard | Commercial Grade |
|---|---|---|
| AC Rating | AC3 | AC5 |
| Wear Layer | 12 mil | 20+ mil |
| Core Density | 800 kg/m3 | 950 kg/m3 |
| Acclimation | 48 Hours | 72 Hours |
The chemistry of the expansion gap
Expansion gaps are mandatory because high density fiberboard cores are hygroscopic and will expand or contract based on ambient relative humidity levels. The core of a laminate plank is a matrix of refined lignocellulosic fibers combined with synthetic resin. When moisture fluctuates, the hydrogen bonds within the cellulose fibers absorb water molecules. This causes the plank to expand in its width more than its length. If you do not leave a quarter inch gap at the perimeter, the floor has nowhere to go. It will lift off the subfloor. It will peak at the seams. I have seen entire floors rise two inches off the ground because an installer forgot to remove his spacers. You must treat the floor like a living thing.
- Check subfloor moisture with a calcium chloride test
- Vacuum every speck of dust before laying underlayment
- Index the first row with a T-square and a chalk line
- Maintain a constant temperature between 65 and 75 degrees
- Stagger end joints by at least eight inches
The ghost in the expansion gap
Perimeter spacing prevents buckling and joint separation by allowing the floating floor system to move as a single monolithic unit. You also need to think about heavy objects. Homeowners always ask why their waterproof vinyl is buckling. Usually, it is because they locked it under a heavy kitchen island. If you put a thousand pound island on top of a floating floor, you have pinned it. It can no longer expand. The floor will pull apart at the weakest joint. You must install the island first, then floor around it. Or, use a fixed flooring like hardwood floors or tile that is glued or thin-set to the substrate.
“Deflection limits for ceramic tile and stone installations should not exceed L/360 under total anticipated load.” – TCNA Handbook Standards
The transition to grout and showers
Wet area transitions between laminate and showers require a silicone-filled expansion joint rather than hard grout to prevent water infiltration. When you move from a floating floor to a tiled bathroom, the height difference is your biggest enemy. You cannot just slap a T-molding down and call it a day. You need to ensure the subfloor height is matched using plywood underlayment or a cementitious backer board. In the shower, the waterproofing membrane must be continuous. If you are installing tile, the grout choice matters. Epoxy grout is waterproof and stain-resistant, but it is a nightmare to work with if you are slow. Traditional cementitious grout is porous. It will soak up water and let it sit against your subfloor. This leads to rot. Always seal your grout or use a high-performance polymer-modified mixture.
The final walkthrough of the mechanical bond
The mechanical locking profile of a modern plank uses angle-angle or drop-lock technology to create a tension-based connection. Every time you click a board together, you are engaging a precision-milled geometry. If there is a single grain of sand in that groove, the joint will not close. The T-square hack ensures that the first row is a perfect baseline. Without that baseline, the cumulative error of the installation will grow. By the time you are ten rows in, you will see gaps. You will try to hammer them shut. You will damage the tongue. The installation is over. Do it right the first time. Respect the physics of the material. Keep your tools clean and your lines straight. A floor is the foundation of the home’s interior. It deserves the respect of a master’s touch. Avoid the cheap shortcuts. Use the square. Check your moisture. Build something that lasts longer than the mortgage.