
I spent three days grinding concrete on a job last month just so the floor wouldn’t click like a castanet. Most guys skip the leveling compound. They think the underlayment will hide the dip. It won’t. I saw a $10,000 installation fail because the installer thought he could just kick the planks into place with his sneakers. The subfloor is the foundation of your reputation, and if you treat it like an afterthought, your floor will betray you with every step. I have spent twenty-five years on my knees, smelling the dust of hardwood floors and the chemical tang of grout. I know the sound of a failing joint before it even opens up. This is not about aesthetics. This is about structural engineering on a microscopic scale.
The invisible tension of the locking mechanism
Laminate flooring relies on mechanical friction within the clicking profile to maintain structural integrity. Using a rubber mallet ensures the tongue and groove are fully seated without damaging the fragile HDF core. This precise seating prevents gap formation, moisture infiltration, and the eventual failure of the floor locking system under dynamic loads. When you slide a plank into place, the friction between the high-density fiberboard surfaces creates resistance. If you do not overcome this resistance with a controlled, percussive force, the joint remains under tension. This tension is the primary cause of the dreaded clicking sound. It is the sound of two pieces of wood rubbing together because they were never truly married. You need that mallet to finish the conversation that the locking profile started.
The physics of the clicking sound
The sound of a floor is determined by the air gaps beneath it. When a plank is not fully engaged, it sits at a micro-angle. This creates a tiny void between the plank and the underlayment. Every time someone walks across that spot, the plank flexes into the void. This is not just annoying. It is a mechanical failure. The constant movement wears down the milled tongue until it eventually snaps. Once the tongue is gone, the floor is dead. I have seen hardwood floors that lasted a century, but a laminate floor can die in six months if the joints are stressed. You must use a mallet to ensure that the vertical and horizontal locking points are perfectly aligned. This is not a suggestion. It is a requirement for anyone who respects the trade.
“A floor is only as good as the subfloor beneath it; deflection is the enemy of every joint.” – Master Flooring Axiom
Subfloor secrets that haunt your installation
Your subfloor is lying to you. It looks flat to the naked eye, but a ten-foot straightedge will reveal the truth. If you have a dip greater than 3/16 of an inch over ten feet, your laminate will fail. I don’t care how thick your underlayment is. In fact, if you use an underlayment that is too thick, you are actually making the problem worse. The extra cushion allows the planks to dip even further, putting even more stress on the joints. This is a common mistake made by people who are used to the rigidity of tile and grout in showers. They think they can pad their way out of a leveling problem. You cannot. You must grind the high spots and fill the low spots. There is no shortcut to a flat floor.
The chemistry of the wear layer vs the core density
Laminate is a sandwich of technology. The top layer is usually a melamine resin with aluminum oxide for scratch resistance. Beneath that is the decorative paper, and beneath that is the HDF core. The core is the heart of the plank. It is made of wood fibers compressed under extreme heat and pressure. This material is hygroscopic. It moves. It breathes. If you don’t use a mallet to seat the joints properly, you leave the core exposed to ambient humidity. A gap as thin as a human hair is enough for moisture to enter the core. Once that happens, the edges will swell. This is called peaking. Once a floor starts peaking, there is no fix. You are tearing it out and starting over.
| Property | Laminate Performance | Hardwood Floors | Tile Showers |
|---|---|---|---|
| Core Material | High Density Fiberboard | Solid Oak or Maple | Mortar and Mesh |
| Joint Integrity | Mechanical Locking | Tongue and Groove Nail | Cured Grout |
| Moisture Resistance | Surface Only | Low to Moderate | High with Membrane |
| Expansion Rate | High Across Width | High Across Grain | Minimal |
Why your hand is not a precision instrument
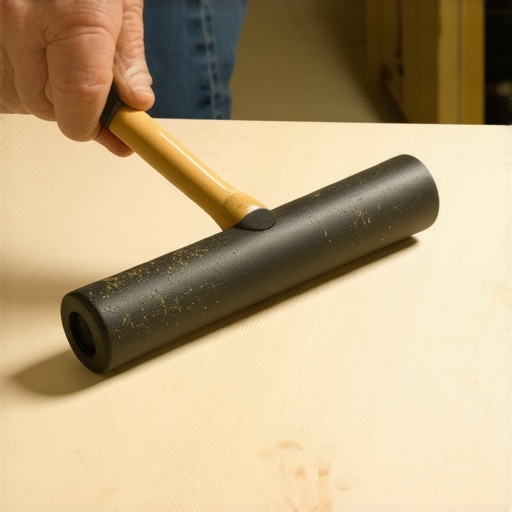
I see guys trying to palm the planks into place. It is a joke. Your hand cannot deliver the focused, dead-blow force required to seat a modern drop-lock system. A rubber mallet, specifically a white-headed one that won’t leave scuff marks, distributes the force across the tapping block. This protects the wear layer while forcing the tongue into the groove at the correct angle. If you hit it too hard with a hammer, you will shatter the HDF. If you hit it too soft with your hand, you leave a gap. The mallet is the middle ground of professional precision. It is the tool that separates the craftsmen from the weekend warriors who will be calling me in two years to fix their buckling hallway.
Comparing laminate to hardwood floors and showers
The logic of hardwood floors is different because you are typically using a pneumatic nailer. The nailer provides the force. In showers, you are dealing with grout and thin-set, where the bond is chemical. Laminate is the outlier. It is a floating system. It is held together by nothing but the geometry of its edges. This makes it incredibly sensitive to subfloor prep. If you treat a laminate install like a tile job, you will fail. If you treat it like a hardwood job, you will fail. You must respect the specific physics of the floating floor. This means providing the 1/4 inch expansion gap at every wall and using the mallet to lock the system into a single, cohesive unit.
“Substrate preparation is the most critical phase of any flooring installation; if the base is not stable, the finish will not endure.” – TCNA Technical Bulletin
The 1/8 inch that ruins everything
Precision is not a luxury in this business. It is the bare minimum. If your joints are off by even 1/8 of an inch at the start of a run, that error will compound. By the time you get across a twenty-foot room, you will be looking at a massive gap or a plank that refuses to lock. I have seen entire jobs ruined because the first row wasn’t straight. You use the mallet to nudge the planks into perfect alignment. You check your work every three rows. You measure. You tap. You listen for the solid thud of a seated joint. If you hear a hollow click, you stop. You take it apart. You find the piece of debris in the groove and you start again.
The checklist for a silent floor
- Acclimate the planks for 48 hours in the room where they will be installed.
- Check the subfloor moisture levels with a calibrated meter.
- Ensure the subfloor is flat within 3/16 inch over 10 feet.
- Use a vapor barrier on concrete slabs even if the underlayment says it is not needed.
- Maintain a consistent expansion gap around the entire perimeter.
- Use a white rubber mallet and a high-quality tapping block.
- Vacuum the grooves of every plank before clicking them together.
The reality of flooring is that it is a battle against the elements and the laws of physics. Gravity wants to find the dips. Humidity wants to swell the fibers. Friction wants to prevent the joints from locking. Your job is to win that battle. The mallet is your primary weapon. It provides the force necessary to create a monolithic surface that can withstand the weight of furniture and the traffic of a busy household. Without it, you are just laying boards on the ground and hoping for the best. Hope is not a strategy. Engineering is a strategy. Take the time. Use the tools. Do it right or don’t do it at all.