
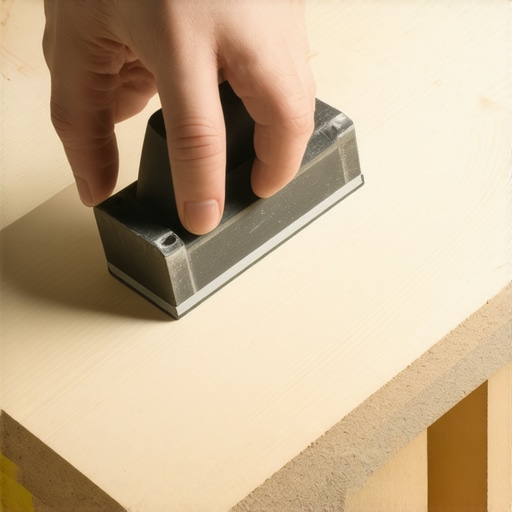
I smell like WD-40 and oak dust most days. My knees tell the story of twenty-five years spent chasing a flat subfloor. Most guys skip the leveling compound. They think the underlayment will hide the dip. It won’t. I spent three days grinding concrete on a job last month just so the floor wouldn’t click like a castanet. That job taught me that if you don’t respect the flat, the floor will fight back every time you walk on it. People look at a laminate floor and see a cheap alternative to wood. I see a high-pressure laminate system with a core of resin-saturated fiberboard that is as brittle as a cracker if you treat it with disrespect. The biggest disaster I see involves the tool meant to help. The tapping block is the primary weapon of destruction when wielded by someone who thinks force is a substitute for finesse.
The structural failure of the overzealous hammer
Laminate edge failure occurs when the installer applies excessive force via a tapping block against the fragile tongue of the plank. This impact compromises the structural integrity of the high density fiberboard core. Once the locking profile is crushed or sheared, the joint loses its ability to remain tight under foot traffic. The physics of a click-lock floor depend on the geometry of the tongue and the groove. These are not just shapes cut into wood. They are engineered tolerances measured in fractions of a millimeter. When you strike a tapping block, you are sending a kinetic shockwave through the resin matrix of the board. If the block is not perfectly seated against the thickest part of the plank, that energy focuses on the thin, protruding tongue. It snaps. You might not see the crack today. You will see the gap in six months when the humidity shifts and the board tries to contract. Without the mechanical lock, the board walks away from its neighbor.
Why your subfloor is lying to you
A subfloor that looks flat to the naked eye often contains undulations that exceed the maximum tolerance of one eighth inch over ten feet. These microscopic hills and valleys create air pockets beneath the laminate planks. When you walk across these voids, the floor deflects. This vertical movement is the enemy of every joint. Laminate is a floating floor. It is a single, massive diaphragm of wood and resin. If the subfloor is not planed or filled to a level state, the joints are constantly under shear stress. Think about the chemistry of the adhesive used to bind those wood fibers. It is a rigid bond designed for compression, not for the constant bending and flexing caused by a dip in the concrete. I have seen installers try to compensate by adding a second layer of underlayment. This is a massive error. Too much cushion allows the floor to bounce, which eventually snaps the locking mechanisms just as surely as a hammer blow would.
“A floor is only as good as the subfloor beneath it; deflection is the enemy of every joint.” – Master Flooring Axiom
The ghost in the expansion gap
Expansion gaps at the perimeter of a room are the lungs of a laminate floor, allowing it to expand and contract with seasonal humidity changes. If you pin the floor against a wall or a heavy kitchen island, you have essentially killed the installation. Wood fibers are hygroscopic. They take in moisture from the air and they grow. In a typical living room, a laminate floor can expand by nearly a quarter of an inch. If there is no gap, the floor has nowhere to go but up. This results in buckling or peaking. I once saw a floor where the installer ran the planks tight against the door casings. Within three months, the floor had lifted two inches off the subfloor in the center of the room. It looked like a tent. People blame the product. They blame the humidity. They should blame the lack of a half inch of empty space hidden under the baseboards. This is why I always carry a spacer kit and I never, ever trust a visual measurement. I use a gauge because the math of wood expansion does not care about your feelings.
The 1/8 inch that ruins everything
Precision in the first row of a laminate installation determines the success of the entire project because any deviation is magnified across the width of the room. If your starting wall is not perfectly straight, and few walls are, your floor will begin to curve. This puts lateral tension on the short-end joints. You might get the boards to click together, but they are under a state of constant stress. Over time, the vibration of footsteps will cause those stressed joints to fail. I spend more time on the first three rows than I do on the rest of the house combined. I use a string line. I check for square against the primary focal point of the room. I scribe the first row to the wall so the expansion gap remains consistent even if the drywall is wavy. It is the difference between a floor that lasts twenty years and one that needs replacement in two.
| Feature | Laminate HDF Core | Solid White Oak | Luxury Vinyl (SPC) |
|---|---|---|---|
| Janka Hardness Equivalent | High (Surface Only) | 1360 lbf | N/A (Indentation Sensitive) |
| Expansion Rate | Moderate | High | Low (Thermal Only) |
| Typical Thickness | 8mm to 12mm | 19mm (3/4 inch) | 4mm to 7mm |
| Acclimation Time | 48 Hours | 7 to 14 Days | 0 to 24 Hours |
Adhesive chemistry and the HDF bond
The core of a laminate plank is composed of wood fibers ground into a powder and reconstituted with urea-formaldehyde or melamine resins under extreme heat and pressure. This creates a material that is incredibly dense but lacks the structural grain of solid lumber. When you use a tapping block, you are interacting with this resin-heavy edge. If the block is made of a material harder than the floor, such as steel, it will deform the edge upon impact. I prefer a high-density polyethylene block. It absorbs just enough of the shock to protect the plank while still transferring enough force to seat the joint. You also have to consider the wear layer. Most modern laminates use an aluminum oxide finish. This is one of the hardest substances on earth, sitting just below diamond on the Mohs scale. However, it is a thin coating. If you strike the surface of the plank with a hammer, you can create micro-fractures in this brittle layer. Moisture from a damp mop will find those fractures, seep into the HDF core, and cause the edges to swell. Once an edge swells, the floor is ruined. There is no sanding it down like real wood.
The moisture migration through the concrete slab
Concrete is a sponge that holds thousands of pounds of water, and that moisture will migrate upward into your flooring unless an adequate vapor barrier is installed. Even a slab that has been cured for years will breathe. I always use a calcium chloride test or a pinless moisture meter before I even open a box of flooring. If the moisture vapor transmission rate is too high, you need a six mil poly film at a minimum. I prefer a high-grade underlayment with an integrated vapor barrier and a high IIC rating for sound dampening. If you skip this, the bottom of the laminate plank will absorb that moisture. Because the top of the plank is sealed with a non-porous wear layer, the board will expand unevenly. This leads to cupping. The edges rise up, creating a series of ridges across the room. It is a structural failure caused by ignoring the chemistry of the house. You cannot fight the moisture of the earth with a thin piece of plastic. You have to seal it out completely.
“Deflection is the silent killer of the click-lock system; it turns a floor into a series of individual moving parts rather than a unified surface.” – TCNA Technical Bulletin (Adapted)
- Always check subfloor levelness with a ten foot straight edge.
- Acclimate the planks in the room for at least 48 hours.
- Use a tapping block specifically designed for the floor’s locking profile.
- Maintain a half inch expansion gap around all vertical obstructions.
- Never install heavy cabinetry or islands on top of a floating floor.
- Verify that the concrete slab moisture is below three pounds per thousand square feet.
The rhythmic failure of the pull bar
The pull bar is the most dangerous tool in the installer’s kit because it allows for immense leverage against the final row of planks. When you reach the wall, you cannot use a tapping block. You have to use the pull bar to cinching the joints together. If you yank on that bar with too much force, you will not just close the gap. You will pull the entire floor toward the wall, closing your expansion gap on the opposite side. It requires a controlled tap, not a violent pull. I have seen entire rooms shifted an inch to the left because someone got aggressive with the pull bar. This ruins the alignment of the joints and creates a diagonal stress line across the entire installation. It is about the transfer of energy. You want just enough vibration to overcome the friction of the locking mechanism. Anything more is destruction. I treat every plank like it is made of glass. It looks like wood, but it behaves like a precision instrument. If you treat it like a 2×4 on a framing job, you are going to have a bad time. The sawdust under my nails is a reminder that this trade is about the details that no one sees until they fail.