
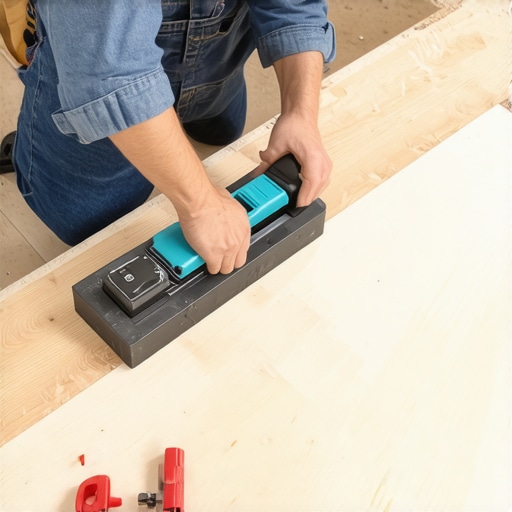
The subfloor secret that ruins most installations
To achieve tight laminate seams, you must eliminate all subfloor deflection and high spots with self-leveling compound or mechanical grinding before the first plank is laid. Most guys skip the leveling compound. They think the underlayment will hide the dip. It won’t. I spent three days grinding concrete on a job last month just so the floor wouldn’t click like a castanet. I once walked into a house where a $15,000 wide-plank walnut floor was cupping so bad it looked like a potato chip because the installer didn’t check the crawlspace humidity, and I see the same negligence in laminate work daily. If your subfloor has a deviation of more than 3/16 of an inch over 10 feet, your joints will fail. I smell like floor wax and sawdust right now because I just finished fixing a botched job where the installer used a hammer directly on the plank edge. That is a crime in the world of flooring. You need a professional tapping block that distributes force across the entire profile of the tongue. This is not about aesthetics, it is about structural integrity and the physics of the locking mechanism. The high-density fiberboard core of a laminate plank is susceptible to shearing if hit with a concentrated point of impact. You are managing the kinetic energy of a three-pound dead-blow hammer and transferring it through a sacrificial medium to seat a mechanical lock.
The ghost in the expansion gap
A proper expansion gap of 1/4 to 3/8 inch around the entire perimeter of the room allows for the natural expansion and contraction of the HDF core. Without this gap, the floor will bind against the drywall and cause the seams to peak or the centers to buckle. The physics are simple. Wood fibers in the laminate core respond to changes in relative humidity by swelling or shrinking. Even though laminate is more stable than hardwood floors, it is not immune to the laws of thermodynamics. When the humidity in a room like a kitchen or a hallway increases, the floor grows. If it hits a wall, that energy has to go somewhere. Usually, it goes up. This creates a trampoline effect that eventually snaps the locking tongues. I have seen entire rooms lift off the slab because someone didn’t want to remove the baseboards. Use spacers. Check them every three rows. A floor is a living, breathing structural element that requires room to move. If you pin it down with a heavy kitchen island or a transition strip screwed into the subfloor, you are asking for a failure. The laminate needs to float as a single, unified raft across the room. Any restriction of that movement will manifest as a gap or a peak in your seams.
“A floor is only as good as the subfloor beneath it; deflection is the enemy of every joint.” – Master Flooring Axiom
The physics of the mechanical lock
The locking mechanism of a laminate plank relies on a precise friction fit between the tongue and the groove that must be engaged without damaging the HDF fibers. When you use a tapping block, you are seated the joint. The trick is to use a block that fits the specific profile of the floor you are installing. Not all click systems are the same. Some use a drop-lock system on the short end, while others require a 45-degree angle of insertion followed by a horizontal tap. If you are working near showers or moisture-prone areas, this seal is your only defense against water infiltration. While people talk about waterproof laminate, the truth is in the joints. If the joint isn’t tight, water will sit in the groove, soak into the core, and cause edge swelling that can never be reversed. The chemistry of the melamine wear layer protects the top, but the core is the Achilles heel. You need to ensure the joint is so tight that you cannot slide a piece of paper into it. This requires a rhythmic, consistent application of force. One sharp blow is better than ten light taps. You want to overcome the static friction of the joint in one movement without exceeding the material’s yield strength.
Why your subfloor is lying to you
A subfloor may look flat to the naked eye but still possess micro-deviations that will cause the laminate joints to open over time. I always use a 10-foot straightedge. Anything else is just guessing. If you find a low spot, you use a high-quality patch or leveler. If you find a high spot, you grind it down. This is where the real work happens. The installation of the planks is just the victory lap. I’ve seen guys try to use double layers of underlayment to fill a hole. That is a disaster waiting to happen. Too much cushion under a floating floor allows for too much vertical movement. When you step on a seam that has too much deflection, the tongue acts as a lever and the groove acts as a fulcrum. Eventually, the groove will split. This is why grout and tile are preferred in high-stress areas by some, but a properly installed laminate on a flat floor can last thirty years. It all comes back to the prep work. The tapping block won’t fix a bad subfloor. It only seats the planks on the surface you’ve prepared.
| Material Property | Laminate HDF | Solid Hardwood | Engineered Wood |
|---|---|---|---|
| Core Density | 850-950 kg/m3 | 700-800 kg/m3 | 600-750 kg/m3 |
| Moisture Resistance | Moderate | Low | High |
| Expansion Rate | 0.1 percent | 0.4 percent | 0.15 percent |
| Janka Rating | N/A (Wear layer) | 1290 (Red Oak) | 1360 (White Oak) |
The 1/8 inch that ruins everything
Precision at the start of the first row determines the success of the entire installation because a small deviation at the beginning compounds across the room. If your first row is out of square by just 1/8 of an inch, by the time you reach the other side of a twenty-foot room, you could be off by several inches. This forces you to make crooked cuts and puts uneven pressure on the locking mechanisms. Use a chalk line. Measure twice, then measure a third time. I don’t care if the wall is crooked. Most walls are. You scribe the first row to the wall so that the floor remains perfectly square. This is the difference between a professional job and a DIY mess. When you use the tapping block on a floor that is out of square, you are fighting the material. The planks will want to drift. You will find yourself hitting the block harder and harder to close gaps that are being caused by the geometry of the room, not the quality of the floor. This is how tongues get broken. A floor should click together with a satisfying, low-frequency sound. If it sounds like a sharp crack, you’ve broken something.
“Modern flooring systems are engineered for performance, but they lack the tolerance for error found in traditional site-finished wood.” – NWFA Technical Manual
The chemistry of the wear layer and its limits
The AC rating of a laminate floor indicates the durability of the aluminum oxide wear layer but provides no protection against structural failure caused by poor installation. You can buy an AC5 rated floor, which is designed for commercial traffic, but if you don’t use a tapping block correctly, the seams will be the first thing to go. The wear layer is a coating of microscopic aluminum oxide crystals suspended in a resin. It is incredibly hard. It will dull a carbide saw blade in ten cuts. However, that hardness makes it brittle. If you hit the edge of the plank directly with a hammer, you will chip the wear layer. These chips allow moisture to enter the HDF core. Once the core starts to swell, the wear layer will delaminate. It is a chain reaction of failure. The tapping block acts as a protective buffer for this brittle edge. It should be made of a high-density polyethylene or a similar non-marring material. Some guys use a scrap piece of flooring as a tapping block. That works in a pinch, but a real block has a groove that fits over the tongue, protecting the most vulnerable part of the plank.
- Check subfloor for moisture using a calcium chloride test before starting.
- Acclimate the planks in the room for at least 48 hours at living conditions.
- Use a 6-mil poly vapor barrier over concrete slabs to prevent vapor drive.
- Vacuum every single row to ensure no debris gets trapped in the locking tracks.
- Maintain a 35 to 55 percent relative humidity in the home year-round.
The tapping block trick for tighter seams
The secret to using a tapping block effectively is to apply downward pressure on the plank while simultaneously tapping it horizontally into the previous row. This ensures that the tongue is fully seated in the groove before the mechanical lock engages. I see people just banging away at the side of the plank. That just makes the floor bounce. You need to use your knees or your off-hand to hold the plank flat against the underlayment. Then, a series of short, sharp taps will walk the plank into position. If a seam isn’t closing, stop. Don’t hit it harder. Take the plank out and check the groove. Usually, there is a small piece of wood transition or a piece of the core that broke off and is sitting in the track. A 1/16-inch piece of debris will prevent a 12-foot row from closing. This is where patience pays off. If you force it, you lose. The tapping block is a tool of precision, not a tool of force. I’ve spent twenty-five years on my knees learning this, and it’s the one thing that separates the masters from the amateurs. Keep your tools clean, keep your subfloor flat, and respect the expansion gap. Do that, and the floor will stay tight until the house comes down around it.