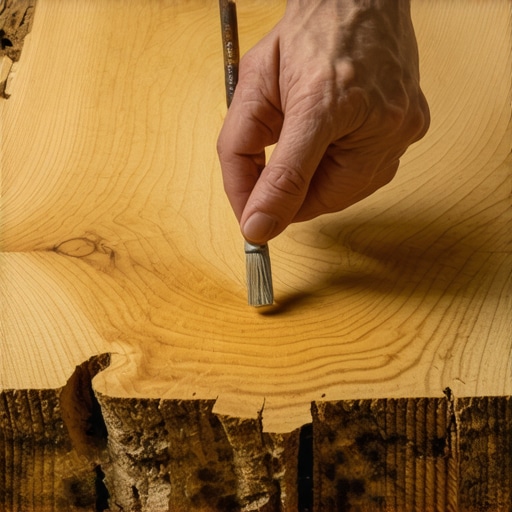
The walnut oil miracle for surface repair
The walnut trick involves rubbing a raw walnut meat into a hardwood gouge to use its natural oils and fibers as a filler. The oils darken the exposed wood to match the surrounding finish while the soft pulp fills the physical void. It works best on medium to dark woods like oak and walnut. I once walked into a house where a $15,000 wide-plank walnut floor was cupping so bad it looked like a potato chip because the installer didn’t check the crawlspace humidity. The homeowner was in tears. That job taught me that wood is a living thing. It breathes, it moves, and it reacts to everything in its environment. When you see a deep gouge in a walnut floor, your first instinct is to reach for the wood filler. Stop right there. Wood filler is a chemical compound that rarely takes a stain correctly and often shrinks over time, leaving a brittle plug that eventually pops out under foot traffic. The walnut trick is different because it uses organic lipids that bond with the cellular structure of the timber. You take a raw walnut and rub it diagonally across the scratch. The friction generates heat. This heat thins the walnut oil, allowing it to penetrate the compressed wood fibers of the gouge. It is not just a cosmetic fix, it is a structural replenishment of the natural oils lost when the wood was scarred. For those of us with sawdust under our nails, we know that walnut has a Janka hardness of about 1,010. It is soft enough to be worked but hard enough to last. When you rub the nut into the floor, you are essentially performing a localized site-finish. It is a trick that has saved me hundreds of dollars in resin kits. However, this only works if the gouge has not pierced through the entire wear layer into the plywood core of an engineered plank. If you are dealing with solid 3/4 inch white oak or black walnut, the depth of the scratch determines your strategy. Surface scratches vanish with the oil. Deep gouges require the fiber of the nut to be packed in.
“A floor is only as good as the subfloor beneath it; deflection is the enemy of every joint.” – Master Flooring Axiom
Why your subfloor is lying to you
A subfloor may appear flat to the naked eye but can contain hidden dips and peaks that cause hardwood floors to flex and fail. Using a ten foot straightedge is the only way to verify that a subfloor meets the industry standard of one eighth inch deviation over ten feet. Most guys skip the leveling compound. They think the underlayment will hide the dip. It won’t. I spent three days grinding concrete on a job last month just so the floor wouldn’t click like a castanet. If your subfloor is not perfectly flat, no amount of walnut oil or high-end finish will save you. When a plank spans a dip in the subfloor, it creates a bridge. Every time you walk over that bridge, the tongue and groove joint is stressed. Eventually, the wood fibers fatigue and the joint snaps. This is especially true with laminate and thinner engineered products. You need to understand the physics of deflection. Deflection is the amount of ‘give’ in your floor. If you have 16-inch on-center joists, your subfloor needs to be at least 3/4 inch thick CDX plywood. If you are installing over OSB, you need to be even more careful because OSB can swell at the edges when exposed to any moisture from the crawlspace. I always use a moisture meter to check the subfloor before a single plank hits the ground. If the subfloor is at 12 percent moisture and the hardwood is at 6 percent, you are asking for a disaster. The floor will pull moisture from the subfloor, swell, and buckle. You must wait for the two materials to be within 2 to 4 percentage points of each other. This is the law of the NWFA. There are no shortcuts.
The ghost in the expansion gap
The expansion gap is the vital space left around the perimeter of a room to allow hardwood floors to expand and contract with seasonal humidity changes. Without this gap, the floor will eventually push against the walls and buckle in the center of the room, creating expensive damage. Homeowners always ask why their waterproof vinyl is buckling. Usually, it’s because they locked it under a heavy kitchen island, killing the floor’s ability to breathe. Wood and even some laminate products are hygroscopic. They absorb water from the air. In the summer, the planks grow. In the winter, they shrink. If you run your flooring tight against the drywall, the wood has nowhere to go. It will find the weakest point and lift. I call this the ghost in the gap because you don’t see the problem until the seasons change. You need a minimum of 1/2 inch gap for most solid installations. I use spacers every 12 inches during the install to ensure that gap remains consistent. People hate the look of baseboards and shoe molding, but they are there for a reason. They hide the necessary breathing room for your floor. If you are doing a zero-threshold transition into a tiled area like showers or where grout meets the grain, you must use a flexible 100 percent silicone sealant in the gap rather than hard grout. Grout will crack the moment the wood moves.
Hardwood floors and the moisture threshold
Moisture management is the single most important factor in the longevity of a hardwood floor installation. You must control the relative humidity of the room between 30 and 50 percent to prevent the wood from shrinking, gapping, or crowning due to atmospheric water absorption. The chemistry of a concrete slab is a complex beast. Even if a slab looks dry, it is constantly emitting water vapor. This is known as the Moisture Vapor Emission Rate or MVER. If you glue a walnut floor directly to a green slab, the adhesive will eventually fail or the wood will cup. I always perform a calcium chloride test or use an in-situ RH probe to check the slab’s internal humidity. For laminate, you must use a 6-mil poly vapor barrier. For hardwood, I prefer a liquid-applied moisture mitigation system. This creates a chemical bond that blocks the vapor from reaching the wood cells. While most people want the thickest underlayment, too much cushion actually causes the locking mechanisms on LVP to snap under pressure. You want a high-density, low-compression underlayment. It should feel firm, not like a sponge. A sponge allows too much vertical movement, which is the death of any click-lock system.
The molecular zoom into walnut chemistry
Black walnut wood contains high concentrations of tannins and natural oils that react to friction and heat during the repair process. These organic compounds are more effective than synthetic fillers because they mimic the light-refractive properties of the original wood grain. When you rub a walnut into a gouge, you are not just filling a hole. You are performing a chemical integration. The tannins in the walnut meat help to darken the light-colored wood that is often exposed in the bottom of a deep scratch. This light wood is the ‘flesh’ of the timber, which has not been oxidized or stained. By introducing the oils from the nut, you are accelerating the oxidation and sealing the grain in one step. This is far superior to using laminate repair kits which often have a plastic-like sheen that catches the light and screams ‘repair.’ For deeper gouges, you can even take a few shavings from a hidden area of the floor, like inside a closet, mix them with a tiny bit of clear epoxy, and fill the hole. Once dry, use the walnut trick over the top to blend the color perfectly.
Comparing Floor Durability and Ratings
| Material Type | Janka Hardness Rating | Acclimation Time | Moisture Tolerance |
|---|---|---|---|
| Solid Black Walnut | 1,010 lbf | 7-10 Days | Low to Moderate |
| White Oak | 1,360 lbf | 7-14 Days | Moderate |
| Premium Laminate | N/A (AC4 Rating) | 48 Hours | High (Surface Only) |
| Engineered Hickory | 1,820 lbf | 3-5 Days | High |
The repair checklist for deep gouges
- Vacuum the gouge thoroughly to remove any loose splinters or grit.
- Use a magnifying glass to check for cracked finish around the edges.
- Select a raw, unsalted walnut meat for the repair.
- Rub the nut firmly into the scratch at a 45-degree angle.
- Wait five minutes for the oils to soak into the wood fibers.
- Buff the area with a clean microfiber cloth to remove excess pulp.
- Apply a drop of wood-grade polyurethane if the gouge was exceptionally deep.
When the grout meets the grain
The transition between hardwood floors and tiled areas like showers requires a specialized approach to prevent moisture wicking. A physical break must exist between the two materials to allow for independent movement and to stop water from traveling through grout lines into the wood. I’ve seen too many contractors run hardwood right up to a shower curb. It’s a mistake. The grout in the tile work will eventually develop hairline cracks. Water will seep through those cracks and find its way under the hardwood. Once water gets under the finish, the wood will turn black with mold and the finish will peel. You need a transition strip or a dedicated silicone joint. Silicone is the hero of the flooring world. It is flexible and waterproof. In areas where showers and hardwood floors coexist, I always use a waterproof membrane that extends at least 12 inches past the tile onto the subfloor. This protects the wood from the inevitable splashes and drips. If you see grout cracking at a floor transition, don’t just add more grout. Dig it out and replace it with a color-matched caulk. Your floor will thank you.