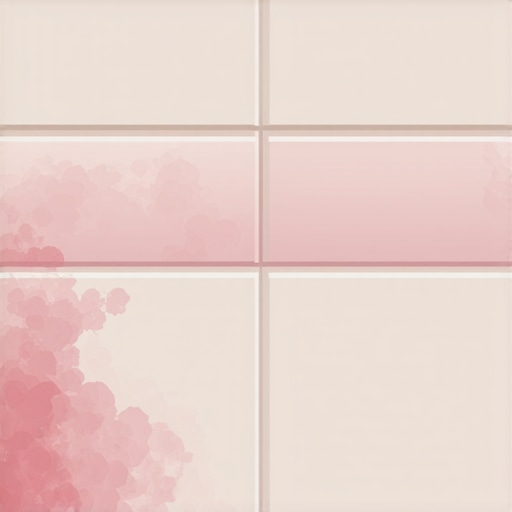
The pink ghost in the bathroom corners
The pink stain appearing in your shower grout is not actually mold but a bacterial colony known as Serratia marcescens that thrives in moist environments. This biological intruder feeds on fatty acids and phosphorus found in soap residues and human skin cells. When you see that salmon-colored hue spreading along your tile lines, you are looking at a biofilm that is actively colonizing your porous grout surfaces. Most homeowners mistake this for a plumbing issue or a water quality problem, but it is a fundamental maintenance and structural challenge. I spent thirty years looking at things people ignore, and I can tell you that a pink stain is just the warning shot for a bathroom that is failing its moisture management test. I once walked into a house where a custom marble shower was turning bright pink because the installer used a cheap, high-porosity grout and didn’t apply a sealer. The moisture was wicking through the grout and sitting against the subfloor, creating a petri dish that eventually rotted the floor joists under the master bath. This is not just a cosmetic nuisance, it is an indicator of how moisture moves through your home. If you ignore the pink film, you are ignoring the health of your tile assembly and the structural integrity of the flooring in the adjacent rooms.
The biological reality of Serratia marcescens
Serratia marcescens is a Gram-negative, rod-shaped bacterium that produces a reddish pigment called prodigiosin under specific environmental conditions. This organism is ubiquitous in the environment, found in soil and water, but it finds a perfect sanctuary in the humid microclimate of a shower. It is particularly fond of the fatty substances found in shampoos and soaps. The bacteria do not just sit on the surface, they penetrate the microscopic pores of cementitious grout. If you are using a standard sanded grout, you are essentially providing a high-rise apartment complex for these microbes. The texture of sanded grout is rough and cavernous at a molecular level, allowing the biofilm to anchor itself deeply. This is why a simple wipe-down rarely solves the problem for more than a few days. The bacteria are airborne and can be stirred up by construction dust or even open windows. Once they find a wet surface with a food source, they begin to multiply. This is a resilient species that can survive in challenging conditions, making it a persistent foe for anyone with a tile shower. The presence of this pink biofilm is a sign that your cleaning routine is not addressing the microscopic level of the grout or that your bathroom ventilation is inadequate to dry the surfaces between uses.
“A floor is only as good as the subfloor beneath it; deflection is the enemy of every joint.” – Master Flooring Axiom
The physics of grout capillary action
Cement-based grout is inherently porous and acts like a hard sponge that pulls moisture and bacteria into its internal structure through capillary action. When you spray water on an unsealed grout line, the liquid is drawn into the material. Along with that water come the nutrients the bacteria need to survive. This is the structural zooming reality that most people miss. You see a solid surface, but I see a network of tunnels. If the grout is not properly densified or sealed, it becomes a highway for moisture to reach the thin-set and the waterproofing membrane. In older homes, where a proper membrane might be missing, this moisture hits the wood subfloor. This leads to the phenomenon where the grout stays damp for hours or even days after the shower is used. This constant dampness is the primary catalyst for Serratia marcescens outbreaks. To stop the pink stain, you have to break the cycle of moisture retention. This means changing the physical properties of the grout through chemical sealing or upgrading to a non-porous material like epoxy. Most guys in the big-box stores will tell you a cheap sealer is fine, but those topical silicates often fail within months under the heat of a shower. You need a penetrating sealer that actually fills those microscopic voids to prevent the bacteria from taking root.
Why shower moisture ruins nearby hardwood floors
Excessive moisture in the bathroom creates a high-pressure vapor environment that can migrate through walls and under floors to damage hardwood floors and laminate in adjacent rooms. I have seen dozens of cases where a homeowner complained about their hallway hardwood floors cupping, only to find the source was a leaking or poorly maintained shower three feet away. Hardwood is hygroscopic, meaning it absorbs moisture from the air. When your bathroom is a swamp of pink bacteria and constant dampness, that humidity seeks equilibrium. It travels through the subfloor, wicking along the plywood or OSB. If you have solid oak flooring in the hallway, the bottom of those boards will expand as they soak up that migrating moisture. This causes the edges to rise, creating a wavy appearance known as cupping. Laminate is even more sensitive, as the fiberboard core will swell and blow out the joints if the moisture levels in the subfloor rise above 12 percent. The pink stain in your shower is the canary in the coal mine. It tells you that your bathroom is not drying out properly, and that moisture is likely going places it shouldn’t. Proper moisture management in the shower is the first line of defense for every other floor in your house.
The chemistry of the kill
To eliminate Serratia marcescens, you must use an oxidizing agent or a high-pH cleaner that can penetrate the biofilm and dissolve the bacterial cell walls. Common household vinegar is often recommended, but its acidity is sometimes not enough to reach the bacteria hiding deep in the grout pores. Hydrogen peroxide is a far more effective tool because the bubbling action helps to lift the biofilm out of the grout. Bleach is the traditional choice, but it can be hard on cementitious grout if used in high concentrations, eventually causing the material to crumble. The goal is to sanitize without destroying the structural integrity of the grout. Once you have killed the bacteria, you must physically remove the food source. This means scrubbing with a stiff-membered brush to get into the texture of the grout. Simply spraying and rinsing will not work. You have to break the mechanical bond of the soap scum and the dead bacterial cells. After a deep clean, the grout must be allowed to dry completely, usually for 24 to 48 hours, before a high-quality sealer is applied. This drying phase is where most people fail. They clean the shower and then use it that evening, trapping moisture back in the grout and inviting the pink ghost to return immediately.
| Grout Type | Porosity Level | Bacterial Resistance | Recommended Use |
|---|---|---|---|
| Sanded Cement | Very High | Low | Wide joints in low moisture areas |
| Unsanded Cement | High | Low | Thin joints on walls |
| High-Performance Cement | Medium | Medium | Standard residential showers |
| Epoxy Grout | Zero | Very High | Commercial and high-end residential |
Prevention through structural sealing
Sealing your grout is not an optional aesthetic choice but a structural requirement to prevent moisture infiltration and bacterial growth. A quality penetrating sealer works by lining the pores of the grout with a hydrophobic substance, usually a fluorocarbon or a silane-siloxane blend. This changes the surface tension of the grout, causing water to bead up rather than soak in. When water cannot enter the grout, the bacteria cannot survive. However, sealers are not permanent. In a shower that sees daily use, a sealer might only last a year before the heat and friction of cleaning wear it down. You can test your sealer by flicking a few drops of water onto a dry grout line. If the water darkens the grout, the sealer has failed. For the ultimate protection, I always recommend epoxy grout for new installations. Epoxy is a two-part resin system that is completely non-porous. It does not require sealing, it is stain-resistant, and it does not provide a foothold for Serratia marcescens. While it is more difficult to install and more expensive, it eliminates the pink stain problem permanently. For existing showers, consistent re-sealing is the only way to keep the bacteria at bay and protect the subfloor from rot.
“Water is a persistent traveler; it will find every crack and every pore in your tile assembly if you let it.” – TCNA Installation Manual Commentary
The regional humidity factor
Local climate conditions significantly impact how quickly your bathroom dries and how aggressive the bacterial growth will be. In the swampy humidity of Houston or Miami, a bathroom might never drop below 60 percent relative humidity, making it an eternal paradise for pink bacteria. In these regions, you cannot rely on passive ventilation alone. You need high-CFM exhaust fans that run for at least thirty minutes after every shower. Conversely, in the dry heat of Phoenix, the grout might dry out fast enough to naturally inhibit bacterial growth, but the dry air can also cause the grout to shrink and crack, creating new entry points for moisture. Regardless of your location, managing the indoor climate is essential. If you live in a high-humidity area, you should be even more diligent about using a squeegee on your tile walls after every use. Removing the bulk of the water mechanically reduces the workload on your ventilation system and cuts off the supply of standing water that the bacteria need to bloom. Your flooring, from the tile in the shower to the laminate in the hallway, depends on your ability to control the moisture levels in your home.
A checklist for a bacteria free shower
- Scrub all grout lines with a stiff nylon brush and a hydrogen peroxide-based cleaner.
- Use a steam cleaner to reach temperatures that kill bacteria deep within the grout pores.
- Ensure the bathroom exhaust fan is clean and moving the rated amount of air.
- Wipe down tile walls with a squeegee after every shower to remove soap scum.
- Allow the shower to dry for 48 hours before applying a high-quality solvent-based sealer.
- Inspect the perimeter caulking for gaps where water could bypass the tile and hit the subfloor.
- Check the moisture levels in the adjacent hallway flooring with a pinless meter once a year.
The final word on shower maintenance
Maintaining a shower is a structural engineering task that requires constant vigilance against the forces of moisture and biology. The pink film you see is more than just a stain, it is a sign that your home’s defenses against water are being tested. By understanding the chemistry of Serratia marcescens and the physics of grout porosity, you can take steps to protect your bathroom and the expensive flooring throughout the rest of your house. Don’t be the homeowner who ignores a small pink spot only to find a rotted subfloor three years later. Get on your knees, check your grout, and treat your shower as the performance surface it was meant to be. The smell of floor wax and a clean, dry bathroom is the sign of a home that will last for generations. Stop letting the pink ghost win the battle for your grout lines. Take control of the chemistry, seal the pores, and keep the moisture where it belongs, in the drain and out of your structural framing.