I once walked into a house where a $15,000 wide-plank walnut floor was cupping so bad it looked like a potato chip because the installer did not check the crawlspace humidity before the first sand. That experience taught me that the life of a floor is finite. You do not just sand wood because it looks dull. You sand it when the structural integrity allows for it. Most homeowners treat their hardwood floors like a bottomless well of material, but in reality, you are dealing with a microscopic layer of wood above the tongue and groove. If you cross that line, the floor is dead. This is where the chalk test becomes your most valuable tool in the shed. It is the only way to visualize the topography of your floor before you commit to a drum sander that will eat through your investment in seconds.
The myth of the infinite sand
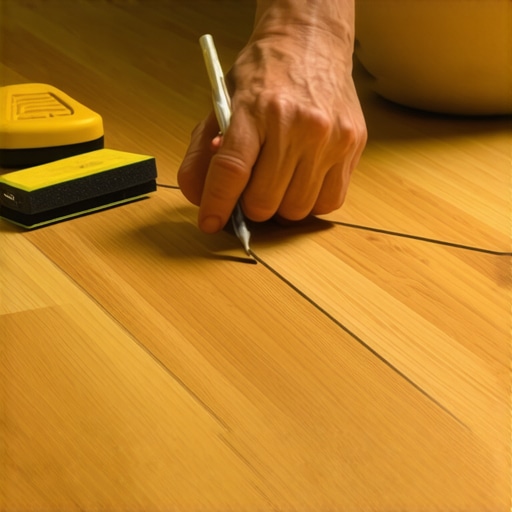
The chalk test reveals the hidden peaks and valleys of a hardwood surface by highlighting where a sander makes contact and where it skips over thin spots. This diagnostic process involves marking the floor with a grid of carpenter chalk and performing a light pass with a buffer to see what remains. If the chalk stays in the grain after a pass, you are looking at a low spot that may require more wood removal than the plank can handle. You have to understand that every floor has a clock. A solid three-quarter inch plank only has about five or six real sands in its lifetime before you hit the nails. If you are working with engineered material, you might only have one or two shots before you hit the plywood core. I have seen guys try to sand laminate thinking it was wood, which is a fast way to ruin a room and a machine simultaneously. Wood is a living cell structure that responds to the environment. It expands and contracts. It breathes. When you sand it, you are removing the protective armor and the history of the tree itself.
The geometry of the tongue and groove
The wear layer of a hardwood floor is the distance from the top of the board to the top of the tongue and groove joint. Once this layer is gone, the floor loses its structural stability and the boards will begin to splinter or even pop out of the floor entirely. I always carry a small metal ruler to measure the depth of the gaps. If I can see the top of the tongue, the floor is finished. It is time for a tear out. This is especially true near moisture-heavy areas. If you have wood running up against a tile floor where the grout is cracking, it usually means the wood is moving too much and putting pressure on the transition. In bathrooms or near showers, the wood is often in a constant state of stress. Sanding these areas requires even more precision because the wood cells are often saturated or degraded from years of humidity cycles. You are not just looking for a flat surface. You are looking for a surface that can still hold a nail and a finish.
“A floor is only as good as the subfloor beneath it; deflection is the enemy of every joint.” – Master Flooring Axiom
The chalk test as a diagnostic weapon
To execute a proper chalk test, you must first clean the floor of all wax and debris then apply a heavy layer of blue or white chalk across the entire suspect area. Use a long straightedge to identify obvious dips first. Then, using a floor buffer with a fine grit screen, make a single, steady pass over the chalked area. The result will look like a map of your failures. Areas where the chalk is gone are your high spots. Areas where the chalk remains are your valleys. If the valleys are deeper than an eighth of an inch, you cannot sand them flat without compromising the rest of the floor. This is the information gain most contractors will not tell you. They want to sell the sand. I want to save the wood. I have spent three days grinding concrete on a job last month just so the floor would not click like a castanet. That level of prep is what separates a floor that lasts eighty years from one that lasts eight.
| Wood Species | Janka Hardness Rating | Estimated Sanding Cycles | Wear Layer Depth |
|---|---|---|---|
| White Oak | 1360 | 5 to 7 | 5/16 inch |
| Black Walnut | 1010 | 3 to 5 | 1/4 inch |
| Hard Maple | 1450 | 6 to 8 | 5/16 inch |
| Brazilian Cherry | 2350 | 8 to 10 | 3/8 inch |
Why your subfloor is lying to you
A subfloor that is out of level by even a fraction of an inch will cause a sander to dig deeper into certain planks while barely touching others. This creates an uneven wear layer across the room that the naked eye cannot see until the finish is applied. I have seen subfloors that look flat but have a slow roll over ten feet. When you run a drum sander over that roll, you are effectively thinning the wood at the peak of the curve. This is why the chalk test is mandatory on old houses. The house has settled. The joists have bowed. If you do not account for the subfloor movement, your hardwood will eventually fail at the joints. While most people want the thickest underlayment to fix this, too much cushion actually causes the locking mechanisms on modern floors to snap under pressure. You need a flat, rigid base. No amount of sanding can fix a subfloor that is bouncing every time you walk on it.
- Check the moisture content of the wood and the subfloor before starting.
- Identify all protruding nail heads that could tear the sanding belt.
- Map the room for high spots using a six foot level and carpenter chalk.
- Verify the species of the wood to determine the correct grit sequence.
- Inspect the transitions near wet areas like kitchens and laundry rooms.
“Sand wood only as much as necessary and as little as possible to preserve the architectural legacy of the timber.” – NWFA Technical Guidelines
The chemistry of cellular collapse
Over-sanding leads to cellular collapse in the wood where the remaining fibers are too thin to support the weight of furniture or foot traffic. This results in a floor that feels soft or spongy when you walk on it. The wood is no longer acting as a structural member. It is essentially a veneer floating on the subfloor. This is particularly dangerous in high traffic areas. If you sand too deep, the wood cannot hold the stain evenly. You will get blotchy patches because the density of the wood has changed. You are hitting the softer heartwood or the area of the plank that was never meant to see the light of day. I always tell my clients that a little character in an old floor is better than a perfectly smooth floor that needs to be replaced in two years. We are architects of the ground. We build things to stay.
When to walk away from the machine
There comes a point in every inspection where the chalk test tells you the truth you do not want to hear which is that the floor is done. If you see the chalk sitting in deep grooves across more than thirty percent of the room, you are fighting a losing battle. You can try to fill the gaps, but the filler will eventually pop out as the wood moves. You can try to spot sand, but the finish will never match. At that point, you have to look at alternatives. Maybe a screen and coat is enough to bring back the shine without removing wood. Maybe it is time to admit the floor has served its purpose. I have seen people try to save a floor that was basically paper thin. It is a safety hazard. It is a waste of money. A real professional knows when to put the sander back in the truck and start talking about a new installation. We respect the material too much to watch it disintegrate under our watch. Use the chalk. Trust the chalk. It does not have an agenda. It only shows you what is there.