I spent three days grinding concrete on a job last month just so the floor wouldn’t click like a castanet. Most guys skip the leveling compound. They think the underlayment will hide the dip. It won’t. I have seen the same laziness in shower installations for two decades. You see a puddle on the bathroom floor and you reach for the grout bag. You think that a fresh layer of cementitious paste will stop the water. You are wrong. Grout is not a waterproofing agent. It is a filler. It is a porous medium designed to take up the space between your tiles. When you see water migrating past your shower door, you are likely looking at a failure of physics and structural engineering, not a cosmetic issue with your joints.
The myth of the waterproof grout joint
Grout is fundamentally porous and allows water to pass through its molecular structure via capillary action. When you apply grout to a shower, you are creating a decorative and structural bridge between tiles, but you are not creating a dam. Water eventually saturates the grout. If the waterproofing membrane behind the tile is compromised or non-existent, that water will travel. It finds the path of least resistance. Often, that path leads right under your shower door or through the curb and onto your expensive hardwood floors. People treat grout like it is a solid sheet of plastic. In reality, it is more like a very dense sponge. If you do not have a topical waterproofing system like a liquid-applied membrane or a bonded sheet membrane, the substrate is getting wet every single time you turn on the shower. This is why your shower door continues to leak. The water is not just coming through the door seal. It is often wicking through the mud bed or the backer board and surfacing outside the enclosure.
Structural deflection and the skeleton of the shower
Deflection is the measurement of how much your floor system bends under a load and it is the primary killer of tile installations. If your subfloor is bouncing, your grout will crack. Even hairline fractures that you can barely see with the naked eye are enough to let gallons of water pass through over time. I have walked onto jobs where the joists were spaced 24 inches on center with only a single layer of 5/8 inch plywood. That is a recipe for disaster. The Tile Council of North America specifies very strict deflection limits for a reason.
“A floor is only as good as the subfloor beneath it; deflection is the enemy of every joint.” – Master Flooring Axiom
When the floor moves, the bond between the shower door frame and the tile breaks. You can pump all the silicone you want into that gap, but if the curb is shifting every time you step on it, the seal will fail within weeks. You need a rock-solid foundation. This often means sistering joists or adding a second layer of plywood to ensure the assembly is stiff enough to support the weight of the tile and the glass without flexing.
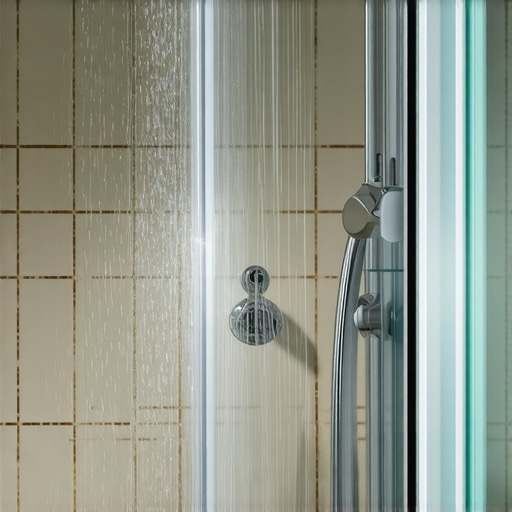
The physics of the shower curb pitch
Every shower curb must be pitched toward the drain at a minimum slope of 1/8 to 1/4 inch per foot to ensure gravity pulls water inward. This is where most amateur installers fail. They build a curb that is perfectly level. While level sounds good in theory, it is a nightmare for water management. Surface tension allows water to sit on top of a level curb. Eventually, it pools and spills over the outside edge. If the curb is pitched slightly outward, you are essentially building a slide for water to exit your shower. I have torn out million-dollar bathrooms because the installer didn’t check the pitch of the curb with a torpedo level. Once the water gets under the track of the shower door, it sits there. It rots the wooden framing of the curb. It causes the grout to soften and crumble. You must ensure the slope is aggressive enough to overcome the surface tension of the water. If your curb is flat, no amount of re-grouting will stop the leak because the water has no physical incentive to stay inside the shower.
The chemistry of capillary action and moisture migration
Water moves through cement-based materials through a process called capillary action where liquid is drawn into tiny pores. This is the same reason a paper towel drinks up a spill. Your grout and your thin-set are both cementitious. They are thirsty. If your shower was built with a traditional move-bed and a buried PVC liner, the entire pre-slope is saturated with water. This is known as a wet-bed system. If the weep holes in your drain are clogged with thin-set, that water has nowhere to go. It sits in the pan and gets deep. Eventually, the water level in the pan rises above the height of the curb’s waterproofing. It then wicks up the framing and out onto your bathroom floor. This is why you see moisture damage on the baseboards five feet away from the shower. It is not a leak in the door. It is the entire floor assembly acting like a wick. To fix this, you have to understand the perm rating of your materials. A lower perm rating means less vapor and moisture can pass through. Modern installers use topical waterproofing to keep the entire mortar bed dry, which eliminates this wicking effect entirely.
Hardwood floors in the splash zone
Water migration from a failing shower will cause nearby hardwood floors to cup and crown as the wood fibers swell from the bottom up. I have seen beautiful 3/4 inch solid white oak floors ruined because a shower pan was leaking behind the walls. When the subfloor gets wet, the hardwood absorbs that moisture. Because the top of the wood is finished with polyurethane, the moisture cannot escape. This causes the bottom of the board to expand more than the top. The result is cupping. You see the edges of the planks rising. If you see this happening near your bathroom, do not sand the floor. You have to fix the leak first. The moisture content of your subfloor should never be more than 4 percent different from your hardwood. If your shower is leaking, that subfloor might be at 20 percent moisture. That is a death sentence for wood.
“Wood is a hygroscopic material that constantly seeks equilibrium with its environment; moisture is its only true predator.” – Master Flooring Axiom
You must use a pin-type moisture meter to check the levels around your shower. If the readings are high, the grout is not your problem. Your shower pan is the culprit.
Laminate failures and the risk of topical moisture
Laminate flooring is essentially high-density fiberboard and it reacts to shower leaks by blistering at the seams. While many modern laminates claim to be waterproof, that usually only refers to the top surface. The locking mechanisms are the weak point. If water from a leaking shower door runs under the transitions, the core of the laminate will soak it up like a sponge. It will swell and the decorative layer will begin to peel away. This is irreversible. Unlike hardwood, you cannot sand laminate. If your shower door is leaking even after re-grouting, you are risking a total floor replacement. The 1/8 inch gap at the transition between your tile and your laminate is often where the most damage occurs. Installers often forget to caulk this expansion gap with a color-matched 100 percent silicone. Without that seal, any water that escapes the shower door goes straight into the end-grain of your laminate or the underside of your LVP.
The ghost in the expansion gap
A lack of proper expansion joints in the tile assembly causes stress fractures that allow water to bypass the grout entirely. Tile expands and contracts with temperature changes. If the tile is installed tight against the shower door frame or the walls without a movement joint, it will tent or crack. These cracks are the primary highway for water. You might think you are fixing it by shoving more grout into the crack, but grout is rigid. It will just crack again. You must use a flexible sealant, specifically a high-grade silicone that meets ASTM C-920 standards. This allows the shower assembly to move without breaking the water seal. I see people use cheap latex caulk because it is easier to clean up with water. Latex caulk shrinks and pulls away from the tile. Within six months, you have a gap large enough to fit a credit card into. That is where your leak is coming from.
Materials comparison for shower waterproofing
| Material Type | Waterproof Rating | Durability | Installation Difficulty |
|---|---|---|---|
| Cementitious Grout | Low (Porous) | Moderate | Easy |
| Epoxy Grout | High (Impermeable) | High | Difficult |
| Liquid Membrane | Very High | High | Moderate |
| Sheet Membrane | Maximum | Maximum | High |
| Silicone Sealant | High (Flexible) | Moderate | Easy |
The 1/8 inch that ruins everything
Precision in the final seal of the shower door track is the difference between a dry floor and a mold problem. Most people apply a bead of silicone to the inside and the outside of the shower door track. This is a mistake. You should never silicone the inside of a bottom track. If water gets into the track, it needs a way to drain back into the shower. If you seal both sides, you trap the water. It then sits there and eventually finds a tiny hole in your grout or a screw penetration and enters the subfloor. You only seal the outside edge. This creates a dam that prevents water from escaping while allowing the track to breathe and drain. It is a counter-intuitive trick that many pro installers use to prevent the “stagnant track” syndrome. This microscopic attention to detail is what separates a master from a handyman.
Diagnostic checklist for leaking showers
- Check the curb pitch with a level to ensure it slopes inward.
- Inspect the weep holes at the base of the drain for blockages.
- Perform a flood test by plugging the drain and filling the pan.
- Use a moisture meter on the drywall and flooring outside the shower.
- Check the integrity of the silicone seal on the outside of the door track.
- Verify that the grout is not soft or crumbling, which indicates constant saturation.
- Inspect the door sweeps and gaskets for signs of dry rot or misalignment.
The chemistry of the bond and why it fails
Adhesion failure occurs when the substrate is contaminated or when the wrong thin-set is used for the tile type. If you have porcelain tile, you must use a polymer-modified thin-set. Standard dry-set mortar will not bond to the non-porous surface of porcelain. If the bond fails, the tile becomes loose. A loose tile acts like a pump. Every time you step on it, it forces water through the grout joints and under the door. This is why re-grouting is a temporary fix. You are putting a new top on a moving part. The mechanical stress will break the new grout within days. You have to ensure the tile is fully thin-setted with at least 95 percent coverage in wet areas. Anything less leaves voids where water can collect and eventually migrate outward. Stop looking at the surface and start looking at the chemistry of the bond beneath. If the tile moves, the shower leaks. It is as simple as that. While most people want the thickest underlayment or the most expensive tile, too much cushion or poor bonding actually causes the locking mechanisms of the entire system to snap under pressure. You need rigidity in the subfloor and flexibility in the joints. That is the secret to a dry bathroom. Your shower door is just a piece of glass; the real work is happening in the inches of mud and membrane you can’t even see.