Use This Cardboard Template for Perfect Hardwood Cuts Around Door Jambs
I once walked into a house where a $15,000 wide-plank walnut floor was cupping so bad it looked like a potato chip because the installer didn’t check the crawlspace humidity. The homeowner was in tears, seeing their investment warp into a series of miniature mountains. The contractor was busy blaming the manufacturer, claiming the wood was defective from the mill. I walked straight to the door jambs. I saw the problem immediately. The boards were jammed tight against the door casings with zero room for expansion. The installer had forgotten that wood is a living, breathing organic material. It is not static like the grout in a shower or the plastic in a cheap laminate. It is a bundle of cellulose and lignin that reacts to every grain of moisture in the air. That job taught me that the smallest details, like a perfect cut around a door jamb, are where the battle for a floor is won or lost. If you do not respect the physics of wood, the wood will eventually break your heart. This guide is about the professional way to handle those complex cuts using nothing but a scrap of cardboard and a sharp eye.
The ghost in the expansion gap
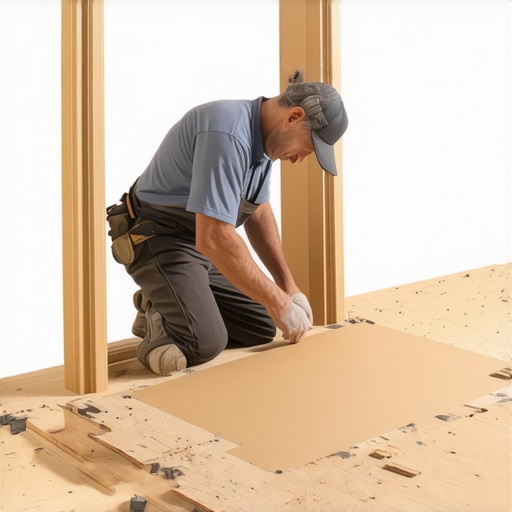
Hardwood floors require a consistent expansion gap around the entire perimeter to prevent buckling and structural failure during seasonal humidity shifts. This gap is usually 1/2 inch or 3/4 inch, depending on the species and the width of the planks. When you reach a door jamb, you cannot simply butt the wood against the wood. You must create a space where the floor can hide its movement. Most amateurs try to cut the wood to fit the shape of the casing. Professionals do the opposite. We undercut the casing so the wood can slide underneath it. This provides the necessary expansion room while giving the appearance of a seamless fit. Without this gap, the floor becomes a ticking time bomb. When the humidity rises in the summer, those wood cells swell. If they hit a solid object like a door frame, the pressure has nowhere to go but up. This creates the dreaded peak in the middle of the room. It is a simple matter of physics. Wood will expand. You either give it space or you pay for it later. [IMAGE_PLACEHOLDER]
“A floor is only as good as the subfloor beneath it; deflection is the enemy of every joint.” – Master Flooring Axiom
Why your subfloor is lying to you
Subfloor flatness is measured by a 1/8 inch deviation over 10 feet according to standard industry engineering protocols. Many installers think a few dips and humps will be hidden by the hardwood. They are wrong. Wood is stiff, but it is not a bridge. If there is a void under a plank near a door jamb, that plank will deflect every time someone steps on it. Over time, this mechanical stress will snap the tongue or the groove of the board. I have spent days grinding down high spots in concrete and filling low spots with self-leveling compound just to ensure a flat plane. You must check the moisture content of your subfloor with a pin-meter. If your plywood is sitting at 12 percent and your hardwood is at 6 percent, you are asking for a disaster. The moisture will migrate from the subfloor into the hardwood, causing the bottom of the board to expand faster than the top. This is the recipe for cupped floors. I never start a cut until the moisture levels are within 2 percent of each other for solid oak. This is not a suggestion. It is the law of the trade.
The cardboard template method for precision
The cardboard template method involves using a scrap piece of corrugated cardboard to scribe the exact contour of a door casing before transferring it to the wood. This is the secret of the master mechanic. You take a piece of the cardboard from the flooring box. It is the perfect thickness for a template. You slide it against the door jamb and use a compass or a simple block of wood with a pencil to trace the profile. This creates a 1 to 1 map of the obstacles. Why use cardboard? Because it is cheap and rigid enough to hold a line. Once you have the shape, you cut the cardboard with a fresh utility knife. Test the fit against the jamb. If it is tight, you trim it. Once the cardboard fits like a glove, you lay it over your hardwood plank and trace the line. This eliminates the guesswork of trying to measure three different angles with a tape measure. A tape measure is for rough work. Scribing is for masters. When you use this method, your cuts around the casing will be so tight that they look grown there, yet they will have the hidden 1/2 inch of space tucked safely under the undercut for the wood to move.
Moisture and the cellular memory of oak
Wood cells are essentially bundles of microscopic straws that absorb and release water based on the relative humidity of the environment. When you bring hardwood into a house, it needs to acclimate. I am not talking about a quick 24 hours. I mean sitting in the room where it will be installed until it reaches equilibrium. This process allows the internal stresses of the wood to relax. If you install wood that is too dry in a humid environment, it will grow like a weed. If you install wet wood in a dry house, it will shrink, leaving gaps big enough to lose a nickel in. We see this often in regions with extreme weather. In the swampy humidity of the Gulf Coast, solid wood is often a risk. You might need engineered cores that use cross-ply technology to fight that expansion. In the dry heat of the desert, you have to worry about the wood splintering as it loses its internal moisture. The cardboard template doesn’t just help with the cut. It helps you visualize how that specific plank will behave in that specific doorway over the next ten years.
| Brazilian Cherry | 2350 | Moderate |
| White Oak | 1360 | Low |
| Black Walnut | 1010 | High |
| American Cherry | 950 | High |
Adhesive bonds and the molecular grip
Modern flooring adhesives utilize silane-modified polymers to create a bond that is both incredibly strong and permanently flexible. When you are working around door jambs, you might be using a glue-assist method even on a nail-down floor. This provides extra stability in high-traffic transition areas. The chemistry of these glues is fascinating. They react with the moisture in the air to cure. However, you must respect the open time of the adhesive. If you wait too long after spreading the glue to set your board, the surface of the glue will skin over. This prevents the adhesive from wetting out the back of the wood, leading to a weak bond. I have seen entire floors fail because the installer spread too much glue and then took a long lunch. When they came back, the glue looked fine, but it was dead. Always check for transfer. Lift a board after you set it. If the back isn’t 100 percent covered in glue, you are doing it wrong. This is especially vital near door jambs where you cannot always get a flooring nailer into the tight space. The glue has to do the heavy lifting.
“Wood is hygroscopic, meaning it constantly exchanges moisture with the surrounding air to reach equilibrium.” – Master Flooring Axiom
The 1/8 inch that ruins everything
Precision in flooring is not about the feet or the inches but about the fractions of an inch that determine the longevity of the install. When I undercut a door jamb, I use a scrap piece of the actual flooring and a piece of underlayment as my height guide. I rest the saw blade on top of those scraps. This ensures the cut is perfectly level and at the exact height needed. If the cut is 1/8 inch too high, you will see a gap above the floor. If it is 1/8 inch too low, the wood won’t fit, and you will end up hacking at the jamb with a chisel, leaving a ragged mess. I see this all the time with builders who are in a hurry. They think the baseboard will hide the crimes. But at a door jamb, there is no baseboard. The cut is exposed. It has to be perfect. This is why the cardboard template and the precision undercut are the hallmarks of a pro. We do not hide our work. We make sure the work doesn’t need hiding.
Essential installation checklist
- Verify subfloor moisture is within 2 percent of hardwood moisture.
- Check subfloor flatness using a 10-foot straight edge.
- Undercut all door jambs using a scrap of the flooring as a height guide.
- Create a cardboard template for every unique door casing profile.
- Maintain a 1/2 inch expansion gap at all vertical obstructions.
- Vacuum the subfloor three times to remove all grit and sawdust.
- Acclimate the wood in the installation environment for at least 72 hours.
Tools of the trade for the master installer
The quality of your work is directly related to the maintenance and selection of your specialized flooring tools. You cannot expect a clean cut with a dull blade. I sharpen my chisels every single morning. I check my moisture meter calibration weekly. For the door jambs, an oscillating multi-tool is standard, but a dedicated flush-cut saw is better for long-term accuracy. The blades for these saws are expensive, but a single ruined door jamb costs more. When you are using the cardboard template, use a mechanical pencil. A standard carpenter pencil has a thick lead that can lead to a 1/16 inch error. In this game, 1/16 inch is a mile. You want a line so thin it looks like a hair. That is how you get the fit that makes other contractors stop and stare. It is about the pride of the craft. It is about knowing that when you walk away, that floor is going to stay flat and beautiful for the next fifty years. It won’t click. It won’t pop. It won’t buckle. It will just be a floor. And that is the highest compliment you can give to a mechanic like me.