
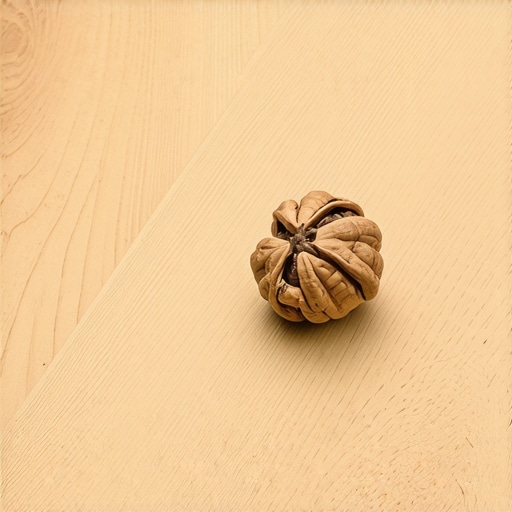
I once walked into a house where a $15,000 wide-plank walnut floor was cupping so bad it looked like a potato chip because the installer didn’t check the crawlspace humidity. It was a tragedy of structural engineering. That floor was gasping for air while the subfloor was a damp sponge. You learn quickly in this trade that wood is a living material even after it is milled and nailed. It reacts to every molecule of water and every grain of dust. When a homeowner calls me because they have a scratch on their hardwood floors, they expect a miracle. They usually reach for a marker or a bottle of wax. But the old timers know something about the chemistry of the forest. The walnut shell trick is a classic for a reason. It is not just about hiding a mark. It is about the physical interaction between the natural oils of the nut and the cellular structure of the timber. You have to understand the physics of the scratch before you can fix it. A scratch is a canyon in the polyurethane finish or the lignin. It changes how light hits the floor. It creates a shadow. To fix it, you need to change the refractive index of that canyon. Using a raw walnut is a way to deposit linoleic acid and juglone into the fiber. It is a temporary structural filler that blends with the tannins of the wood. This is not for laminate or showers where water resistance is the priority. This is for real, breathing hardwood floors that have suffered a minor surface trauma. You are not just rubbing a nut on a board. You are performing a chemical intervention.
The microscopic anatomy of a surface scratch
Hardwood floor scratches are physical deformations where the protective coating or the wood fiber itself has been compressed or displaced by a harder material. When a chair leg or a pebble under a shoe drags across the surface, it creates a light-scattering valley that appears white or grey to the human eye. This is the refractive index failing. The scratch is not usually a loss of material but a displacement of it. In solid oak or walnut, the cells are crushed. This compression makes the wood more porous in that specific spot. A moisture meter would show that a deep scratch allows humidity to enter the core of the plank faster than the sealed surface. This is why you see checking or crowning in high traffic areas. The Janka Hardness Scale determines how much pressure a wood species can take before the cells collapse. Red Oak has a rating of 1,290 while Black Walnut sits at 1,010. This means walnut is actually softer and more prone to the very scratches people try to fix with the nut. When you rub the meat of a walnut into the scratch, the friction generates heat. This heat thins the natural oils in the nut, allowing them to seep into the crushed vascular bundles of the wood. It is a capillary action that fills the void with a substance that mimics the original refractive properties of the finish.
“A floor is only as good as the subfloor beneath it; deflection is the enemy of every joint.” – Master Flooring Axiom
The walnut shell trick for minor repairs
The walnut shell trick involves using the raw nut meat to deposit natural pigments and oils into a surface scratch on hardwood floors. This method is specifically effective for open-grain species where the oil can penetrate the wood pores and bond with the lignin. You cannot just use any nut. The walnut contains high levels of tannic acid which acts as a natural dye. When you rub the nut over the scratch, you are essentially french polishing the floor on a microscopic level. The oil acts as a binder. The small pieces of the nut meat act as a filler. You must follow the direction of the grain. If you rub against the grain, you are just making more micro-scratches. I tell people to think of it like grout in a shower. You are filling a gap, but instead of cementitious material, you are using organic lipids. This works best on satin or matte finishes. If you have a high-gloss polyurethane, the walnut oil will look like a dull spot. You have to know the sheen level before you start. This is not a fix for waterproof laminate because laminate is just a plastic picture of wood. There is no vascular system for the oil to enter. On real wood, however, the oil becomes part of the fiber. It stabilizes the area and prevents oxidation of the exposed wood. While most people want the thickest underlayment, too much cushion actually causes the locking mechanisms on LVP to snap under pressure. The same logic applies here. Do not overfill the scratch. A light hand is what preserves the structural integrity of the surface.
| Wood Species | Janka Rating | Oil Absorption Rate | Walnut Success Rate |
|---|---|---|---|
| Red Oak | 1290 | High | 95% |
| Black Walnut | 1010 | Moderate | 98% |
| Brazilian Cherry | 2350 | Low | 40% |
| White Pine | 420 | Extreme | 60% |
The ghost in the expansion gap
Expansion gaps are the peripheral zones left at the edge of a hardwood floor installation to allow for hygroscopic movement. Without these gaps, the floor will buckle or heave as the relative humidity changes throughout the seasons. Many installers hide these gaps with quarter round or baseboards, but if the gap is too small, the floor has nowhere to go. It becomes a structural time bomb. I have seen floors rip the trim right off the wall because the installer didn’t account for the equilibrium moisture content. When you are fixing a scratch, you are looking at the result of a floor that might be moving too much. If the floor is unstable, a walnut trick is just a band-aid on a broken leg. You need to ensure the subfloor is flat within 1/8 inch over a 10-foot span. If there is a dip, the planks will flex. That deflection causes the boards to rub against each other, creating squeaks and micro-scratches. You can rub all the walnuts in the world on the surface, but if the subfloor is not level, the scratches will return. Wood is an anisotropic material, meaning it moves differently in different directions. It expands more across the width of the grain than the length. This is why wide-plank floors are so much more temperamental than narrow strips. Every 1/8 inch of movement matters. If you are working in a high humidity area like a kitchen or near a shower, you need to be even more vigilant about these tolerances.
Why your subfloor is lying to you
Subfloor moisture levels are the most commonly lied about metric in the flooring industry. An installer will walk onto a concrete slab, feel that it is dry to the touch, and start laying hardwood floors. This is a recipe for delamination and rot. You need a calibrated moisture meter to check the internal humidity of the slab. Even if the surface is dry, the center of the concrete could be at 90% relative humidity. This moisture will eventually migrate upward through capillary action, hitting the bottom of your wood floor. This causes cupping, where the edges of the boards are higher than the center. When a floor is cupped, it is far more likely to get deep scratches because the wear layer is no longer flat. You are catching the edges of the boards with your vacuum or your furniture. Before you worry about buffing out a scratch with a walnut, you better make sure your subfloor is not pushing water into your hardwood. If you are over a crawlspace, you need a 6-mil vapor barrier. I have seen $20,000 jobs ruined because someone saved $50 on plastic sheeting. The National Wood Flooring Association is very clear on this. You cannot ignore the vapor drive. It is a force of nature. If your grout in the nearby bathroom is cracking, it is a sign that your subfloor is moving. That movement translates to the hardwood in the hallway. Everything is connected in the building envelope.
“The moisture content of the wood should be within 4 percent of the subfloor moisture for strip flooring.” – NWFA Technical Manual
The 1/8 inch that ruins everything
Flatness tolerances in flooring installation are usually measured as 1/8 inch over 10 feet. This metric is the difference between a floor that lasts 100 years and one that fails in six months. If the subfloor has a hump or a valley, the hardwood cannot sit flush. This creates voids. When you walk over a void, the tongue and groove joint is stressed. This leads to creaking and eventually fractures in the finish. These fractures look like scratches, but they are actually structural cracks. A walnut shell cannot fix a stress fracture. You need to address the underlying support. I have spent days grinding concrete or shimming joists just to get that 1/8 inch tolerance. People think underlayment will hide the bumps. It won’t. Underlayment is for sound dampening and thermal breaks, not for leveling. If you use a thick cushion under laminate or LVP, you are actually making the problem worse. The vertical deflection will snap the locking system. On solid hardwood, it causes the cleats to pull out of the subfloor. This movement is what causes most of the surface damage that homeowners try to buff out. You have to stop the movement to stop the scratches. It is all about the physics of the assembly. If the base is stable, the wear layer remains uncompromised. If the base is soft, the finish will shatter like glass.
- Check the moisture content of both the subfloor and the hardwood planks.
- Ensure the subfloor is flat within the NWFA specification of 1/8 inch.
- Use a vacuum to remove all debris from the scratch before attempting a walnut repair.
- Rub the walnut meat firmly into the scratch following the direction of the grain.
- Allow the natural oils to sit for at least five minutes to penetrate the fiber.
- Buff the area with a soft microfiber cloth to remove excess residue.
- Check the sheen to ensure the oil blends with the polyurethane or oil finish.
The chemical reality of walnut oil
The walnut shell trick is not magic; it is organic chemistry. The walnut (Juglans regia) is rich in unsaturated fats and polyphenols. When these are forced into the crushed cells of a hardwood floor, they undergo a process called oxidative polymerization. This means the oil reacts with the oxygen in the air to harden slightly. It is similar to how a tung oil or linseed oil finish works. The pigments in the walnut, specifically juglone, provide a semi-transparent stain that matches the amber tones of aged oak or walnut. This is why it doesn’t work well on grey-washed or pickled floors. The chemistry is wrong. For traditional wood tones, however, it is a perfect match. The linoleic acid acts as a solvent for the existing finish, slightly softening the edges of the scratch and allowing the new oil to bond. This is a molecular level repair. It is superior to a wax stick because wax sits on top of the wood and attracts dust. The walnut oil becomes part of the wood structure. In high traffic areas, the repair will eventually wear away, but it can be reapplied without building up a nasty residue. It is the most honest way to treat a natural material like hardwood floors. You are using the forest to fix the forest. Just keep it away from your grout and showers. Organic oils in a wet environment are just food for mold. Stick to epoxy grouts and silicone sealants for the bathroom. In the living room, the walnut is king. It is about material compatibility and structural logic.