
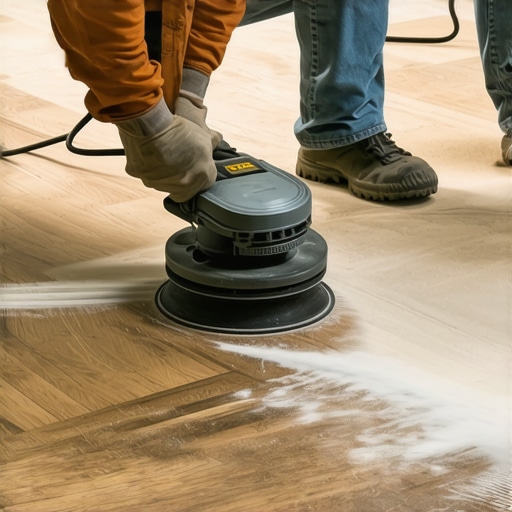
Why You Should Never Sand Your Own Hardwood Floors Without a Buffer
I once walked into a house where a three thousand dollar rental mistake had turned a century old white oak floor into a series of rolling waves. The homeowner spent three days with a rented drum sander and thought he was doing a great job until the first coat of poly went down. Every single stop and start of the machine was visible. Every slight hesitation had created a deep valley in the wood that no amount of finish could fill. Most guys skip the leveling compound and they definitely skip the buffer. They think the underlayment or the finish will hide the dip. It won’t. I spent three days grinding concrete on a job last month just so the floor wouldn’t click like a castanet and the same principle applies to sanding wood. If you do not understand the physics of the buffer, you are just making a mess that a professional will have to charge you double to fix.
The brutal physics of the drum sander gouge
A drum sander is a high speed beast that requires constant linear motion to prevent irreversible damage to the hardwood grain. If you pause for even a fraction of a second, the centrifugal force of the heavy drum rotating at high revolutions per minute will carve a semi-circular trench into your floor boards. This is not like working on showers or grout where a mistake can be scraped away. When you lose wood, it is gone forever. Professional installers use a buffer as the final stage of the sanding process to flatten these microscopic variations. The drum sander is for bulk removal but the buffer is for architectural integrity. It uses a planetary motion that avoids the aggressive linear cutting path of the belt. Without it, you are left with chatter marks and dish out where the softer springwood has been excavated deeper than the hard summerwood.
The microscopic dance of the orbital buffer
The buffer utilizes an orbital or planetary movement to blend the scratch patterns left by the initial sanding passes. When you sand with a drum, the scratches are all in one direction. This creates a visual strobe effect when sunlight hits the floor from a window. The buffer uses a fine mesh screen or a multi-head drive plate to cross-cut those scratches. This process is about refining the surface to a molecular level of smoothness. It closes the pores of the wood evenly so that the stain absorbs at a consistent rate. If you skip this, your floor will look blotchy. One area will be dark because the grain is open and the next will be light because the grain was burnished by a dull belt. This is the difference between a floor that looks like a DIY project and one that looks like a professional installation.
“A floor is only as good as the subfloor beneath it; deflection is the enemy of every joint.” – Master Flooring Axiom
The ghost in the expansion gap
Hardwood floors are living organisms that respond to the ambient humidity of the room by expanding and contracting. If you sand your floors without a buffer to properly blend the edges, you will see the ghost of your mistakes as soon as the seasons change. In high humidity environments like Houston or New Orleans, the wood cells swell. This swelling highlights every uneven ridge left by a drum sander. Unlike laminate, which is a static product, solid wood needs a perfectly flat surface to breathe. If the surface is uneven, the finish will crack at the high points first. I have seen floors where the finish peeled off in sheets because the homeowner didn’t use a buffer to remove the glaze left by the high speed sanding belts. The wood was so hot it scorched the lignins and the finish could not bond.
| Wood Species | Janka Hardness Rating | Recommended Final Grit | Acclimation Time |
|---|---|---|---|
| White Oak | 1360 | 100 – 120 Grit | 10 – 14 Days |
| Black Walnut | 1010 | 120 – 150 Grit | 7 – 10 Days |
| Hard Maple | 1450 | 80 – 100 Grit | 14 – 21 Days |
| Brazilian Cherry | 2350 | 60 – 80 Grit | 21+ Days |
Why your subfloor is lying to you
The subfloor is the foundation of your sanding quality and any deflection there will translate into a poor sanding finish. If your subfloor has a dip, the heavy drum sander will skip over it or dive into it. A buffer is more forgiving because it covers a larger surface area at once. It bridges the small gaps in the subfloor levelness that a 8 inch drum cannot. Many people think they can just throw down some laminate over a bad floor, but with hardwood, you are married to the subfloor. I have spent decades on my knees with a straight edge checking for eighth inch variances. If the subfloor is not flat, your sanding will never be flat. The buffer is the only tool that can hide the minor sins of a subfloor that is less than perfect.
The cost of skipping the buffer
- Extreme chatter marks that look like ripples in the water.
- Swirl marks from the edger that become permanent scars.
- Uneven stain absorption leading to a tiger stripe effect.
- Finish failure because the surface was too smooth or too rough.
- Loss of wood thickness due to over-sanding in an attempt to fix mistakes.
Using a buffer is the only way to ensure that the transition between the field of the room and the edges is invisible. Most DIYers use a small circular edger for the perimeter. This tool leaves deep circular swirls. If you do not go over those swirls with a buffer and a heavy pad, they will scream at you once the stain hits the wood. It is like the grout in a tile job. If the lines are crooked, that is all you see. On a floor, if the edges don’t match the middle, the whole job is a failure. You need the weight and the slow speed of a professional buffer to marry those two distinct sanding patterns into one cohesive surface. It is a structural engineering challenge that requires more than just a rental machine from the hardware store.
“Wood flooring is a hydroscopic material; its dimensions are in a constant state of flux based on the moisture content of the air.” – NWFA Technical Manual
The chemistry of friction and heat
The heat generated by a sanding belt can actually melt the natural resins in the wood and create a barrier for the finish. This is called burnishing. When you run a drum sander too fast or with a grit that is too fine, you aren’t cutting the wood anymore. You are polishing it. This creates a surface that is too slick for polyurethane to grab onto. A buffer with a screen disc cuts through this burnished layer. It creates a mechanical tooth on the surface of the wood. This is the same reason why you can’t just paint over a glossy surface without sanding it first. The buffer provides the perfect balance between a smooth look and a functional surface that the finish can actually stick to. I have seen five thousand dollar floors ruined because the homeowner thought he could skip the buffer and go straight to finish. Within six months, the poly was flaking off like a bad sunburn.
The regional climate impact on sanding
In regions with high seasonal swings in temperature, the precision of your sanding determines the longevity of the floor. In the dry heat of Phoenix, wood shrinks until the gaps between the boards are wide enough to lose a credit card. If you haven’t buffered the floor flat, the edges of the boards will cup upward. This creates a trip hazard and causes the finish to wear off on the edges of the boards prematurely. In the swampy humidity of the south, the wood wants to expand. A buffered floor allows for a more even distribution of this stress. The buffer is not just a cosmetic tool. It is a tool for long term structural stability. It ensures that the wear layer is consistent across the entire square footage of the home. This is why pros never skip it and why you should never try to do this job without one.