
The math that breaks the budget and the physics of the zigzag
The smell of WD-40 and fresh oak dust is the only thing that makes sense on a job site at six in the morning. I have spent twenty five years on my knees with a moisture meter and a level, and I can tell you that a floor is not a decoration. It is a high performance structural engine. If you treat it like a rug you bought at a department store, it will fail you. I once walked into a house where a $15,000 wide-plank walnut floor was cupping so bad it looked like a potato chip because the installer did not check the crawlspace humidity before the first nail went in. It was a tragedy of engineering. When it comes to a herringbone pattern, that tragedy usually starts with a homeowner trying to save five percent on their material order. You need fifteen percent extra hardwood for a herringbone layout because the geometric waste at the perimeter is relentless and every single board requires a precision double cut that leaves no room for error.
The geometry of waste in a 45 degree world
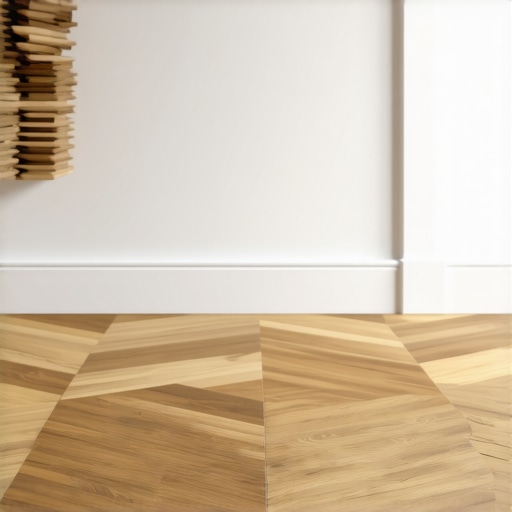
Herringbone patterns require 15 percent extra material because every board meeting a wall must be cut at a 45 degree angle, creating triangular offcuts that are often too small to be reused elsewhere in the field. This differs from a straight lay installation where offcuts from the end of one row can frequently start the next row. In a herringbone assembly, the orientation of the tongue and groove is directional. You cannot simply flip a board over to make it fit. The interlocking mechanism of high quality hardwood is a marvel of milling, but it is also a rigid constraint. When you are running a zigzag pattern, you are fighting the physics of the room. Most rooms are not perfectly square. In a 2,500 square foot installation, even a quarter inch of variance in the wall can lead to an exponential increase in waste as you reach the edges. You are not just buying wood. You are buying a margin of safety against the irregularities of your architecture. If you run out of wood three feet from the finish line, you are looking at a different dye lot or a different lumber batch. That is a recipe for a visual disaster that no amount of sanding can fix.
“A floor is only as good as the subfloor beneath it; deflection is the enemy of every joint.” – Master Flooring Axiom
Why your subfloor is lying to you
Subfloor flatness is the most critical factor in a herringbone installation because the complex joinery of the pattern has zero tolerance for vertical movement or dips in the plywood or concrete. If your subfloor has a dip of more than an eighth of an inch over ten feet, your herringbone will click, squeak, and eventually pull apart. I have spent three days grinding concrete on a job last month just so the floor would not click like a castanet. People think underlayment is a magic carpet that hides sins. It is not. In fact, if you use an underlayment that is too thick or too soft, it will cause the locking mechanisms on your floor to snap under the pressure of foot traffic. You want a high density moisture barrier, not a sponge. In places like Phoenix where the air is dry enough to crack your skin, the wood will shrink. In the swampy humidity of Houston, that same wood will swell. If your subfloor is holding moisture, that moisture will migrate into the wood cells, causing the lignin to expand and the boards to cup. This is why we use calcium chloride tests on concrete. We are looking for the vapor emission rate. If it is too high, you are essentially laying your expensive floor over a slow motion geyser.
The 1/8 inch that ruins everything
Precision cutting for herringbone requires a dedicated miter station and a sharp blade because a variance of even one sixteenth of an inch will accumulate across the room until the pattern is visibly crooked. This is where the fifteen percent buffer becomes your best friend. Every time a blade passes through a piece of white oak, it removes the kerf, which is roughly an eighth of an inch of material. Over hundreds of cuts, you are literally turning square feet of your floor into sawdust. Then there is the human element. Even the best installer will occasionally miscalculate a cut. In a straight lay, you might hide that board in a closet. In a herringbone pattern, every board is part of a structural sequence. If the tongue is on the wrong side, the board is scrap. Unlike laminate, which often uses a universal click system, real hardwood has a specific handedness to its milling. You cannot force a left hand board into a right hand slot without compromising the integrity of the tongue and groove bond.
| Installation Type | Recommended Waste Factor | Complexity Rating | Average Installation Time |
|---|---|---|---|
| Straight Lay | 5 to 7 percent | Low | 1.0x Base Speed |
| Diagonal Lay | 10 percent | Medium | 1.5x Base Speed |
| Herringbone | 15 percent | High | 2.5x Base Speed |
| Chevron | 20 percent | Extreme | 3.0x Base Speed |
The chemistry of bond and breath
Hardwood is a hygroscopic material that behaves like a living lung, expanding and contracting with the ambient humidity of the room. This is why acclimation is not optional. I have seen guys deliver wood on a Tuesday and start nailing on a Wednesday. That is a crime. The wood needs to sit in the environment where it will live until its moisture content is within two percent of the subfloor. If you are using an adhesive, you are dealing with a chemical bond that must remain flexible. Modern silane modified polymers are the gold standard here. They allow the wood to move slightly without breaking the bond to the subfloor. If you use a rigid, old school glue, the wood will eventually shear the top layer of the plywood off or pull itself apart. This is especially true near wet areas. While you should never put hardwood inside showers, the transition zones near bathrooms are high stress areas. The moisture from the grout in the bathroom tile can migrate into the wood if you do not have a proper transition strip and a silicone seal at the edge. The wood absorbs that moisture, the cells swell, and suddenly your beautiful herringbone pattern is pushing against the baseboards with enough force to crack the mitered corners of your trim.
“Wood flooring is a life-long product if the installer respects the moisture equilibrium of the wood cells.” – NWFA Technical Guidelines
The ghost in the expansion gap
The expansion gap is the empty space around the perimeter of the room that allows the entire floor to grow and shrink without buckling against the wall. Many homeowners see this gap and think it is a mistake. They want the wood to go tight against the drywall. That is the fastest way to ruin a floor. For a herringbone pattern, which has movement vectors in multiple directions, that gap is your insurance policy. You cover it with baseboards or shoe molding. You also have to consider the weight of the furniture. If you put a massive, heavy kitchen island on top of a floating floor, you have effectively pinned that floor to the ground. It can no longer breathe. This is a common reason why vinyl or laminate floors buckle in the middle of a room. Hardwood that is glued or nailed down is more stable, but it still needs that perimeter space. Every board is a tiny piston. When the humidity goes up, the piston extends. If there is nowhere for that energy to go, the floor will lift off the subfloor. It is simple physics. The fifteen percent extra material also covers the cost of the starter rows. You have to create a perfectly straight spine down the center of the room to start a herringbone. This often involves cutting many boards into specific lengths before you even begin the main field.
The technical checklist for a successful installation
- Verify subfloor moisture content is within 2 to 4 percent of the flooring material.
- Grind all high spots in concrete and fill all low spots with a high compressive strength leveling compound.
- Ensure the HVAC system has been running at living conditions for at least fourteen days.
- Confirm the installer is using a 40 tooth or higher carbide blade for all miter cuts to prevent splintering.
- Check that the expansion gap is a minimum of one half inch around the entire perimeter.
- Verify that the adhesive is compatible with both the wood species and the subfloor type.
Why your choice of species matters for waste
Dense hardwoods like Hickory or Brazilian Cherry have higher Janka ratings but are more prone to splintering during the complex cuts required for herringbone. White oak is the industry standard for a reason. It is stable, it takes stain beautifully, and it cuts cleanly. If you choose a brittle species, your waste factor might actually need to be closer to twenty percent because you will lose boards to end grain splitting. This is the molecular reality of wood. The cellulose fibers are held together by lignin. When you cut across those fibers at a 45 degree angle, you are exposing the weakest part of the board. A dull blade will tear these fibers rather than slicing them, leading to a ragged edge that will not sit flush against the next board. In a pattern where every joint is a focal point, you cannot hide a ragged edge with filler. Well, you can, but it will look like a mistake. A true master floor is about the precision of the joinery. It is about the way the light hits the grain. It is about knowing that the floor is solid beneath your feet because the installer didn’t take shortcuts with the subfloor or the material order.