
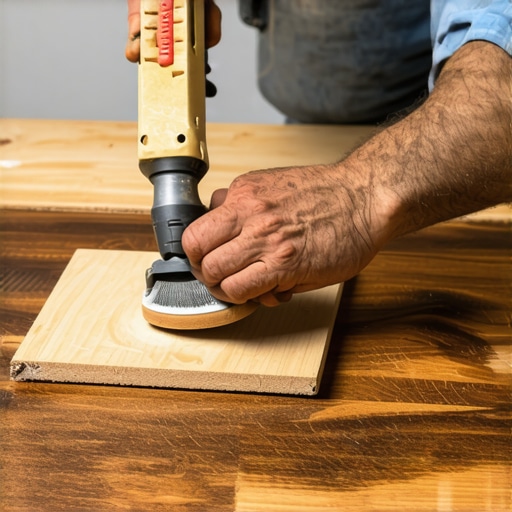
Why You Should Sand Hardwood with the Grain Not Against It
I once walked into a house where a $15,000 wide-plank walnut floor was cupping so bad it looked like a potato chip because the installer didn’t check the crawlspace humidity. That was the initial diagnosis. But as I got closer and wiped away the construction dust, I saw something even worse. The entire surface was covered in deep, rhythmic circular scars. The guy had run a buffer with a coarse grit right across the grain. He thought he was being efficient. Instead, he turned a premium piece of lumber into something that looked like it had been dragged behind a truck. This is the reality of hardwood. It is not a plastic laminate or a porcelain tile. It is a biological organism that demands respect for its cellular structure.
The cellular anatomy of a hardwood plank
Hardwood is composed of longitudinal cells called tracheids and vessels that run the length of the tree. When you sand with the grain, you are essentially shaving these fibers down in a parallel motion. This preserves the integrity of the wood cell walls. If you go against the grain, you are slamming abrasive minerals into the side of these fibers. This action does not cut. It tears. It crushes the lignin that holds the cells together and leaves microscopic valleys that will later haunt you during the staining process. Unlike laminate which uses a printed image of wood, or showers where grout fills the gaps between inert stone, hardwood is a collection of open pores. If you rip those pores open sideways, they will never look right again.
“A floor is only as good as the subfloor beneath it; deflection is the enemy of every joint.” – Master Flooring Axiom
The physics of pigment loading in cross grain scratches
Sanding against the grain creates what we call pigment loading. When you apply a stain to a floor that was sanded improperly, the color does not soak in evenly. Instead, the pigment particles fall into the deep lateral gouges created by the sandpaper. These gouges act like tiny troughs. They collect more stain than the surrounding wood, resulting in dark, unsightly streaks that look like tiger stripes. This is especially prevalent in species like Red Oak or White Oak, where the earlywood and latewood densities vary significantly. You might think you can hide these scratches with a thicker finish, but the light refraction will always give you away. The scratches act as prisms, catching the light and highlighting every mistake you made in the preparation phase.
The grit sequence and the microscopic scratch pattern
Proper sanding is a process of refined destruction. You start with a coarse grit to flatten the floor and then use progressively finer grits to remove the scratches left by the previous pass. If you sand against the grain on your first pass, you create a scratch that is nearly impossible to remove with the next grit. You would have to sand away a massive amount of the wear layer just to reach the bottom of that initial cross-grain valley. This wastes wood and shortens the life of the floor. Most guys are lazy. They want to skip from 36 grit to 80 grit without the middle steps. This is a recipe for disaster. The scratch pattern must be consistent and always oriented with the direction of the wood fibers to ensure the finish bonds correctly to the surface.
| Wood Species | Janka Hardness | Recommended Initial Grit | Acclimation Time |
|---|---|---|---|
| Red Oak | 1290 | 36 Grit | 10-14 Days |
| White Oak | 1360 | 40 Grit | 14 Days |
| Brazilian Cherry | 2350 | 24 Grit | 21 Days |
| Walnut | 1010 | 60 Grit | 7-10 Days |
Why your subfloor is lying to you
Before you even touch a sander to the wood, you have to understand what is happening underneath. A subfloor that has a dip or a crown will cause the drum sander to skip or dig in. If the floor is bouncing, you cannot get a flat sand. I spent three days grinding concrete on a job last month just so the floor wouldn’t click like a castanet. Many installers believe they can use a thick underlayment to bridge these gaps. That is a lie. While some people want the thickest underlayment, too much cushion actually causes the locking mechanisms on LVP to snap under pressure. For hardwood, a spongy subfloor means the boards will move as the sander passes over them. This movement leads to chatter marks, which are small rhythmic undulations in the wood that only become visible after the first coat of polyurethane is applied.
The ghost in the expansion gap
Wood is a hygroscopic material. It breathes. It expands when it is humid and shrinks when it is dry. When you sand against the grain, you are essentially weakening the structural walls of the wood cells at the edges of the boards. This makes the floor more susceptible to splintering during the seasonal expansion cycles. You must leave an expansion gap at the perimeter of the room. I have seen entire floors buckle and lift off the subfloor because some genius pushed the hardwood tight against the drywall. There is no room for the wood to grow. When you sand with the grain, you are working with the natural movement of the material, not against it. This is why we avoid using hardwood in wet areas like showers where grout and waterproof membranes are the only things standing between you and a mold nightmare.
- Always vacuum the floor between every grit change to prevent cross-contamination.
- Check the moisture content of the subfloor and the hardwood using a pin-type meter.
- Ensure the room temperature is stabilized for at least 48 hours before sanding.
- Inspect the sandpaper frequently for pitch buildup or burned spots.
- Always sand in the direction of the longest wall when possible to enhance the visual length.
The chemical bond of modified thin set vs floor finish
While the world of tile relies on the chemical bond of modified thin-set to hold things in place, hardwood relies on mechanical and chemical bonds between the wood fibers and the finish. If the fibers are torn and ragged from cross-grain sanding, the finish cannot lay flat. It will soak in unevenly, creating dull spots and shiny spots. This is known as a telegraphing effect. Every imperfection in the wood will be telegraphed through the clear coat. If you are working in a region with high humidity, like the coastal areas, the wood will move even more. This movement will stress the finish. A floor that was sanded correctly with the grain will have a smoother surface area, allowing the finish to expand and contract more uniformly with the wood planks.
“Wood is a living material even after it is cut; treat it like a stone and it will crack like one.” – National Wood Flooring Association Standard
The 1/8 inch that ruins everything
Precision is the difference between a master and an amateur. If your sander is off by even an eighth of an inch in its leveling, you will create a divot. This is why we use the clock method when sanding. We work our way across the room in a methodical pattern, overlapping each pass by half the width of the drum. We never start or stop the sander while the drum is in contact with the wood. If you do, you create a drum mark. If that drum mark is across the grain, you might as well pack up and go home. You will never get it out without removing a significant portion of the wood. This is the structural engineering side of flooring. It is about tolerances and pressure. It is about understanding that the sandpaper is a cutting tool, not a buffing tool. Treat it with the same respect you would a table saw or a chisel.