Why Your Hardwood Finish is Peeling in High-Traffic Lanes
I once walked into a house where a $15,000 wide-plank walnut floor was cupping so bad it looked like a potato chip because the installer didn’t check the crawlspace humidity. The homeowner was devastated. The finish was flaking off in sheets, looking like a bad sunburn. This was not a product defect. It was a failure of the fundamentals. As a master installer with 25 years in the dirt, I can tell you that when a floor fails, it is almost always because the physics of the environment were ignored in favor of speed. Hardwood floors are not static objects. They are living, breathing organic structures that react to every grain of dust and every molecule of water.
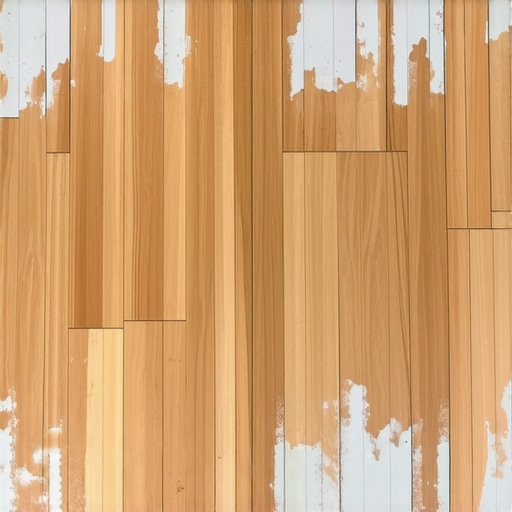
The ghost in the finish layer
Hardwood finish peeling in high-traffic lanes occurs due to mechanical adhesion failure, chemical contamination, or subfloor moisture fluctuations. When the bond between the wood fibers and the polyurethane topcoat breaks, the protective layer delaminates, exposing the raw timber to dirt and graying. This phenomenon is often called peeling or flaking. It happens when the topcoat fails to bite into the surface below it. In my shop, we see this most often when someone tries to do a screen and recoat without properly cleaning the floor. If there is even a trace of wax, oil soap, or silicone-based polish on that surface, the new finish will sit on top like water on a waxed car. It will eventually snap under the pressure of foot traffic. This is a chemical bond failure. The molecules of the new finish cannot reach the molecules of the old finish because of the contaminant barrier. Unlike laminate, which has a factory-bonded wear layer, hardwood relies on the installer to create a perfect chemical or mechanical bridge. If that bridge is weak, the traffic in your hallway will act like a jackhammer, slowly vibrating the finish loose until it starts to flake away.
“A floor is only as good as the subfloor beneath it; deflection is the enemy of every joint.” – Master Flooring Axiom
Why your subfloor is lying to you
Subfloor moisture is the primary driver of finish delamination in residential settings. If the moisture content of the wood planks exceeds the ambient humidity by more than four percent, the wood cells will expand, putting immense stress on the finish film which eventually cracks and peels. Many installers skip the moisture meter. They think because the house feels dry, the floor is safe. They are wrong. A concrete slab can look bone dry while it is actually pumping liters of water vapor into the bottom of your hardwood floors every single day. This vapor pressure pushes against the finish from the inside out. It is like trying to paint a balloon while you are still blowing air into it. Eventually, the pressure wins. We also see this near bathrooms. The steam from showers migrates through the walls and settles into the flooring. If your bathroom tile has cracked grout, water can seep under the transition and travel along the subfloor. This causes the edges of your hardwood planks to cup. When the wood cups, the finish is stretched to its limit. In high-traffic lanes, the constant flexing of these cupped boards breaks the finish at the edges.
The chemistry of a failed bond
Mechanical adhesion failure happens when the surface is too smooth for the finish to grab or when the grit used during sanding was too fine. To ensure a long-lasting bond, the wood surface must have enough microscopic profile to allow the polyurethane to wrap around the wood fibers. If you sand a floor to a 150-grit or 220-grit finish before applying your first coat, you might be making it too slick. The finish needs some tooth. If the installer used a dull screen during the final buffing, they might have burnished the wood. Burnishing closes the pores of the timber. When you pour polyurethane over burnished wood, it cannot soak in. It just sits on the surface. Within six months, the friction of people walking on the floor will shear that finish right off. This is why we use specific sequences of abrasives. We start with heavy grits to flatten the wood and move to finer grits to smooth it, but we never go so fine that we seal the wood before the finish can. The molecular chains in the finish must interlock with the cellulose fibers. If they cannot, you are just waiting for a failure.
| Wood Species | Janka Hardness Rating | Typical Acclimation Time | Expansion Risk |
|---|---|---|---|
| Red Oak | 1290 | 7 to 14 Days | Moderate |
| Brazilian Cherry | 2350 | 14 to 21 Days | High |
| White Pine | 380 | 5 to 7 Days | Very High |
| Hard Maple | 1450 | 10 to 14 Days | Moderate |
The humidity trap from nearby showers
High humidity from bathrooms and laundry rooms creates a microclimate that can destroy hardwood finishes in adjacent hallways. When warm, moist air hits the cooler surface of the floor, it can cause localized swelling that weakens the chemical bond of the topcoat. This is a common issue in modern open-concept homes. A master bathroom is right off the bedroom, and the bedroom has beautiful white oak floors. The moisture from the shower is not vented properly. It travels into the bedroom and settles. The wood absorbs this moisture, but only on the top or at the seams. This creates a differential in moisture content within a single board. The top of the board wants to expand, but the bottom is still dry. This internal war within the wood fibers creates a massive shear force on the finish. Eventually, the finish gives up. It cracks. Once there is a crack, skin oils and dirt get under the finish. This is why you see those dark, ugly patches in the middle of your hallway. It is not just wear. It is dirt trapped under a dying finish. You can see a similar issue with laminate floors, but laminate will usually peak at the edges rather than peel in the center.
“Wood is a hygroscopic material that will always seek equilibrium with its environment.” – NWFA Technical Manual
The wrong chemicals in the wrong places
Using improper cleaning agents like vinegar or oil soaps will chemically dissolve the bond between finish layers. These substances leave a residue that prevents the polyurethane from maintaining its structural integrity, leading to premature peeling in areas of high friction. I see this every week. A homeowner wants to be eco-friendly, so they use vinegar and water. Vinegar is an acid. It slowly eats away at the finish. Over time, it makes the finish brittle. A brittle finish cannot handle the impact of a footstep. It needs to be flexible enough to move with the wood. If the finish becomes too hard and glass-like, it will shatter on a microscopic level every time you walk on it. Then there are the oil soaps. They leave a film. Even if you think you rinsed it all off, you didn’t. When the finish starts to look dull, the homeowner adds more polish. Now you have a sandwich of dirt, wax, and old finish. This is a recipe for disaster. The only way to fix this is a full sand and finish. You cannot just put more finish on top of a contaminated floor. It will fail. Every single time.
- Check the moisture content of the subfloor and the flooring planks before installation.
- Ensure the HVAC system is running to maintain a consistent indoor climate during acclimation.
- Avoid using steam mops on any wood surface as they force moisture into the joints.
- Use only manufacturer-approved cleaners that do not leave a waxy residue.
- Inspect the transition strips near bathrooms for signs of moisture migration from showers.
The final inspection of the finish failure
Repairing a peeling finish requires identifying the depth of the damage and whether the failure is between coats or between the wood and the base coat. For superficial peeling, a professional screen and recoat might work, but deep adhesion failure requires a full sand. If you can take a piece of scotch tape and pull up more finish, your floor is a candidate for a full sand. There is no shortcut. I know people want a quick fix. They want a magic spray. It does not exist. If the bond is gone, it is gone. You have to remove everything back down to the raw wood. This means taking off the old finish, the stain, and a tiny layer of the wood itself. Then you start over with a clean slate. You ensure the wood is at the right moisture level. You use a high-quality sealer that is compatible with your topcoat. You follow the dry times to the minute. Flooring is a science. If you treat it like a craft project, you will be doing it twice. A floor should last a lifetime if the physics are respected from the day the subfloor is laid. Moving forward, always prioritize the environment of the room over the color of the stain. A beautiful color on a failing floor is just a waste of money.