
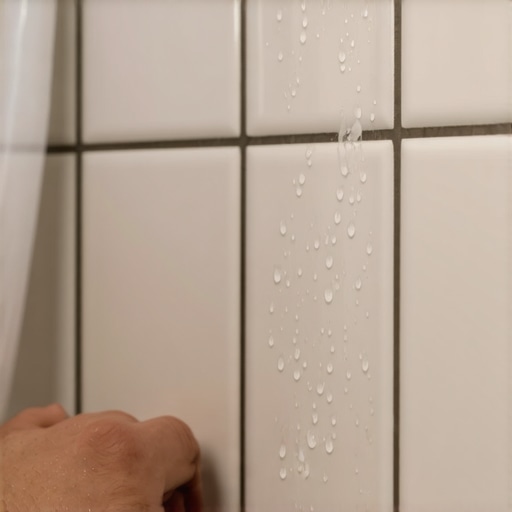
Why Your New Shower Tile is Starting to Pop Off the Wall
I spent three days grinding concrete on a job last month just so the floor wouldn’t click like a castanet. That job was a wake up call for the homeowner who thought a thin layer of underlayment could mask a half inch dip in the slab. It is the same story with vertical surfaces. When I walk into a bathroom and see a bullnose tile sitting on the floor or a vertical stack of subway tiles leaning away from the wall, I do not see a cosmetic failure. I see a structural betrayal. Most guys skip the leveling compound and ignore the moisture levels in the substrate. They think the adhesive will do the heavy lifting for them. It will not. A shower is a high stress environment where physics and chemistry collide every time you turn on the hot water. If your tile is popping, it is because someone ignored the invisible forces of deflection, hydration, and mechanical bonding. I have spent twenty five years with a level and a moisture meter. I know that a floor or a wall is only as good as the preparation beneath it. If you skip the prep, you are just waiting for a disaster. Tiles do not just fall off for no reason. They fall off because the installer failed to respect the standards set by the Tile Council of North America or the National Wood Flooring Association when dealing with transition zones. We are going to look at the microscopic reality of why your shower is failing.
The brutal reality of bond failure
Shower tile bond failure occurs when the mechanical attachment between the thin-set mortar and the substrate or tile back is compromised. This is usually caused by surface contamination, insufficient mortar coverage, or improper substrate preparation which prevents the cementitious crystals from interlocking with the porcelain pores.
When we talk about bond failure, we are talking about the failure of the thin-set to hold onto either the wall or the tile itself. If the back of the tile is clean when it falls off, the bond failed at the tile interface. This often happens because the installer did not back-butter the tile. Modern porcelain is dense. It has an absorption rate of less than point five percent. If you do not force the mortar into the back of that tile, it is just sitting on top of the ridges. It is like trying to glue two pieces of glass together with dry sand. It might stay for a week, but the first sign of vibration or thermal expansion will knock it loose. The chemistry of the mortar matters too. Using an unmodified thin-set on a non-porous porcelain tile is a recipe for a callback. You need those polymers to create a bridge. I have seen guys try to use grout as a structural adhesive in a pinch. It is madness. Grout is for filling joints, not for holding weight. If the substrate is a dusty piece of old drywall or a water-damaged stud, the mortar will never find a home. It will just hang there until gravity wins. I always tell my apprentices that the mortar is the most important part of the budget. Do not buy the cheap bag at the big box store. Buy the high-latex modified stuff that actually sticks to things.
Why your backer board is probably thirsty
Substrate thirst or high suction happens when a porous backer board or cementitious substrate pulls the hydration water out of the thin-set mortar too quickly. This stops the chemical curing process and leaves the adhesive layer brittle, powdery, and unable to support heavy tile loads.
If you are using cement backer board, you are dealing with a giant sponge. If you do not wipe that board down with a damp sponge before you apply your mortar, the board will suck the water right out of the mix. This is a common mistake that ruins thousands of showers every year. The mortar needs that water to grow crystals. Those crystals are what lock the tile to the wall. If the water disappears into the wall too fast, the crystals never grow. You end up with a layer of dried mud instead of a structural bond. I have seen tiles pop off where the mortar on the wall was so soft I could scrape it off with a fingernail. That is a hydration failure. It is even worse in dry climates like Phoenix where the air is as thirsty as the board. You have to manage the moisture during the entire installation. This is not like installing hardwood floors where you worry about the wood expanding. Here, you worry about the mortar dying before it can live. You also have to consider the waterproofing membrane. If you are using a topical membrane like Kerdi, you have a non-porous surface. You need a specific type of mortar that does not rely on the wall to soak up excess water. It is a delicate balance of moisture management that most DIY installers and low-bid contractors completely ignore.
“A floor is only as good as the subfloor beneath it; deflection is the enemy of every joint.” – Master Flooring Axiom
The math of structural deflection
Structural deflection refers to the vertical movement or flexing of the subfloor or wall studs under a live load. For natural stone or large format tile, the L/720 standard must be met to prevent grout cracking and adhesive shearing from torsional stress.
A wall might look solid, but it moves. Houses breathe. They settle. They expand when the furnace kicks on and shrink when it gets cold. If your wall studs are spaced too far apart or if they are undersized, the wall will flex. Tile is rigid. It does not like to flex. When the wall moves and the tile stays still, something has to give. Usually, it is the bond. This is why we use 1/2 inch backer board instead of the thin stuff. We need that rigidity. I have seen showers where the installer used 1/4 inch board on walls because it was easier to carry. That board is for floors, not walls. It has too much whip. Every time someone leans against that wall, the bond is being stressed. Eventually, the mortar fatigues and snaps. It is the same principle as a laminate floor that bounces because the subfloor is uneven. Over time, the locking mechanisms break. In a shower, the locking mechanism is the chemical bond. If you have a joist that is sagging under the bathroom, the whole floor moves. That movement travels up the wall. You need to ensure the framing is stiff enough to handle the weight of the tile and the water. I always check the L-rating of a room before I even open a bag of thin-set. If it is not stiff enough, I tell the client we need to sister the joists or add blocking. They hate the extra cost, but they hate a falling wall more.
| Mortar Category | ANSI Standard | Best Use Case | Flexibility Level |
|---|---|---|---|
| Unmodified | A118.1 | Absorbent Saltillo or over Kerdi | Low |
| Modified | A118.4 | Porcelain tile and standard CBU | Medium |
| High-Performance | A118.15 | Large format tile on walls | High |
Chemical profiles of modern mortars
Modern mortar chemistry relies on polymer additives and redispersible powders to increase shear bond strength. These chemical enhancers allow thin-set to grip non-vitreous surfaces and accommodate thermal expansion without delamination or brittle fracture during temperature cycles.
We are no longer in the days of just mixing sand and cement. The science inside a bag of high-end mortar is incredible. These polymers act like tiny rubber bands inside the cement. They allow the mortar to flex just a tiny bit without breaking. This is vital in a shower where the temperature can jump from 60 degrees to 105 degrees in seconds. This thermal shock causes the tile to expand. If the mortar is too rigid, it will crack. If it has those polymers, it can take the hit. I see people using the cheapest thin-set they can find for 12 by 24 porcelain tiles. That is a mistake. Large format tiles require a medium bed mortar that can support the weight without shrinking. If the mortar shrinks as it cures, it pulls on the tile. If the bond is not strong enough, the tile will pull away from the wall. You also have to watch your water ratios. If you add too much water to make it easier to spread, you are diluting the polymers. You are weakening the chemical structure. It is like watered down whiskey. It might look the same, but it does not do the job. I measure my water with a graduated cylinder. People laugh until they see my floors still standing twenty years later. Precision is the difference between a master and a handyman.
The grout misconception
Grout joints are designed to accommodate dimensional tolerances and provide a sacrificial seal against debris infiltration. However, grout is porous and is not a waterproofing layer, meaning moisture migration can still occur through the capillary action of the cementitious matrix.
People think grout is what keeps the water out. It is not. Grout is just a filler. Water goes through grout like it is a filter. If you do not have a solid waterproofing membrane behind your tile, that water gets into the substrate. Once the substrate gets wet, it expands. When it expands, it pushes the tile off. This is why you see tile popping near the bottom of the shower. The water pools behind the tile and rots the wall. I have pulled down showers where the studs were so mushy I could poke a screwdriver through them. The tile was the only thing holding the wall up. You must use a high-quality grout, but more importantly, you must use it correctly. You cannot skip the expansion joints at the corners. Every corner where two walls meet or where the wall meets the floor should be caulked, not grouted. This is a TCNA standard that is ignored on ninety percent of jobs. Walls move in different directions. If you put hard grout in a corner, it will crack. Once it cracks, water gets in. Then the rot starts. Then the tiles pop. It is a predictable chain of events that starts with a lack of siliconized caulk. I use a high-grade 100 percent silicone that matches the grout color. It stays flexible. It stops the water. It saves the shower.
- Check subfloor deflection for L/360 or L/720 compliance
- Verify substrate moisture content is below 4 percent
- Ensure 95 percent mortar coverage in wet areas
- Use 100 percent silicone in all change of plane joints
- Back-butter every tile larger than 8 inches
- Acclimate tile and mortar to room temperature for 48 hours
Expansion gaps and perimeter relief
Perimeter expansion gaps are essential relief zones that allow the tile assembly to expand and contract without tenting or shearing. Without a soft joint at the perimeter, the internal compressive stress will eventually exceed the bond strength of the adhesive.
Think of your tile as a giant sheet of glass. If you wedge that glass tight against four walls and then heat it up, it will shatter or bow. Tile does the same thing. It is called tenting. The tiles push against each other until they lift off the floor in a V shape. It looks like a little tent. I have walked into houses where the homeowners heard a loud bang like a gunshot in the middle of the night. That was the sound of the bond failing and the tiles jumping off the floor. You need a gap. Usually, a 1/4 inch gap around the perimeter is enough. This gap is hidden by the baseboard or the wall tile. In a shower, that gap is at the corners. If you pack those corners with grout, you have created a locked system. There is no room for movement. The 1/8 inch that ruins everything is the gap you didn’t leave. It is the same with hardwood floors. If you don’t leave room for the wood to breathe, it will buckle. In a shower, the stakes are higher because water is involved. Once that bond is broken, the waterproofing is compromised. You are no longer looking at a simple repair. You are looking at a tear out. I tell my clients that a shower is a machine. Every part has to work together. The framing, the board, the membrane, the mortar, and the tile. If one part fails, the machine breaks. Do not let a lack of a gap be the reason your beautiful marble tile ends up in a pile on the floor.