
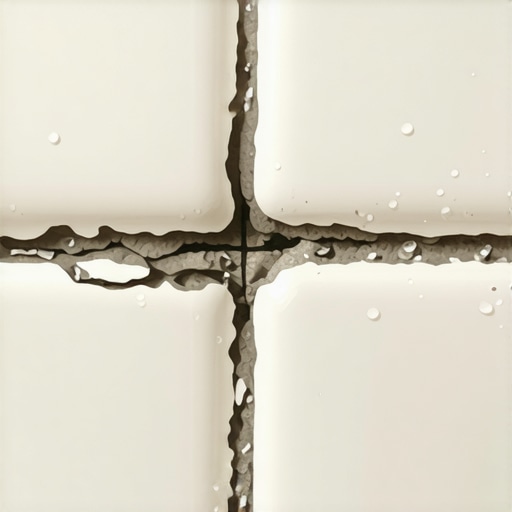
I spent three days grinding concrete on a job last month just so the floor wouldn’t click like a castanet. Most guys skip the leveling compound. They think the underlayment will hide the dip. It won’t. I have seen it a thousand times in bathrooms from Seattle to Miami. You notice a hairline fracture in your shower grout. You scrape it out, you re-grout it, and six months later, it is back. It is frustrating, messy, and a sign that you are fighting the laws of physics with a butter knife. I have been installing floors for over 25 years. I have sawdust under my nails and a permanent ache in my knees from kneeling on subfloors that were never flat to begin with. When a homeowner tells me their grout is cracking, I do not look at the grout. I look at the structure. A floor is not a decoration. It is a performance surface. If the foundation is moving, the surface will fail every single time. Hardwood floors and laminate might give you a little warning with a squeak or a gap, but tile is a snitch. It tells you exactly where your house is moving by cracking the most rigid point in the system. That point is your grout.
The physics of structural movement in wet environments
A recurring grout crack in a shower usually indicates excessive deflection in the subfloor or differential movement between two planes. When the floor joists flex beyond the L/360 or L/720 standards or when a wall meets a floor without a flexible sealant, the rigid grout must break. Most residential framing is built to a minimum standard that allows for some bounce. While that bounce is fine for carpet or even some hardwood floors, it is a death sentence for tile. When you step into a shower, you are adding 150 to 250 pounds of concentrated load on a small area. If the joists underneath that shower pan are spaced 16 inches apart and are under-spanned for the weight of a thick mortar bed, they will bow. This microscopic bowing is enough to snap the bond of a Portland cement-based grout. It is not about the quality of the grout you bought at the big box store. It is about the deflection of the timber. Timber is a living material. It breathes. It moves with humidity. In a bathroom, where the relative humidity can swing from 30 percent to 90 percent in twenty minutes, your framing is constantly expanding and contracting. If your subfloor was not reinforced with a second layer of exterior grade plywood or a proper cement board, that movement has nowhere to go but up through the tile assembly.
“A floor is only as good as the subfloor beneath it; deflection is the enemy of every joint.” – Master Flooring Axiom
Why your subfloor is lying to you
Subfloors often appear flat to the naked eye but possess micro-deviations that prevent a proper bond for tile and grout. If the subfloor has a dip of even 1/8 inch over a ten-foot span, the tile will bridge that gap, creating a hollow point. When pressure is applied, the tile flexes into the void. This creates tensile stress on the grout lines. I have spent decades telling people that if you skip the floor patch and the self-leveling underlayment, you are gambling with your investment. You can buy the most expensive Italian marble in the world, but if it is sitting on a wavy subfloor, it will look like a jigsaw puzzle in five years. You have to understand the chemistry here. Cement grout is incredible under compression. It can handle weight being pushed down on it. However, it has almost zero tensile strength. It cannot be pulled or twisted. When your subfloor dips, it pulls the tile away from the adjacent piece. The grout is caught in the middle. It is the weakest link in the chain. [IMAGE_PLACEHOLDER] Most people assume the thin-set mortar will fill the gaps. Thin-set is not a filler. It is an adhesive designed to be used in a thin layer. Using it to level a floor is a rookie mistake that leads to shrinkage and debonding.
The ghost in the expansion gap
Every material expands and contracts based on thermal and hygroscopic changes in the environment. In showers, where water temperatures vary, the tile and the wall studs expand at different rates. If you do not have a movement joint at the corners, the expansion pressure will crush the grout. This is why the TCNA (Tile Council of North America) Handbook explicitly states that all changes of plane must be filled with a flexible sealant, not grout. When you see a crack in the vertical corner of a shower, it is because the two walls are pushing against each other. If that corner is filled with rigid grout, it will crumble. I see this mistake on 90 percent of the DIY jobs I am called to fix. People think caulk looks cheap, so they shove grout into the corners. Grout is a rock. Rocks do not bend. If the house settles or the wood studs behind the tile swell from the steam, that grout has to go somewhere. It either pops out or it forces the tile to tent. This is a fundamental rule of flooring architecture. You must provide a path for the energy to escape. Without an expansion gap, your shower is a ticking time bomb.
The chemistry of Portland cement and epoxy
Standard grout is a mixture of Portland cement, graded aggregates, and chemical additives that control the setting time. Its crystalline structure is rigid and porous. When you mix grout with too much water, you create a surplus of capillary pores as that water evaporates. These pores make the grout weak and prone to cracking. Epoxy grout, on the other hand, is a two-part resin system that is nearly impervious to water and has significantly higher flexural strength. However, even epoxy cannot save a floor with a bad subfloor. If the deflection is too high, epoxy will simply pull the edge of the tile off or cause the tile itself to crack. I have seen guys think they can fix a structural problem by using a more expensive grout. It is like putting a racing tire on a car with a broken axle. The tire might be better, but the car still is not going to drive straight. You need to address the water-to-cement ratio during the mixing phase. If the grout is too soupy, it will shrink as it cures. That shrinkage pulls the grout away from the edge of the tile, creating a microscopic gap that water will find. Once water gets behind the grout, it starts to degrade the thin-set and the subfloor, leading to a total failure.
| Feature | Cement Grout | Epoxy Grout | Urethane Grout |
|---|---|---|---|
| Flexibility | Very Low | Moderate | High |
| Stain Resistance | Low | Excellent | Very Good |
| Water Absorption | High | Near Zero | Low |
| Installation Difficulty | Easy | Very High | Moderate |
The 1/8 inch that ruins everything
Precision in flooring is measured in fractions of an inch over long spans to ensure the longevity of the installation. If your installer tells you that a 1/8 inch deviation in the subfloor is fine, they are lying to you to save time. In my shop, we do not even start a tile job until we have checked the floor with a ten-foot straight edge. If we find a hump, we grind it. If we find a dip, we fill it. This is even more important when you are dealing with modern large-format tiles. These tiles are huge and have almost no room for error. A small dip under a 12×24 inch tile creates a massive amount of leverage. When you step on the edge of that tile, it acts like a crowbar against the grout line. This is also why you see issues with laminate flooring in adjacent rooms. If the subfloor is not flat, the locking mechanisms on the laminate will eventually snap from the constant clicking and rubbing. People want to blame the product, but it is almost always the preparation. You have to be a stickler for the details. You have to care about the stuff no one sees once the tile is down. That is the difference between a floor that lasts thirty years and one that lasts three.
- Check subfloor deflection using the L/360 formula for ceramic and L/720 for natural stone.
- Ensure the subfloor is clean of all oils, waxes, and drywall mud before applying thin-set.
- Always use a waterproof membrane like Kerdi or a liquid-applied guard in wet areas.
- Never grout a change of plane; use 100 percent silicone sealant instead.
- Verify that the tile has at least 95 percent mortar coverage in wet environments.
- Respect the acclimation times for all materials, including the tile and the adhesive.
Regional humidity and the bathroom ecosystem
The local climate plays a massive role in how your shower performs over the long term. If you live in a high-humidity area, your framing lumber will have a higher baseline moisture content. When you turn on the air conditioning and dry out the house, that wood shrinks significantly. This is a major cause of grout failure in new construction. The house is still drying out. The studs are twisting and bowing as they reach equilibrium with the indoor environment. If the installer did not use a decoupling membrane, that movement is transferred directly to the tile. These membranes act as a buffer zone. They allow the subfloor to move independently of the tile surface. It is like a shock absorber for your floor. In the dry heat of places like Phoenix, the opposite happens. The moisture in the grout can evaporate too quickly during the curing process, leading to a soft, powdery grout that eventually falls out. You have to understand the environment you are working in. You cannot treat a bathroom in Maine the same way you treat one in Arizona. The physics change, and your installation methods have to change with them. This is why I always tell people to hire a pro who knows the local building codes and the local climate quirks.
The hidden cost of cheap underlayment
While most people want the thickest underlayment, too much cushion actually causes the locking mechanisms on LVP or laminate to snap under pressure. This same logic applies to tile. If you use a cheap, spongy underlayment or too many layers of plywood that are not glued and screwed properly, you are creating a trampoline. Every time you walk across that floor, you are stressing the bond. I have seen people try to use old linoleum as an underlayment for new tile. It is a disaster. The bond between the linoleum and the old subfloor is usually failing, and now you have added several hundred pounds of tile and mortar on top of it. You are building on a foundation of sand. You have to strip it back to the original substrate. If that substrate is concrete, you need to check for moisture vapor emission rates. Concrete slabs might look dry, but they are often pushing out moisture that will eventually de-bond your thin-set. Use a moisture meter. Do the calcium chloride test. Do the work up front or you will be doing it again in two years. There are no shortcuts in this business. If you try to save a few hundred dollars on prep, you will spend thousands on the repair. That is the blunt truth of it. Fix the subfloor, use the right materials for the climate, and respect the expansion gaps. That is how you stop the grout from cracking once and for all.