
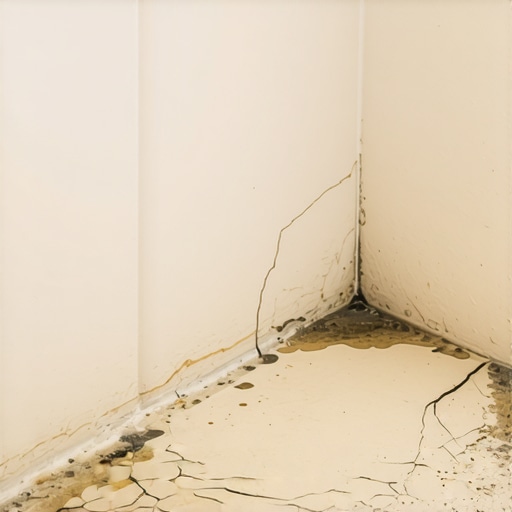
Why Your Shower Grout is Cracking Near the Baseboard and How to Stop It
Most guys skip the leveling compound. They think the underlayment will hide the dip. It won’t. I spent three days grinding concrete on a job last month just so the floor wouldn’t click like a castanet. That same logic applies to the shower. If the foundation is moving, the surface is cracking. I have spent twenty five years fixing what builders rushed, and a cracked grout line at the baseboard is the canary in the coal mine for structural movement or poor material choice. It is not just an eyesore. It is a pathway for water to rot your subfloor. This guide breaks down the physics of the bond and how to fix it for good.
The failure at the change of plane
Grout cracks at the shower baseboard because of structural movement at the change of plane where the floor meets the wall. Rigid cementitious grout cannot handle the differential expansion between these two surfaces. The industry standard requires a flexible 100 percent silicone sealant in all transition joints.
When you look at the junction where your shower floor meets the wall or the baseboard, you are looking at two different planes of movement. The floor wants to move horizontally and vertically based on the load of the water and the person standing on it. The wall is tied to the studs, which might be bowing or shrinking as they lose moisture. When you pack that corner with standard grout, you are creating a hard bridge. As soon as the house settles or the temperature shifts, that bridge snaps. It is a fundamental law of physics that a rigid material will fail when placed between two moving objects. This is why the Tile Council of North America explicitly states that all changes of plane require a movement joint. If your installer used grout there, they ignored the manual. They might as well have used glass to join two pieces of wood. It will shatter every time.
Why your subfloor is lying to you
The subfloor often appears stable while hiding microscopic deflection that causes grout failure at the perimeter. Even a minor dip of one eighth of an inch over ten feet can create enough leverage to snap a grout bond at the wall. Proper stiffening of the joists is necessary.
I have walked into bathrooms where the tile looked perfect in the center but the edges were crumbling. The homeowner usually thinks the grout was mixed wrong. It was not. The problem is underneath. If you have a plywood subfloor, it flexes. If you have a concrete slab that was poured too thin or has a crack, it shifts. This movement is called deflection. When you stand in the shower, you are applying a concentrated load. That load pushes the subfloor down. The wall stays put. This creates a shearing force at the baseboard. I have seen guys try to fix this by packing more grout into the crack. That is like putting a band-aid on a broken leg. You are just adding more material that is destined to fail. You need to understand that the floor is a living, moving thing. If you do not account for that movement, the grout will tell the truth about the subfloor’s instability within months of the installation.
“A floor is only as good as the subfloor beneath it; deflection is the enemy of every joint.” – Master Flooring Axiom
The physics of structural deflection
Deflection is the measurement of how much a floor system bends under a specific load, usually calculated as L over 360 for ceramic tile. Excessive bending puts extreme stress on the bond between the grout and the tile edge. This stress is highest at the rigid corners.
The L over 360 standard means the floor should not bend more than the length of the span divided by 360. For a ten foot span, that is only one third of an inch. If your joists are spaced too far apart or if they are undersized, your deflection is likely higher. This is why you see grout cracking in showers more often than in other areas. The weight of the water, the tile, the mortar, and the human body all combine to test the limits of the floor. When the floor bows, the grout at the perimeter is compressed or pulled apart. Cementitious grout has high compressive strength but almost zero tensile strength. It cannot stretch. When the house moves, the grout loses its grip on the tile or the baseboard. This creates the hairline fracture that eventually turns into a crumbling mess. If you have laminate or hardwood floors outside the shower, their movement is even more pronounced, which adds to the pressure at the transition point.
The chemistry of the polymer bond
Modern grout often contains polymers to increase strength, but these additives do not provide enough elasticity for movement joints. Only 100 percent silicone or high grade urethanes offer the necessary elongation to survive the stress of a shower baseboard transition.
Let us talk about what grout actually is. It is a mixture of portland cement, sand, and pigments. Even if it is a high performance epoxy grout, it is designed to be a hard, dense filler. When it cures, it forms a crystalline lattice. This lattice is tough, but it is brittle. On the other hand, a 100 percent silicone sealant is made of long chain polymers that can stretch and return to their original shape. This is called elongation. A good silicone can stretch up to 25 percent or more of its original width. In a shower, where moisture causes wood to swell and metal to expand, you need that elasticity. Many installers use cheap caulk that is a mix of acrylic and silicone. That stuff is garbage. It shrinks when the water evaporates from it, leaving a gap that pulls away from the wall. You need the pure stuff that stays flexible for decades.
Comparing sealant performance in high moisture zones
| Material Type | Flexibility Rating | Moisture Resistance | Typical Lifespan |
|---|---|---|---|
| Standard Sanded Grout | None | Low | 2 to 5 Years |
| Acrylic Caulk | Moderate | Low | 1 to 2 Years |
| Siliconized Acrylic | Medium | Medium | 3 to 5 Years |
| 100% Silicone | Excellent | High | 10 to 20 Years |
As the table shows, there is no contest. Using grout in a change of plane is a temporary solution that leads to permanent damage. The lack of flexibility in sanded grout means it will fail as soon as the first seasonal change hits. Acrylic caulks are better, but they are prone to mold and they harden over time. Only 100 percent silicone provides the waterproof seal and the structural movement capacity required for a shower environment.
The truth about movement joints
Movement joints are intentional gaps in the tile assembly designed to absorb the expansion and contraction of materials. Without these joints, the tile or grout will crack to relieve the internal pressure. These must be filled with flexible sealant rather than grout.
I have seen $20,000 bathrooms ruined because someone wanted the grout lines to look consistent everywhere. They filled the corners with grout to match the floor. Within six months, the floor was cupping and the grout was falling out in chunks. This happens because materials like ceramic, wood, and concrete all have different coefficients of expansion. They grow and shrink at different rates when the temperature changes. If they are locked together with rigid grout, they fight each other. The weakest link wins, and the weakest link is the grout. A movement joint acts like a relief valve. It allows the surfaces to move independently without destroying the assembly. This is why you must leave a gap of at least one eighth of an inch at the baseboard and fill it with silicone. It is the only way to ensure the longevity of the installation.
“Movement joints are not optional; they are the pressure release valves of a tile assembly.” – TCNA Handbook Principle
The path to a permanent repair
Fixing a cracked joint requires the complete removal of the old grout followed by a thorough cleaning and drying of the gap. You must ensure the joint is free of dust and debris to allow the new silicone to bond properly. Never layer new caulk over old grout.
Follow this checklist to fix your shower grout once and for all. Do not skip steps or you will be doing this again in six months.
- Use a manual grout saw or a multi tool to carefully remove the cracked grout from the baseboard joint.
- Vacuum out all the dust and debris. If there is grit left in the gap, the silicone will not stick.
- Clean the area with denatured alcohol. This removes soap scum and oils that prevent bonding.
- Let the joint dry completely. Use a hair dryer if you have to. Any trapped moisture will cause the silicone to fail.
- Apply a high quality 100 percent silicone sealant that matches your grout color.
- Smooth the bead with a gloved finger or a profiling tool. Do not use too much water during smoothing.
- Let the silicone cure for at least 24 hours before using the shower.
If you follow these steps, you are creating a waterproof, flexible barrier that can handle the shifting of your home. It is a technical process that requires patience, but it is the only way to stop the cycle of cracking.
Moisture migration and the invisible rot
When grout cracks, water travels through the fracture via capillary action, pulling moisture deep into the wall cavity or subfloor. This leads to mold growth and structural decay that remains hidden behind the tile for years. Continuous water exposure will eventually delaminate plywood.
The danger of a small crack at the baseboard is not the crack itself. It is where the water goes. Gravity and capillary action pull the water into the gap. Once the water is behind the tile, it cannot easily evaporate. It sits against the framing or the subfloor. If you have laminate or hardwood floors adjacent to the shower, this water can migrate under the transition strip and cause the wood to buckle or the laminate to swell. I have seen subfloors so rotted from a single cracked corner that I could push a screwdriver right through them. People think that because the tile is waterproof, the floor is safe. Tile is just the skin. The grout and the transitions are the seams. If the seams are broken, the body is at risk. You must treat every crack as a potential leak into the structure of your home.
The final word on maintenance
Regular inspection of the transition joints is the best way to prevent major water damage. Look for hairline fractures or areas where the sealant has pulled away from the tile. Replacing a ten dollar tube of silicone is much cheaper than replacing a subfloor.
Maintenance is not about deep cleaning the tiles every day. It is about watching the movement joints. Homes settle. Foundations shift. Even the best silicone will eventually reach its limit after fifteen or twenty years. If you notice the seal is starting to peel or if you see a crack forming, address it immediately. Do not wait for the water to find its way into the wall. If you have hardwood floors nearby, pay close attention to any darkening of the wood near the shower door. That is a sign that moisture is escaping through a failed joint. Being a homeowner means being a bit of an inspector. You do not need to be a pro to see a gap, but you do need to be smart enough to fix it with the right materials. Use the science of the bond to your advantage and stop trying to force rigid grout to do a job it was never meant to do.