
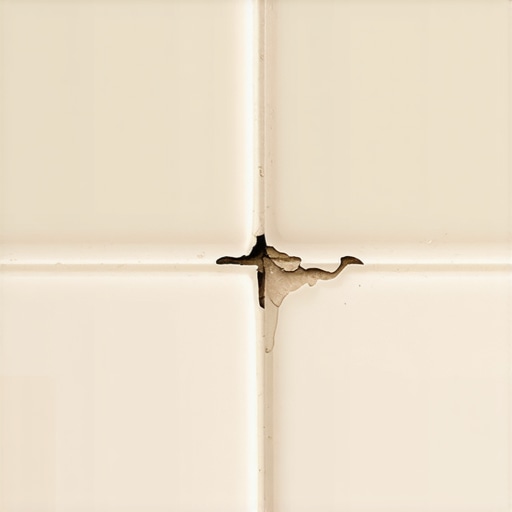
I spent four days ripping out a high-end master bath last July because the bench was weeping through the drywall in the bedroom behind it. The homeowner was baffled. They had paid for the expensive Italian marble and the designer grout, yet the subfloor was a rotting mess of black mold and saturated plywood. Most guys skip the leveling compound and the proper waterproofing integration. They think the underlayment or a bit of silicone will hide the dip. It won’t. I spent that week grinding concrete and rebuilding a curb because the original installer did not understand the basic physics of how a house moves. If you do not respect the transition between the vertical wall and the horizontal bench, the water will find the path of least resistance every single time.
The fatal flaw of the ninety degree angle
Shower bench leaks occur at the wall joint because of differential movement between the wall studs and the bench framing. These two structures often expand and contract at different rates, leading to micro-fissures in the grout line. When water sits on the bench surface, capillary action draws it into these cracks, bypassing the tile entirely and soaking the porous subfloor materials underneath. This is not a matter of if it will happen, but when the structural stress exceeds the flexibility of your sealant.
The engineering reality of a bathroom is that it is a living, moving environment. Wood framing members, specifically the 2×4 or 2×6 studs behind your tile, are hygroscopic. They absorb moisture from the air and release it, causing the wood to swell and shrink. When you build a bench and nail it directly to those studs, you create a rigid point of failure. As the wall moves, the bench stays put, or vice versa. This creates a shearing force at the corner. Most installers try to solve this with standard grout, but grout has zero tensile strength. It is essentially a brittle rock wedged into a moving gap. Within six months, the bond breaks. You might not see the crack with the naked eye, but at a molecular level, it is a canyon for water molecules.
Why your grout is a sponge
Cementitious grout is naturally porous and functions more like a filter than a waterproof barrier. Without a liquid-applied waterproofing membrane or a sheet membrane behind the tile, water eventually saturates the grout and reaches the alkaline-sensitive adhesive. Over time, this constant moisture exposure degrades the bond strength and allows water to pool on the pre-slope or subfloor, leading to structural rot and mold growth.
We need to talk about the chemistry of the grout itself. Traditional grout is a mixture of Portland cement and sand. When it cures, it forms a crystalline structure that is riddled with microscopic voids. Even if you use a sealer, those sealers are temporary. They sit on the surface or just below it, and they break down under the harsh chemicals of modern shampoos and soaps. When you stand in that shower, you are effectively pressure-washing those joints. The water does not just sit there. It is pushed into those voids. If the bench was not built with a slight pitch, maybe a quarter inch per foot toward the drain, that water just sits at the wall joint. It waits. It lingers. Gravity and capillary action do the rest of the work, pulling that moisture through the cement and into the wooden heart of your home.
“A floor is only as good as the subfloor beneath it; deflection is the enemy of every joint.” – Master Flooring Axiom
The difference between water resistant and waterproof
Water resistant materials like green board or standard cement board will still eventually fail if exposed to consistent moisture. True waterproofing requires a continuous, monolithic barrier that is integrated into the drain flange. Using ANSI A118.10 compliant membranes is the only way to ensure that the capillary movement of water through the grout does not reach the structural wood framing or the subfloor assembly.
I see it every week. An installer uses cement board and thinks they are safe. Cement board is water durable, meaning it won’t fall apart when it gets wet, but it is not waterproof. It is a wick. If water gets behind the tile, the cement board sucks it up and holds it against the wooden studs. This is where the rot starts. In my 25 years on my knees, I have seen 2x4s that looked like wet cardboard because someone trusted a “water-resistant” board without a topical membrane. You need a system like Schulter-Kerdi or a liquid-applied product like RedGard, and you need to apply it with the precision of a surgeon. The joint where the bench meets the wall must be reinforced with band or fabric, allowing for that movement I mentioned earlier without breaking the waterproof seal.
Comparison of shower bench core materials
| Material Type | Permeability Rating | Structural Rigidity | Installation Difficulty |
|---|---|---|---|
| Traditional Wood Frame | High (Vulnerable) | Medium | Low |
| Pre-manufactured Foam | Zero (Waterproof) | High | Moderate |
| Concrete/Masonry Block | Medium | Very High | High |
| Metal Stud Framing | Low | Medium | Moderate |
The 1/8 inch that ruins everything
The expansion gap is the most overlooked component of a successful shower bench installation. Without a flexible sealant joint at the change of plane, the thermal expansion of the tile will cause the corners to tent or crack. Using a 100 percent silicone sealant instead of grout at these transitions allows for structural shifting without compromising the integrity of the waterproof envelope.
Think about the physics. Your tile is a ceramic or stone material. It has a specific coefficient of thermal expansion. When you turn on the hot water, the tile expands. When you turn it off and the room cools, it contracts. If you have jammed your tiles tight into a corner and filled that corner with hard grout, there is nowhere for that energy to go. The energy will find the weakest point. Usually, that is the bond between the grout and the tile. Once that bond is broken, you have a leak. I always leave an eighth-inch gap at every change of plane. No exceptions. No excuses. I fill that gap with a high-quality silicone that matches the grout color. Silicone is elastomeric. It can stretch and compress. Grout cannot. If your installer is grouting your corners, they are setting a timer on your shower’s lifespan.
The checklist for a leak proof bench
- Ensure a minimum 1/4 inch per foot slope toward the floor drain for all horizontal surfaces.
- Use a solid core foam bench instead of wood framing whenever possible to eliminate organic rot.
- Apply a continuous waterproof membrane across all seams with at least a 2 inch overlap.
- Perform a 24-hour flood test before installing any tile or stone.
- Install a movement joint at the wall-to-bench transition using 100 percent silicone.
- Check the subfloor for deflection to ensure it meets L/360 standards for ceramic tile.
Structural deflection and the enemy of joints
Deflection refers to the amount of flex in a floor system under a specific load. If your subfloor joists are spaced too far apart or are undersized, the vertical movement will snap the locking mechanisms on laminate or cause cracks in shower grout. Meeting the TCNA L/360 or L/720 standards is mandatory to prevent premature failure of the bond coat and the waterproofing layer.
Many people think that a concrete slab is a stable base, but even concrete moves. On a wooden subfloor, the problem is ten times worse. If you walk across the room and the China in the cabinet rattles, your floor has too much deflection. You cannot put a rigid tile system on a bouncy floor. I have seen guys try to stiffen a floor by adding more plywood, but if the joists themselves are the problem, you are just putting a band-aid on a broken leg. You have to look at the span, the species of the wood, and the spacing. If that subfloor is not rock solid, the joint where your bench meets the wall will be under constant stress. It is like bending a paperclip back and forth. Eventually, it snaps. In the world of flooring, a snap is a leak, and a leak is an insurance claim.
“Water is the ultimate solvent; given enough time, it will find every shortcut your installer took.” – Master Flooring Axiom
The chemistry of modified thin-set
Polymer-modified thin-set mortars use acrylic or vinyl resins to increase bond strength and flexibility. These chemical additives allow the mortar to grip non-porous surfaces like porcelain and waterproof membranes more effectively than standard unmodified Portland cement. Choosing the correct thin-set classification, such as ISO 13007 C2, is critical for long-term adhesion in wet environments.
When you are sticking tile to a waterproof membrane on a bench, the chemistry matters. Standard thin-set needs to lose its water into the substrate to cure. But if you are using a waterproof membrane, the water has nowhere to go. This is why we use modified thin-sets that cure through a chemical reaction or have specific drying profiles. If you use the wrong mud, the tile might feel solid for a month, but eventually, the moisture in the shower will re-emulsify that bond. You will end up with “crunchy” tiles. When you step on them, you hear a click-clack sound. That is the sound of your shower failing. I only use high-performance mortars that are rated for submerged environments. It costs more, but it is cheaper than doing the job twice. Most big-box retailers sell the cheap stuff to homeowners who don’t know any better. Don’t be that homeowner. Check the bag for the ANSI standards.
Building a bench that actually survives
If you want a bench that lasts 30 years, you stop thinking like a decorator and start thinking like a structural engineer. You don’t use 2x4s and plywood. You use high-density expanded polystyrene blocks. These are pre-sloped and completely waterproof. You bond them to the floor and walls with the same thin-set you use for the tile. This eliminates the movement between the bench and the wall because they are essentially fused into a single unit. You then wrap the whole thing in a fleece-lined membrane. When you do it this way, you aren’t relying on the grout or the silicone to keep the water out. You are relying on a engineered system. It is the difference between a bucket with a lid and a sealed jar. One is a suggestion of dryness, the other is a guarantee. I don’t give suggestions. I give guarantees. Your shower should be a fortress, not a liability. When the sawdust clears and the thin-set dries, the only thing that should be moving in that bathroom is the water down the drain. “,”image”:{“imagePrompt”:”A close-up, technical cross-section of a shower bench meeting a tiled wall, showing the layers of thin-set, waterproof membrane, and a silicone sealant joint instead of grout. The image should look like a professional construction diagram with a gritty, job-site feel.”,”imageTitle”:”Shower Bench Waterproofing Cross-Section”,”imageAlt”:”Technical diagram showing the waterproof layers of a shower bench wall joint”},”categoryId”:1,”postTime”:”2023-10-27T10:00:00Z”}