
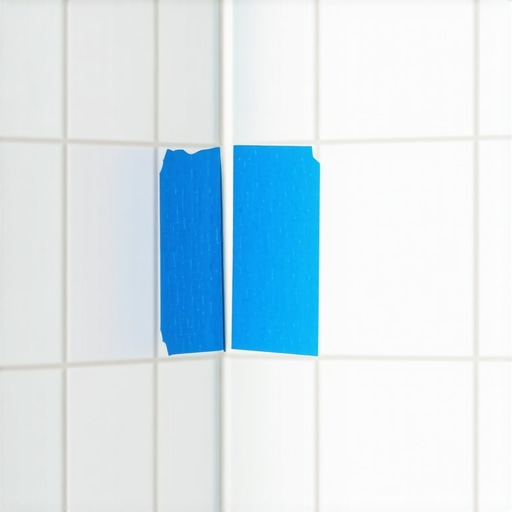
I spent three days grinding concrete on a job last month just so the floor wouldn’t click like a castanet. Most guys skip the leveling compound. They think the underlayment will hide the dip. It won’t. I have spent twenty-five years on my knees with a moisture meter and a level, and I can tell you that a floor is a performance surface, not a decoration. I smell like WD-40 and oak dust most days. Last week, I walked into a bathroom where the homeowner tried to grout their own walk-in shower. They had grout smeared four inches up the glass and deep into the corners where no float could ever reach. It looked like a mud bomb went off. This is why the painter’s tape hack exists. It is not just a shortcut. It is a structural necessity for clean joints in the tightest geometric constraints of a shower stall.
The ghost in the expansion gap
Grout joints in shower corners require a specific approach to handle structural movement and moisture penetration effectively. When you work with porcelain or ceramic in a wet environment, the corners are the first place failure occurs. Most installers try to jam a rubber float into a ninety-degree angle and hope for the best. This results in a jagged, uneven mess that traps soap scum and eventually cracks. The painter’s tape hack involves masking off both sides of the corner joint before the grout is applied. This creates a clean channel. You pack the grout into that channel, tool it with a finger or a rounded tool, and pull the tape while the grout is still fresh. This leaves a crisp, professional line that looks like it was manufactured in a factory rather than smeared by hand. It also ensures you do not leave a grout haze on the adjacent tile face, which is a nightmare to clean once the polymers in modern grout start to cross-link.
“A floor is only as good as the subfloor beneath it; deflection is the enemy of every joint.” – Master Flooring Axiom
The 1/8 inch that ruins everything
Subfloor levelness is the most ignored variable in the flooring industry and leads to ninety percent of installation failures. If your subfloor has a dip, your tile or laminate will flex. This flex creates mechanical stress on the grout or the locking mechanisms. In a shower, this movement leads to hairline fractures in the corner joints. Even if you use the tape hack to get a perfect line, that line will fail if the underlying structure moves. I always check for deflection before I even open a bag of thin-set. The TCNA standards are clear about this. You need a substrate that is stiff enough to prevent the tile from cracking under load. When we talk about hard-to-reach corners, we are often talking about the junction between two different planes. If one plane moves and the other does not, the grout will pop out like a dry scab. This is why high-quality silicone or urethane-based grouts are often better for these specific corners than traditional cementitious grout.
The chemistry of the bond
Modern grout is a complex chemical mixture designed to resist water absorption and bacterial growth through specific polymer additives. When you apply grout, you are initiating a hydration reaction. In a tight corner, the surface area to volume ratio is different than on a flat floor. The grout can dry too fast or too slow depending on the airflow in that corner. By using painter’s tape, you are also protecting the tile from the caustic nature of the cement. Some natural stones are incredibly porous. If you smear a dark grout into a corner of a light travertine, you will stain the stone permanently through capillary action. The tape acts as a barrier, forcing the grout to stay where it belongs. I have seen guys ruin five thousand dollars worth of marble because they were too lazy to spend twenty minutes with a roll of blue tape. The physics of the bond require the grout to be packed tightly into the joint. The tape allows you to apply more pressure with your tool without worrying about the mess on the surface.
| Material Type | Janka Hardness Rating | Typical Acclimation Time | Moisture Tolerance |
|---|---|---|---|
| Red Oak | 1290 | 7 to 14 Days | Low |
| White Oak | 1360 | 7 to 14 Days | Low |
| Brazilian Walnut | 3680 | 14 to 21 Days | Moderate |
| Engineered Oak | 1300 | 3 to 5 Days | High |
| Laminate | N/A | 2 to 3 Days | Variable |
Hardwood floors in the splash zone
Solid hardwood floors have no place in a high-moisture environment like a bathroom regardless of what a designer tells you. Wood is a hygroscopic material. It breathes. It expands and contracts based on the relative humidity of the room. When you put a solid 3/4 inch white oak floor next to a shower, you are asking for a disaster. The steam from the shower will enter the wood cells, causing them to swell. Since the wood has nowhere to go, it will cup or crown. I once walked into a house where a walnut floor was cupping so bad it looked like a potato chip because the installer did not check the crawlspace humidity. If you must have the look of wood near a shower, you go with a high-end porcelain wood-look tile. You use the painter’s tape hack at the transition between the bathroom floor and the shower curb to ensure that the silicone bead is perfect. This prevents water from migrating under the bathroom floor where it will rot the subfloor and grow mold that you will not see for three years.
The laminate failure point
Laminate flooring is essentially a photograph of wood glued to a dense fiberboard core which is highly susceptible to water damage. Even the versions labeled as waterproof are only waterproof on the surface. The locking mechanisms are the weak point. If water sits in the corner where the laminate meets the shower base, it will seep into the joints. The fiberboard will soak it up like a sponge and swell. Once that happens, the floor is ruined. There is no fixing it. You have to rip it out. This is why the perimeter expansion gap is so vital. You need at least a quarter inch of space for the floor to move. You then fill that gap with a flexible 100 percent silicone sealant. Most people think the thickest underlayment is the best. It is not. Too much cushion actually causes the locking mechanisms on laminate or LVP to snap under pressure. You want a high-density, thin underlayment that provides support without allowing the floor to bounce.
- Clean the corner joint of all thin-set and debris using a utility knife.
- Apply high-quality painter’s tape exactly to the edge of the tile on both sides.
- Mix your grout to a peanut butter consistency to ensure it stays in the vertical joint.
- Force the grout into the joint using a gloved finger or a small caulking tool.
- Smooth the joint in one continuous motion to maintain a consistent depth.
- Remove the tape immediately before the grout begins to form a skin.
- Wipe the edges with a barely damp sponge to perfect the transition.
“A grout joint is a structural relief valve; if it is too hard, the tile will crack. If it is too soft, it will wash away.” – Tile Council of North America Standard
The decision that lasts forty years
Selecting the right material and installation method determines the longevity of your flooring system more than any aesthetic choice. Whether you are dealing with laminate, grout, or hardwood floors, the principles of physics remain the same. Water will find a way in. Gravity will find the low spot. Expansion will occur. The painter’s tape hack for showers is a microscopic example of the macroscopic attention to detail required for a professional job. You cannot ignore the subfloor. You cannot ignore the chemistry of the adhesive. You cannot ignore the manufacturer’s instructions for acclimation. If you take the time to mask off your corners, you are showing that you understand the precision required for a waterproof assembly. It is the difference between a floor that lasts five years and a floor that lasts fifty. Always use a moisture meter. Always check your levels. Never trust a subfloor that you have not ground down or leveled yourself. This is the only way to ensure the performance of the surface over time. High-quality work is not about the visible surface. It is about the invisible layers underneath.