
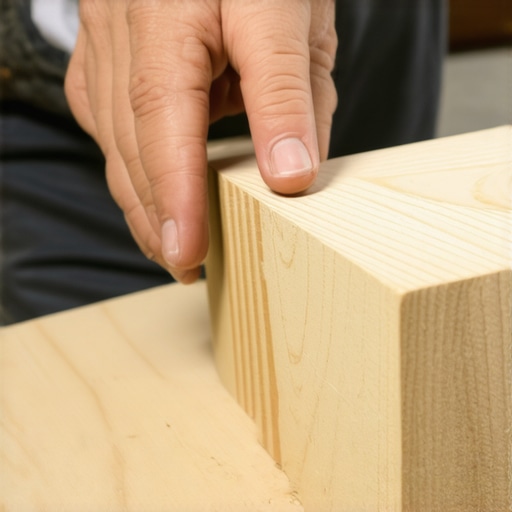
I once walked into a house where a $15,000 wide-plank walnut floor was cupping so bad it looked like a potato chip because the installer didn’t check the crawlspace humidity. The homeowner was in tears. The installer was long gone. My knees have seen over twenty five years of various job sites and I can tell you that a floor is not just something you walk on. It is a structural engineering system. When you are installing hardwood floors, the finish is everything. If you blow the cut and splinter the grain, you are looking at a wasted board or a sloppy transition. I spent decades smelling like WD-40 and oak dust to learn that the difference between a master and a hack is often a three dollar roll of tape. You do not just hack through a piece of expensive walnut or red oak with a circular saw and hope for the best. You have to understand the physics of the saw blade and the cellular structure of the wood fibers. This is the reality of professional installation. It is about precision and the respect for the material. Most guys skip the leveling compound and they think the underlayment will hide the dip. It won’t. I spent three days grinding concrete on a job last month just so the floor wouldn’t click like a castanet. That same level of care must go into every single cut you make.
The physical cost of a jagged edge
Splintering occurs when the saw blade teeth exit the wood grain at high speeds without support. By applying high quality blue painter’s tape to the cut line, you provide a temporary tension surface that keeps the wood fibers compressed. This prevents the upward force of the blade from tearing the finish. This technique is vital for pre-finished hardwood floors where the aluminum oxide coating is brittle. When you are dealing with a 60 tooth carbide blade, each tooth is a miniature chisel. Without the tape, those chisels will lift the grain as they rotate. It is a basic matter of shear force versus tensile strength. The adhesive on the tape acts as a stabilizer. It is not just about the tape though. You have to consider the kerf of the blade and the speed of your pass. If you move too fast, the heat buildup will scorch the wood even with the tape. If you move too slow, you risk burning the resin. It is a delicate balance that requires a steady hand and a deep understanding of the equipment. I have seen guys try to skip this step and they end up with a pile of scrap that costs more than their labor for the day. You have to treat every board like it is the only one you have.
“A floor is only as good as the subfloor beneath it; deflection is the enemy of every joint.” – Master Flooring Axiom
Why your subfloor is lying to you
Subfloor deflection refers to the vertical movement of the floor joists and plywood under a load. If your subfloor has more than 1/8 inch of variation over a 10 foot span, your hardwood floors will eventually squeak and fail. A stable subfloor provides the rigid foundation necessary for long term installation success. Most installers just assume the plywood is flat because it is new. That is a rookie mistake. Plywood reacts to humidity just like the hardwood you are putting on top of it. If you are in a swampy area like Houston, your subfloor is likely holding more moisture than you think. You have to get the moisture meter out. If the subfloor is at 12 percent and your hardwood is at 6 percent, you are asking for a disaster. Those boards are going to pull moisture out of the plywood and they are going to expand. This expansion puts pressure on the locking mechanisms or the nails. Eventually, the floor will buckle or cup. I have seen floors literally lift off the ground because there was no expansion gap at the perimeter. You need a solid half inch of space around the edges. Do not let the baseboards fool you. They are there to hide the gap, not to pin the floor down. If you pin a floating floor under a heavy kitchen island, you are killing its ability to breathe. It will buckle. There is no way around the laws of physics.
The molecular bond of modern adhesives
Modern flooring adhesives utilize moisture cure urethane chemistry to create a permanent and flexible bond between the flooring and the substrate. These polymers cross link with the moisture in the air and the concrete to form a waterproof barrier. This prevents moisture from reaching the wood from below. Using a low quality adhesive is the fastest way to a callback. You need something that has high green grab but remains flexible over decades. Wood is a living material. It moves. If your adhesive is too rigid, the bond will shear as the wood expands and contracts with the seasons. In a place with extreme temperature swings like Phoenix, the dry heat will shrink your baseboards and your floors. If the adhesive cannot handle that movement, you will get hollow spots. I have spent hours injecting epoxy into hollow spots because some guy used builder grade glue. It is a nightmare. You also have to consider the flash time. If you wait too long to lay the boards, the adhesive skins over. If you lay them too soon, the boards will slide. You have to watch the beads. When the ridges of the trowel start to dull, you are in the sweet spot. This is why I always use a notched trowel that matches the manufacturer’s specifications for the specific mil thickness required. It is science, not guesswork.
| Material Type | Janka Hardness | Acclimation Time | Moisture Limit |
|---|---|---|---|
| Red Oak | 1290 | 7 to 10 Days | 4 Percent |
| American Walnut | 1010 | 10 to 14 Days | 2 Percent |
| Hickory | 1820 | 14 Days | 3 Percent |
| Brazilian Cherry | 2350 | 21 Days | 2 Percent |
Hardwood floors and the moisture trap
Moisture vapor transmission rate or MVTR measures the amount of water vapor that passes through a concrete slab over time. High MVTR levels will cause hardwood floors to swell and delaminate. A proper vapor retarder like 6 mil polyethylene is required for all basement and crawlspace installations. I have seen people try to put solid hardwood in a bathroom or near showers. That is a recipe for mold and rot. The humidity from a shower will penetrate the wood and sit in the tongue and groove joints. Even the best finish cannot stop water from getting into the joints if it sits there long enough. If you absolutely must have the wood look in a high moisture area, you go with a high end laminate or a luxury vinyl plank. But even then, you have to be careful. Some of these so called waterproof floors have HDF cores that will soak up water like a sponge if it gets past the wear layer. You need to look at the edge sealing technology. Some manufacturers use a wax based coating on the joints to repel water. That is what you want. But even then, you do not let water sit. You wipe it up. A floor is a performance surface and you have to maintain it. You would not leave a puddle of oil on your car’s engine, so do not leave water on your floor.
- Acclimate the wood in the room where it will be installed for at least 72 hours.
- Check the subfloor for levelness and grind down any high spots in the concrete.
- Use a high quality moisture barrier to prevent vapor from rising through the slab.
- Apply blue painter’s tape to the finish side of the board before making any cross cuts.
- Maintain a consistent 1/2 inch expansion gap around the entire perimeter of the room.
The ghost in the expansion gap
The expansion gap is a mandatory space left between the flooring and the vertical walls to allow for natural wood movement. Without this gap, the floor will push against the walls during humid months and cause the center of the floor to lift or buckle. This is a common failure point in large open floor plans. People hate the look of a wide gap. They want it tight. But wood is cellulose. It is essentially a bundle of straws that soak up moisture from the air. When those straws get wet, they get wider. If you have a 20 foot wide room and each board expands just 1/32 of an inch, you are looking at over half an inch of total movement. If that floor has nowhere to go, it is going to go up. I have seen floors that have lifted three inches off the subfloor because there was no gap. Then you have the issue of transitions. You cannot just run one continuous floor through a 3,000 square foot house without T moldings. I know they look bulky and people hate them, but they are essential. They break the floor into manageable sections that can move independently. If you try to create a zero threshold look without considering expansion, you are going to have a bad time. You have to think like the wood. You have to respect its nature. It wants to move, so let it move.
The 1/8 inch that ruins everything
A subfloor that is out of level by more than 1/8 inch will cause the locking mechanisms on laminate and LVP to fail under the weight of foot traffic. This results in clicking sounds and eventual separation of the planks. Precision leveling is the only way to ensure the longevity of a click-lock floor. I have heard it a thousand times. The homeowner says the floor feels bouncy. That is because there is a void under the plank. When you step on it, the plank bends into that void. The tongue and groove joints are made of thin material. They are not designed to be structural. They are just there to hold the planks together. When they bend repeatedly, they snap. Once they snap, the floor starts to pull apart and you get gaps. Then dirt and water get into those gaps and the whole thing falls apart. You have to use a self leveling underlayment. You pour it on, you spread it out, and you let it find its own level. It is a pain in the neck and it adds a day to the job, but it is the only way to do it right. I have spent more time with a straight edge and a bag of leveler than I have actually laying floors. That is the secret. The work is in the preparation. The actual laying of the floor is just the victory lap. If you don’t do the prep, you don’t get the win.
The chemical intersection of grout and tile
Grout is a cementitious or epoxy based material used to fill the joints between tiles and provide structural stability to the installation. The choice of grout depends on the joint width and the environment, with epoxy grout being the standard for high moisture areas like showers. When you are transitioning from wood to tile, the grout line is your best friend. It hides the minor variations in height. But you have to be careful about the subfloor transition. Tile is rigid. Wood is flexible. If you have them meeting on the same joist, you are going to get a crack in your grout line. You need a transition strip that allows for that differential movement. And for the love of everything, stop using sanded grout in thin joints. It will scratch the surface of your tile and it won’t pack in properly. You need unsanded grout for anything less than 1/8 inch. If you are doing a shower, you use epoxy. It is more expensive and it is a nightmare to clean up if you let it sit, but it is waterproof. Standard grout is porous. Water will go right through it and rot out your backer board if you didn’t waterproof it correctly. This is why I always use a liquid applied waterproofing membrane over the cement board. It is an extra layer of insurance. You do not want to be the guy who has to tear out a shower because the grout leaked. It is a messy, expensive mistake that can be avoided with a little bit of chemistry and a lot of patience.