
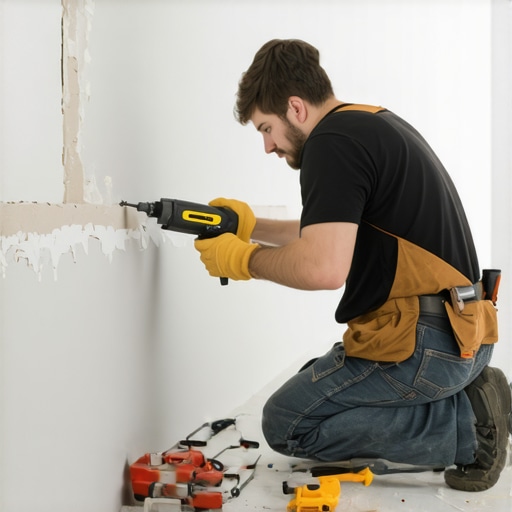
Most guys skip the leveling compound. They think the underlayment will hide the dip. It won’t. I spent three days grinding concrete on a job last month just so the floor wouldn’t click like a castanet, and that same obsession with flatness applies to your walls. When you are installing high-end baseboards against a wall that looks like a topographical map of the Ozarks, you cannot rely on nails alone. The wood will fight back. The tension in a piece of 3/4 inch solid oak or even a dense MDF profile is enough to pull a brad nail straight through the drywall. This is where the physics of adhesion and the chemistry of polymers come into play to save a job from looking like a DIY disaster.
The structural reality of uneven wall framing
Bowed walls occur because of lumber drying cycles, crown orientation in studs, and foundation settling which creates gaps between the drywall and the trim. Fixing this during trim installation requires high-bond adhesives and mechanical fasteners to overcome the structural memory of the wood. Professional results demand the hot glue method. Framing lumber is rarely perfect. A stud might have a crown that pushes the drywall out, or a heavy load from the floor above might have compressed a plate. When you lay down hardwood floors, the last thing you want is a massive shadow line where the baseboard fails to meet the wall. This gap is not just an eyesore, it is a collection point for dust and a sign of a failed installation. We are looking for a zero-tolerance fit. To get there, you need to understand that the wall is a dynamic surface and the trim is a rigid lever.
The mechanical chemistry of the hot glue trick
The hot glue trick involves using a dual-adhesive system where high-temperature ethylene-vinyl acetate provides an immediate structural hold while traditional construction adhesive cures for long-term stability. This hybrid approach allows the installer to pin the trim against a bow without waiting for clamps. It eliminates the need for excessive nailing into empty wall cavities. When I talk about hot glue, I am not talking about the craft gun your kids use. You need a high-output industrial gun that can liquefy the glue sticks at a temperature high enough to bite into the paper face of the drywall. The process is simple but requires speed. You apply beads of heavy-duty construction adhesive every six inches, leaving small gaps. In those gaps, you place a generous dollop of hot glue. Because the hot glue sets in fifteen to thirty seconds, it acts as a temporary clamp, holding the board in place against the tension of the bow while the construction adhesive takes its twenty-four hour journey to full structural cure.
“A floor is only as good as the subfloor beneath it; deflection is the enemy of every joint.” – Master Flooring Axiom
Integrating trim with hardwood floors and laminate
Hardwood floors and laminate require specific expansion gaps at the perimeter that must be hidden by the baseboard without pinning the floor to the subfloor. Using the hot glue trick on the walls ensures the trim stays tight to the drywall without putting downward pressure on the flooring. This prevents the locking mechanisms on laminate from snapping under localized stress. One of the biggest mistakes I see is installers nailing the baseboard into the floor. Never do that. The floor needs to breathe. Hardwood is hygroscopic, meaning it will expand and contract with the humidity of the room. In a humid summer, those planks will grow. If your trim is nailed through the floor and into the plate, the floor will buckle. By using the hot glue trick on the wall, you can pull the trim tight to the wall even if the wall is recessed, keeping the bottom edge of the trim just a hair above the flooring surface. This maintains the grout lines in nearby tile transitions and ensures the laminate has the 1/4 inch of breathing room it needs to float as designed.
Managing transitions near showers and wet areas
Showers and wet areas create a high-moisture microclimate that can cause wood trim to warp if not properly bonded and sealed against the wall. The hot glue trick provides a moisture-resistant temporary bond that prevents the trim from pulling away from the tile or grout interface. This is essential for maintaining a water-tight aesthetic in bathrooms. When your trim meets a shower curb or a tiled wall, you are dealing with two different expansion rates. The tile is stable, but the wood is moving. If the wall is bowed near the shower, the gap becomes a gateway for steam to enter the wall cavity. I use the hot glue method here to ensure the trim is perfectly flush against the tile return. I then follow up with a high-grade silicone-based caulk that matches the grout. This creates a bridge that looks like a single architectural element rather than a slapped-together afterthought.
Adhesive Performance for Trim Installation
| Adhesive Type | Set Time | Shear Strength | Moisture Resistance |
|---|---|---|---|
| Hot Melt EVA | 15-30 Seconds | Medium | Moderate |
| Polyurethane Glue | 4 Hours | High | Excellent |
| Construction Adhesive | 24 Hours | Extreme | High |
| Cyanoacrylate (CA) | 10 Seconds | High | Low |
The physics of the expansion gap and structural tension
Expansion gaps are not suggestions but are the lungs of a floating floor system that prevent structural failure. When a wall is bowed outward, the trim naturally wants to follow the straight line of the floor, creating a massive gap at the top of the baseboard. The hot glue trick forces the wood to conform to the wall’s irregularity without mechanical failure. Think about the PSI required to bend a piece of 1×6 primed poplar. It is significant. If you rely solely on a finish nail, you are counting on a tiny wire head to hold back several pounds of spring tension. Over time, the wood wins. The nail head pulls through. By using a structural adhesive across the entire back of the board, you distribute that tension across hundreds of square inches of surface area. This is why my jobs look the same five years later while the discount builders’ work is falling apart at the seams. You have to respect the material. Wood is a living thing, even when it is painted white and nailed to a wall.
“Expansion gaps are not suggestions; they are the lungs of a floating floor system.” – Master Flooring Axiom
Professional Trim Installation Checklist
- Check moisture content of the trim and the subfloor using a pin-type meter.
- Identify the high and low spots of the wall using a 6-foot aluminum straightedge.
- Clean the back of the trim and the drywall surface of any drywall dust or debris.
- Apply construction adhesive in a serpentine pattern for maximum coverage.
- Deploy high-temp hot glue in strategic locations for the initial tack.
- Use a 15-gauge or 18-gauge nailer only to hit the studs for backup security.
- Seal the bottom edge of the trim near showers with a mildew-resistant barrier.
Regional climate considerations for adhesive selection
If you are working in the swampy humidity of Houston, your wood is going to move more than a politician on election day. You need an adhesive with a higher flexibility rating. In those environments, the hot glue trick is even more vital because the wood is under constant stress from moisture absorption. Conversely, in the dry heat of Phoenix, the wood will shrink, and if you haven’t used a structural bond, your miters will open up so wide you could park a truck in them. Always check the acclimation of your hardwood floors before you even think about the trim. If the floor isn’t stable, the trim will never be. I make it a rule to let the wood sit in the room for at least seven days. I don’t care if the homeowner is in a rush. A rushed job is a failed job, and I don’t put my name on failures. You do the prep work, you use the right chemistry, and you get a floor that stays flat and trim that stays tight.
{“@context”:”https://schema.org”,”@type”:”HowTo”,”name”:”The Hot Glue Trick for Trim”,”step”:[{“@type”:”HowToStep”,”text”:”Apply construction adhesive to the back of the trim.”},{“@type”:”HowToStep”,”text”:”Add hot glue dollops between the construction adhesive.”},{“@type”:”HowToStep”,”text”:”Press the trim against the bowed wall and hold for 30 seconds.”}],”totalTime”:”PT30M”}