
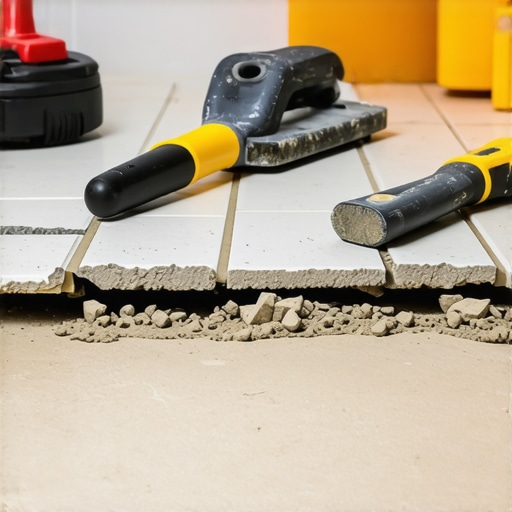
I spent three days grinding concrete on a job last month just so the floor would not click like a castanet. Most guys skip the leveling compound. They think the underlayment will hide the dip. It will not. I have seen enough failed pans to know that a shower is not just a place to wash your hair. It is a hydraulic system. If you treat it like a simple flooring project, you are going to end up with a moldy mess and a cracked subfloor. Most people come into this thinking they can just slap some thin-set down and call it a day. That is how you get lippage. That is how you get water pooling in the corners. I have been doing this for 25 years and my knees tell the story of every poorly prepped slab I have ever encountered. You can not cheat physics. Gravity does not care about your tight schedule or your budget. If that floor is not pitched and leveled to the millimeter, the tile will fail. I smell like thin-set and old coffee most days, and I have learned that the subfloor is the only thing that actually matters in a bathroom renovation.
The ghost in the shower drain
Leveling a shower floor requires a precise 1/4 inch per foot slope toward the drain to ensure gravity-fed drainage. This prevents standing water and mold growth within the grout lines. Unlike living room hardwood floors where a flat surface is the goal, a shower requires a controlled decline. If your subfloor is uneven, you can not simply use a self-leveling underlayment and walk away. Self-leveling products are designed to find their own level, which is the exact opposite of what a shower needs. You need a mud bed or a pre-sloped integrated system to manage the water flow. The drain is the fixed point. Everything else must bow to it. I have walked into jobs where the laminate in the hallway was perfect but the shower was a disaster because the installer forgot that water does not move on its own. You have to force it. This involves a calculated approach to the substrate thickness and the deflection rating of the joists below. If those joists flex even a fraction of an inch, your grout will powder and pop out within six months.
“A floor is only as good as the subfloor beneath it; deflection is the enemy of every joint.” – Master Flooring Axiom
Why your subfloor is lying to you
Subfloor deflection and moisture content are the primary reasons why shower tiles crack and leak over time. You might look at a plywood subfloor and think it is solid, but if it is 5/8 inch thick and the joists are 24 inches on center, it is a trampoline. You can not put tile on a trampoline. The TCNA (Tile Council of North America) has strict rules about this. You need a minimum of 1 and 1/8 inches of wood substrate for a stable base. Even then, you have to worry about hydrostatic pressure in concrete slabs. If the slab is pumping moisture from the earth, no amount of leveling will save you. You need a vapor barrier. I once saw a beautiful marble floor turn yellow because the installer did not check the moisture levels in the concrete. The stone literally sucked the minerals out of the wet slab. That is why I always carry a moisture meter. It is not an option. It is a necessity. If the moisture is over 4 percent, you stop working. You do not install a single piece of hardwood floors or tile until that slab is dry or sealed with a high-quality epoxy mitigator.
| Substrate Material | Max Deflection Limit | Recommended Leveling Method |
|---|---|---|
| Plywood | L/360 | Cement Backer Board and Thin-set |
| Concrete Slab | L/720 | Mortar Bed or Sand Mix |
| Engineered Wood | L/480 | Uncoupling Membrane |
The chemistry of the bond coat
Modified thin-set mortars contain ethylene-vinyl acetate polymers that create a flexible chemical bond between the tile and the substrate. This flexibility is what allows the floor to survive the thermal expansion of hot water. When you turn on a shower, the tile expands. If your thin-set is too rigid, the bond snaps. This is the molecular reality of flooring. You are not just gluing things down. You are creating a layered composite of stone, polymer, and cement. Most homeowners choose the cheapest bag of mortar they can find. That is a mistake. You want a high-polymer content for showers because the environment is constantly cycling through heat and moisture. The hydration process of cement is a chemical reaction, not a drying process. If the water evaporates too fast, the crystals do not form correctly. This leads to a weak, dusty bond that will fail the moment someone steps on it. I always tell my apprentices that the trowel notch matters more than the tile color. If you do not have 100 percent coverage on the back of that tile, you are building a failure.
- Check the subfloor for any vertical movement or bounce before starting.
- Grind down high spots in concrete using a diamond cup wheel.
- Fill low spots with a high-strength floor patch or mud mix.
- Install a waterproof membrane like Schluter-Kerdi over the leveled surface.
- Verify the 1/4 inch per foot slope using a dedicated pitch tool.
The 1/8 inch that ruins everything
A deviation of just 1/8 inch over a 10 foot span can cause lippage that makes a shower floor uncomfortable and dangerous. When you are working with large format tiles, this margin of error shrinks even further. Small tiles can follow a slight curve, but big tiles are like sheets of glass. They will not bend. If there is a hump in the floor, the corner of the tile will stick up. This is a trip hazard. It also makes it impossible to get a clean grout line. In my experience, people try to fix this by adding more thin-set under the low tiles. This is a hack move. As the thin-set cures, it shrinks. The more you use, the more it pulls the tile down. You end up with a floor that looks like the surface of the moon. You have to get the floor flat before the first tile touches the ground. I have spent more time with a 6 foot straight edge than I have with a tile saw. That is the secret. The saw is for the finish, but the level is for the soul of the room.
“Standard installation requires a flat substrate within 1/8 inch over 10 feet for large format tile.” – NWFA Technical Guidelines
The physics of the pre-slope
Creating a pre-slope beneath the waterproofing membrane ensures that any water reaching the subfloor is directed toward the weep holes in the drain. This is the step everyone skips. They put the waterproof liner flat on the subfloor and then build the slope on top of it. That is wrong. When water gets through the grout, it sits on that flat liner and rots. It smells like a swamp after a few years. By sloping the subfloor itself, or adding a sloped mortar bed beneath the liner, you ensure the entire system stays dry. This is why I distrust laminate or click-lock systems in wet areas. They rely on surface tension to keep water out, but water always finds a way. In a shower, the water is the enemy, and the pre-slope is your primary defense. You are building a fortress. Every layer of grout and mortar is a wall. If the foundation is slanted the wrong way, the fortress falls. I have torn out dozens of showers where the wood joists were completely rotted because of a missing pre-slope. It is a $10,000 mistake that could have been avoided with two bags of sand-mix and an extra hour of labor.
{“@context”:”https://schema.org”,”@type”:”Article”,”headline”:”The Secret to Leveling an Uneven Shower Floor Before Tiling”,”author”:{“@type”:”Person”,”name”:”Master Flooring Architect”},”datePublished”:”2023-10-27″,”description”:”Expert guide on leveling shower floors for professional tile installation, focusing on subfloor physics and moisture management.”}