
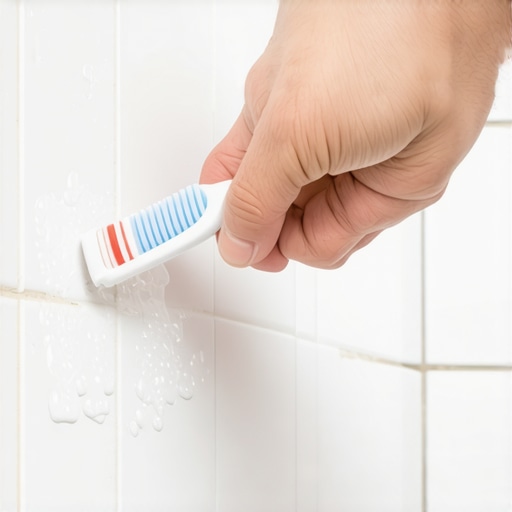
I have spent twenty five years on my knees. Between the smell of WD-40, the fine layer of oak dust on my boots, and the permanent callus on my right thumb from clicking moisture meters, I have learned one thing about floors and showers. Everything fails at the corners. Most guys skip the leveling compound and they think the underlayment will hide a dip in the subfloor. It will not. I spent three days grinding concrete on a job last month just so the floor would not click like a castanet. That same obsession with structural integrity applies to your shower. If you ignore the corners, the moisture wins. I once saw a sixteen thousand dollar marble shower floor rot out from the inside because the homeowner used a wide mop that could not penetrate the corner joints. The water sat there. It stagnated. It traveled through the grout via capillary action and turned the subfloor into a sponge. This is why the toothbrush method is the only way to save a shower from its own geometry.
The physics of corner sediment accumulation
Shower corners accumulate organic biofilms and mineral scaling because standard cleaning tools cannot reach the vertex of the ninety degree angle. This area requires high-density mechanical agitation to break the ionic bonds of calcium carbonate and magnesium deposits that settle in the porous cementitious grout lines and silicone sealant beads. Most people use a large scrub brush. That is a mistake. The wide surface area of a standard brush prevents the bristles from entering the tight radius of the corner. You end up skimming over the top of the grime while the root of the mold stays anchored in the grout pores. A toothbrush allows for concentrated pressure on a microscopic scale. You are not just cleaning a surface. You are disrupting a chemical colony. The bristles act as tiny chisels that get into the valleys of the grout texture. This is structural maintenance, not just aesthetics.
“A floor is only as good as the subfloor beneath it; deflection is the enemy of every joint.” – Master Flooring Axiom
The chemistry of grout and surfactant interaction
Grout is a cement-based material that acts like a rigid filter for contaminated water. When you apply a cleaning agent with high surfactant activity, the liquid must penetrate the capillary network to lift lipids and proteins left behind by soap and skin cells. This process requires targeted dwell time followed by precise mechanical scrubbing to ensure the chemical reaction reaches the substrate. I have seen guys pour bleach on a floor and walk away. That does nothing for the deep mineral salts. You need to understand the pH scale. If you have hard water, you are dealing with alkaline deposits. You need a mild acid to break that bond, but you cannot go too heavy or you will dissolve the lime in the grout itself. It is a delicate balance. The toothbrush method gives you the control to apply the right amount of force without damaging the surrounding tile glaze or the protective sealant layer.
| Tool Type | Bristle Stiffness | Target Surface | Agitation Rating |
|---|---|---|---|
| Standard Toothbrush | Medium | Sanded Grout | High |
| Electric Toothbrush | Soft | Epoxy Grout | Very High |
| Detail Brush | Firm | Hard Water Scaling | Extreme |
| Mop Head | N/A | Tile Glaze Only | Low |
The mechanical advantage of angled bristle paths
The toothbrush method works because the narrow profile of the brush head allows for linear scrubbing along the grout line while maintaining vertical pressure. This orientation ensures that the bristle tips reach the deepest part of the joint to remove biofilm anchors and prevent anaerobic bacteria growth within the porous grout matrix. Think about the way a saw cuts wood. If the teeth are too wide, the cut is sloppy. If the teeth are fine, you get precision. In a shower corner, precision is everything. You have three planes meeting at one point. That vertex is where the mold starts its campaign. I always tell my apprentices that if you cannot see the bottom of the grout texture, you have not finished the job. You have to scrub until the color of the grout is uniform from the center of the room all the way to the baseboard.
The regional impact of water mineral content
The mineral content of local water supplies dictates the chemical composition of shower grime and the scrubbing frequency required for maintenance. In regions like Arizona or Nevada, high calcium and magnesium levels create hard water scale that requires acidic surfactants, whereas humid coastal regions like Florida or Texas face higher biological growth rates and fungal spore infiltration. If you are in a dry heat zone, your grout is likely to crack if it is not sealed properly. That crack becomes a highway for mineral salts. If you are in a swampy area, the humidity keeps the grout wet for hours after a shower. That is when the pink mold takes over. The toothbrush method is your best defense against both. You have to adapt your chemicals to your zip code. Do not use the same spray in Phoenix that you would use in Miami. It just does not make sense from an engineering perspective.
- Inspect the corner for any gaps in the silicone bead before starting.
- Apply a pH-balanced cleaner specifically designed for cementitious grout.
- Allow the cleaner to sit for five minutes to penetrate the biofilm.
- Use a medium-stiffness toothbrush to scrub in small circular motions.
- Rinse with distilled water to prevent new mineral deposits from forming.
- Dry the corner with a microfiber cloth to remove all suspended solids.
The risk of excessive cushion in underlayments
While most people want the thickest underlayment, too much cushion actually causes the locking mechanisms on LVP to snap under pressure. The same logic applies to your shower pan and the grout joints above it. If there is too much flex in the floor, the grout will crack. Once it cracks, the toothbrush method becomes a rescue mission rather than maintenance. You are trying to clean out a fissure that should not be there. I have seen homeowners try to caulk over dirty grout. That is a crime. You are just sealing the rot inside. You have to clean it out to the bone. Use the toothbrush to reach the very bottom of that crack. If the grout is crumbling, it is time to rake it out and start over. But if it is just dirty, the bristles will save you a few thousand dollars in demolition costs. It is about the small wins.
“A floor is a performance surface; any deviation from level is a failure of the installer’s character.” – Master Flooring Axiom
The geometry of the corner joint
Shower corner joints represent the most vulnerable point in a waterproofing system because they are subject to multi-axial thermal expansion and building settlement stress. Using a toothbrush to clean these junctions ensures that debris does not prevent the sealant from flexing, which maintains the integrity of the moisture barrier behind the tiled surface. When the house shifts, those corners move. If they are packed with hard mineral deposits, the grout cannot move. It snaps. Then you have a leak. By keeping those corners clean with the toothbrush method, you are allowing the materials to behave the way the architect intended. You are removing the grit that acts like sandpaper on your seals. It is a simple tool for a complex problem. Stop looking for a magic spray. Start looking for a brush with a good handle and some stiff bristles. That is how you win the war against the wet. It is not pretty work. It is the work that lasts twenty years.