
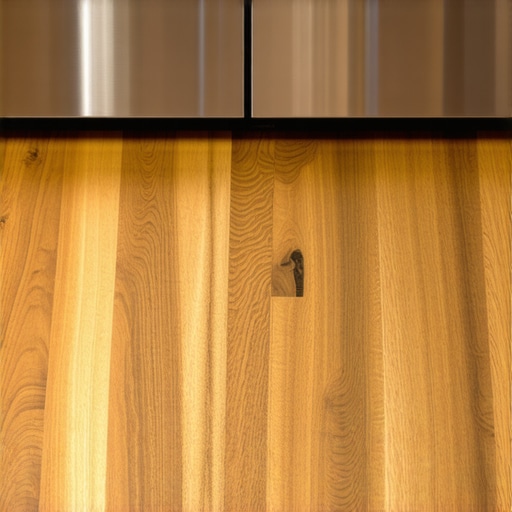
I once walked into a house where a $15,000 wide-plank walnut floor was cupping so bad it looked like a potato chip because the installer didn’t check the crawlspace humidity. The homeowner was devastated. The floor was beautiful, but it was structurally compromised from the moment it came off the truck. I could smell the damp earth from the crawlspace through the floor vents. I spent thirty years learning that a floor is not a decoration, it is a high-performance mechanical assembly. When that assembly fails near your refrigerator, you are not just looking at a cosmetic blemish. You are witnessing a chemical and structural breakdown of the engineered core. I have sawdust under my nails and a moisture meter in my pocket at all times because I know that wood never stops moving. It breathes. It reacts. And near a fridge, it often dies.
The silent killer under the crisper drawer
Delamination near the refrigerator is typically caused by a combination of localized high humidity, thermal cycling from the appliance motor, and slow-leak moisture infiltration. These factors attack the adhesive bond between the hardwood wear layer and the plywood or HDF core. Once the vapor pressure exceeds the shear strength of the glue, the layers separate. This process is often irreversible because the wood fibers have physically pulled apart at a microscopic level. Most homeowners ignore the small signs of a failing ice maker line until the veneer starts to curl like a dead leaf. By then, the damage has reached the subfloor. I have seen laminate and engineered wood swell to twice their thickness because a simple plastic fitting cracked behind the fridge. This is not just about water. It is about the physics of vapor drive. The heat from the refrigerator compressor creates a micro-climate that accelerates the evaporation of any spilled water, forcing it into the grain of the wood.
How adhesive chemistry fails under pressure
Engineered wood relies on Type II water resistant adhesives to hold the various plies of wood together in a cross-grain configuration. When moisture levels remain high for extended periods, these chemical bonds undergo hydrolysis, where water molecules break the polymer chains. This is why you see the edges of your planks lifting. The glue is literally dissolving. If you chose a cheap, builder-grade product, those adhesives are often urea-formaldehyde based, which have a lower tolerance for heat and moisture than modern soy-based or polyurethane resins. I always tell my clients that you pay for the glue as much as you pay for the wood. A high-quality engineered floor can withstand a minor spill, but no floor can survive a constant drip from a faulty solenoid valve. The structural integrity of the floor depends on the bond line. When that bond line is compromised, the floor loses its ability to resist expansion and contraction forces, leading to the dreaded click-clack sound when you walk over it.
“A floor is only as good as the subfloor beneath it; deflection is the enemy of every joint.” – Master Flooring Axiom
The structural reality of cross ply engineering
The core of an engineered floor is designed to counteract the natural movement of wood by alternating the grain direction of each layer. This creates a stable platform that is less likely to gap than solid hardwood. However, when the moisture content of the subfloor rises due to a leak behind the fridge, the bottom layers of the engineered plank expand faster than the top wear layer. This creates a massive amount of internal tension. The wood is trying to tear itself apart. In my twenty five years of installing, I have seen floors where the plywood core remained intact but the thin veneer of oak or hickory simply popped off. This happens because the veneer is too thin to resist the curling force of the thicker core. You need to understand the Janka rating of your wood and the thickness of that wear layer. A 4mm wear layer is substantial, but a 1mm wear layer is essentially a sticker. If that sticker gets wet, it is gone. You cannot sand it. You cannot save it. You have to replace it.
| Floor Type | Wear Layer Thickness | Moisture Resistance | Acclimation Time |
|---|---|---|---|
| Engineered Oak | 3mm to 6mm | Moderate | 48 to 72 Hours |
| Laminate Core | N/A | Low | 48 Hours |
| Solid Hardwood | Full Plank | Very Low | 7 to 14 Days |
| Stone Polymer Composite | 20 mil plus | High | 0 to 24 Hours |
Capillary action and the subfloor connection
Water does not just sit on top of the floor; it travels through the tongue and groove joints via capillary action. This is the same process that allows trees to pull water from their roots to their leaves. Once water gets under the wood, it becomes trapped between the floor and the underlayment. This is a disaster zone. The water cannot evaporate because the wood floor acts as a lid. The moisture then soaks into the subfloor, which is usually OSB or plywood. If you have a concrete slab, the moisture can travel through the pores of the concrete and spread far beyond the initial leak. I have seen leaks behind a fridge cause delamination in a hallway fifteen feet away. You must use a high-quality moisture barrier. Some guys like to use cheap poly film, but I prefer a premium acoustical underlayment with an integrated vapor retarder. It provides a cushion and a shield. While most people want the thickest underlayment, too much cushion actually causes the locking mechanisms on LVP or engineered wood to snap under pressure. You need a dense, firm base.
The environmental zone around your refrigerator
The area surrounding a refrigerator is one of the most hostile environments in a home for wood products. The back of the fridge is a heat engine. It pumps out hot air 24 hours a day to keep the inside cold. This heat dries out the wood directly behind the appliance, while the front of the fridge might be exposed to drips from the water dispenser or ice cubes falling on the floor. This creates a massive moisture gradient across a very small area. One side of the plank is bone dry and shrinking while the other side is wet and expanding. This is a recipe for catastrophic failure. I recommend installing a plastic drip tray under the fridge. It is a ten dollar solution to a five thousand dollar problem. These trays catch those tiny drips from the water line that you never see. Also, make sure your grout in the nearby tiled areas is sealed. Moisture from showers or kitchen sinks can migrate through the wall plates and get under your hardwood floors. Everything in a house is connected.
The 1/8 inch rule for perimeter safety
Expansion gaps are not optional. I see so many DIY installers jam the wood tight against the kitchen cabinets and the fridge panel. That is a death sentence for the floor. Wood needs room to breathe. When that wood gets a little damp from a fridge leak, it wants to grow. If it has no place to go, it will buckle or delaminate. You need at least a quarter inch of space around the entire perimeter. I hide these gaps with baseboards or shoe molding. Some people hate the look of molding, but I hate the look of a ruined floor more. The physics of wood expansion are relentless. A floor can exert thousands of pounds of pressure as it swells. It will lift heavy islands. It will rip out door jambs. Give the floor its space and it will behave. Tight joints look good for a week, but a properly gapped floor lasts a lifetime.
“Moisture is the single most common cause of flooring failure, yet it is the easiest to measure and the hardest to ignore.” – Master Flooring Axiom
- Check the ice maker water line for cracks every six months.
- Use a moisture meter to check the subfloor before any installation.
- Ensure the refrigerator has proper ventilation to prevent heat buildup.
- Never mop engineered wood with excessive water.
- Install a leak detector alarm behind the appliance.
- Verify that the expansion gap is maintained under the toe kicks of the cabinets.
Repairing the irreparable bond
If you catch delamination early, you might be able to save the plank, but usually you are looking at a board replacement. This involves cutting out the damaged plank with a circular saw set to the exact depth of the wood, being careful not to nick the subfloor. Then you have to prepare a new board by removing the bottom groove so it can be dropped into place. We call this a top-glue repair. It is a surgical procedure. I use a high-quality wood epoxy or a specialized flooring adhesive to bond the new plank to the subfloor. If the delamination is widespread, you are looking at a full tear out. It breaks my heart to see good wood go to a landfill because of a five cent plastic washer in a fridge. If you live in a high-humidity area like Florida, your floors are already under stress. The extra moisture from a leak is just the final straw. Always monitor your indoor relative humidity. It should stay between 35 and 55 percent. Anything higher and you are inviting the wood to fail. Anything lower and you will see gaps. Wood is alive. Treat it that way and it will treat you well.