I spent three days grinding concrete on a job last month just so the floor wouldn’t click like a castanet. The homeowner was complaining about their tile grout turning a sickly shade of amber, and they thought the solution was to pour straight bleach onto the lines every Saturday. They were wrong. By the time I got there, the grout was crumbling like a dry biscuit and the subfloor was a petri dish of alkaline residue. Most guys skip the leveling compound and they definitely skip the chemistry lesson. They think the underlayment will hide the dip or that a bottle of Clorox fixes everything. It won’t. I have seen fifteen thousand dollar floors ruined by a lack of understanding regarding moisture vapor transmission and the simple physics of a porous joint.
The chemical reality of yellowing grout
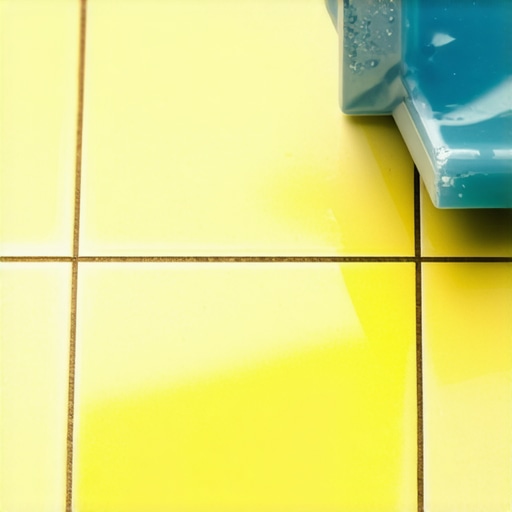
Yellowing grout is caused by a combination of trapped soap scum, iron oxidation from hard water, and the chemical degradation of topical sealers. When minerals in your water supply interact with the lime in cement based grout, a chemical reaction occurs that alters the pigment. This is not just surface dirt. It is a structural change in the grout matrix that happens at a molecular level when moisture is allowed to sit and stagnate within the pores. You are looking at the result of a failed moisture barrier or a sealer that has reached its breaking point.
Grout is essentially a mixture of portland cement and sand. It is naturally hydrophilic, meaning it loves water. Without a high quality penetrating sealer, every time you mop with a dirty bucket, you are simply injecting gray water and surfactants into the floor. Over time, these surfactants oxidize. That yellow tint is the ghost of every floor cleaner you have ever used that was not properly rinsed away. It builds up layer by layer until the original color is buried under a film of waxy residue. This is especially true in showers where body oils and skin cells provide the organic material for bacteria to feed on, creating a biofilm that resists standard scrubbing.
Why bleach is the worst choice for your shower
Bleach is a highly alkaline substance that eats away at the synthetic polymers found in modern grout and destroys the integrity of the sealant. While it might provide a temporary whitening effect through oxidation, it is simultaneously making the grout more porous. Every time you apply bleach, you are creating larger microscopic caverns in the cement. This makes it easier for dirt and minerals to settle even deeper the next time. It is a cycle of destruction that leads to structural failure and water infiltration behind the tile.
Most people do not realize that bleach does not actually kill mold deep within a porous surface. It only bleaches the color out of the surface spores. The roots of the mold stay alive in the damp subfloor or the thinset. Furthermore, bleach is a salt based liquid. As it dries, it leaves behind salt crystals. These crystals grow and expand inside the grout pores, a process known as subflorescence. This expansion creates internal pressure that causes the grout to crack and spall. You are literally exploding your grout from the inside out just to get a brighter white for forty eight hours. Stop doing it.
“A floor is only as good as the subfloor beneath it; deflection is the enemy of every joint.” – Master Flooring Axiom
The structural secrets of a dry subfloor
A yellowing grout line is often a red flag for moisture issues happening beneath the tile surface. If your subfloor is holding onto humidity, that water has to go somewhere. It moves upward through the thinset and into the grout through capillary action. If that water is carrying minerals from a damp concrete slab or tannins from a plywood subfloor, it will stain the grout from the bottom up. This is why moisture testing with a pinless meter is the first thing I do when I walk onto a job site.
In many cases, the yellowing is actually iron or manganese from the local water supply that has concentrated in the grout lines. If you are in a region with hard water, your shower is a giant filter. The grout acts as the filter medium. To prevent this, you need to address the vapor drive. This means using a high quality uncoupling membrane or a liquid applied waterproofing layer before the tile ever touches the floor. If you skip this, you are just waiting for the minerals to migrate. I have seen laminate floors installed right next to these damp tile areas where the wood starts to swell because the moisture from the tile subfloor is leaching into the neighboring room. It is all connected.
How your laminate choice affects the bathroom tile
Transitions between laminate and tile are the primary failure points for moisture migration and grout staining. Many installers use a cheap T molding and call it a day. But if the laminate underlayment is not properly sealed at the edge where it meets the tile, it can act as a wick. Water from the bathroom floor can travel under the transition and saturate the laminate core. This causes the laminate to peak and the tile grout at the edge to turn yellow from the trapped moisture and adhesives. It is a mess that requires a total tear out to fix correctly.
While most people want the thickest underlayment, too much cushion actually causes the locking mechanisms on LVP or laminate to snap under pressure. This same logic applies to grout. If the subfloor has too much flex, the grout will crack. Once it cracks, water gets in. Once water gets in, you get yellowing and mold. You need a rigid, flat surface. The TCNA (Tile Council of North America) is very clear about deflection limits. If your floor bounces, your grout will fail. No amount of cleaning will save a floor that was built on a trampoline.
Comparing Grout Performance and Durability
| Grout Type | Moisture Resistance | Chemical Sensitivity | Stain Resistance |
|---|---|---|---|
| Sanded Grout | Low | High | Very Low |
| Unsanded Grout | Low | High | Low |
| Epoxy Grout | Very High | None | Superior |
| Polymer Modified | Medium | Moderate | Moderate |
The Janka scale and the hardwood moisture problem
Hardwood floors are even more sensitive to the moisture issues that cause grout yellowing in adjacent bathrooms. If you have high Janka rated wood like Brazilian Cherry or Hickory, it is incredibly dense. When this wood absorbs moisture from a leaky shower pan or a damp tile floor, it does not just swell; it moves with enough force to buckle walls. The Janka scale measures the force required to embed a steel ball into the wood, but it doesn’t measure how much that wood will expand when the humidity hits eighty percent because of a poorly ventilated bathroom.
I once walked into a house where a fifteen thousand dollar wide plank walnut floor was cupping so bad it looked like a potato chip because the installer didn’t check the crawlspace humidity. The moisture was migrating from the bathroom where the grout was yellowing and the homeowner was busy bleaching it. The bleach was eating the grout, the water was getting under the tile, and the walnut was drinking it all up. You have to treat the house as a single ecosystem. If one part of the floor is wet, the whole floor is at risk. Use a proper silicone caulk at the transition between wood and tile. Do not use grout there. Grout does not expand. Wood does. When the wood expands against grout, the grout turns to powder.
How to fix the yellowing without destroying the bond
To restore your grout without using bleach, you must use an oxygen based cleaner or a pH neutral professional stone soap. These cleaners break down the organic oils and mineral deposits without etching the cement or destroying the sealer. If the staining is permanent, the only real solution is a grout colorant. This is an epoxy based coating that you paint onto the clean grout lines. It seals the pores and creates a uniform color that is actually waterproof. It is a tedious job, but it is better than a full regrout.
- Vacuum the floor thoroughly to remove all abrasive grit and oak dust.
- Apply a pH neutral cleaner and let it dwell for ten minutes to emulsify the oils.
- Scrub with a stiff nylon brush, never a wire brush which can leave metal fragments that rust.
- Rinse with clean water and dry the floor immediately with a microfiber cloth.
- Apply a high quality penetrating solvent based sealer once the grout is completely dry.
- Wait forty eight hours before letting any moisture touch the floor.
If you follow these steps, you will stop the yellowing at its source. You have to respect the chemistry of the materials. Grout is a living part of your home. It breathes and reacts to the environment. Treat it with harsh chemicals and it will fail you. Treat it with the right physics and a solid subfloor, and it will last as long as the house stands. Do not listen to the big box retailers who tell you that a spray bottle of bleach is a maintenance plan. It is a slow death sentence for your floor. Get on your knees, check the moisture levels, and do the work the right way the first time.