
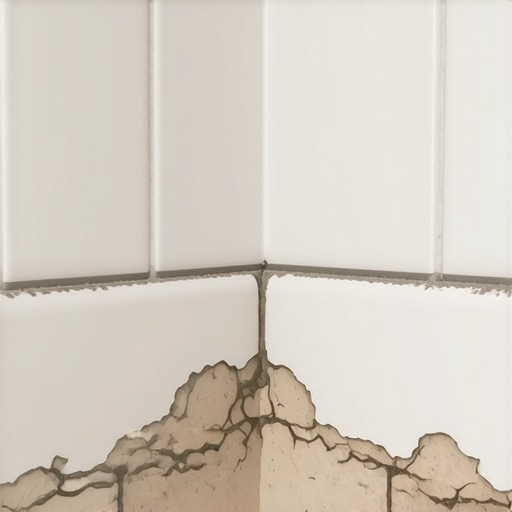
Most guys skip the leveling compound. They think the underlayment will hide the dip. It won’t. I spent three days grinding concrete on a job last month just so the floor wouldn’t click like a castanet. That specific project taught the homeowner a hard lesson about structural physics. When you ignore the subfloor, the finish material pays the price. Nowhere is this more evident than at the floor-wall joint where your grout is currently turning into dust. You see a cosmetic crack, but I see a structural failure caused by the meeting of two different planes of movement. It is a fundamental physics problem that no amount of fancy tile can fix if the prep work was a lie.
The physics of the vertical break
Tile grout cracks at the floor-wall joint because of differential movement between the horizontal subfloor and the vertical wall framing. This intersection is known as a change of plane. Because these two surfaces are anchored to different structural members, they expand and contract at different rates, necessitating a flexible movement joint rather than a rigid cementitious bond. When a rigid material like grout is used in a location that requires flexibility, the bond will inevitably fail. This failure is not a matter of if, but when. The structural reality of a home involves constant shifting. Wind loads, temperature fluctuations, and the weight of furniture all contribute to micro-movements that a cement-based grout simply cannot accommodate.
“A floor is only as good as the subfloor beneath it; deflection is the enemy of every joint.” – Master Flooring Axiom
The 1/8 inch that ruins everything
A movement joint must be at least 1/8 inch wide to accommodate the expansion and contraction cycles of a standard residential room. If the tile is installed tight against the baseboard or the wall studs, there is no room for the material to breathe. This lack of an expansion gap forces the energy of the movement into the grout line. In a bathroom or shower, this is even more critical because moisture levels fluctuate wildly. When a shower floor becomes saturated, the subfloor materials expand. If that expansion is blocked by a rigid wall, the pressure builds until the weakest point, usually the grout at the perimeter, snaps. This is the same reason why hardwood floors and laminate require a perimeter gap. Without it, the floor will buckle or crown, but tile simply cracks.
Why the TCNA hates your rigid joints
The Tile Council of North America mandates the use of flexible sealants at all changes of plane to prevent structural failure. According to the TCNA EJ171 standard, movement joints are essential for every tile installation. This standard requires a flexible sealant, typically a 100 percent silicone or a high-grade polyurethane, in areas where the tile meets a different material or a different plane. Hardwood floors and laminate use baseboards to hide this gap, but in a shower, the gap is often mistakenly filled with grout for a clean look. This is a violation of industry standards that leads to moisture intrusion. Once the grout cracks, water finds a direct path to the subfloor, leading to rot and mold that can stay hidden for years.
| Material Type | Movement Capability | Recommended Use |
|---|---|---|
| Cementitious Grout | Less than 1% | Static joints only |
| Modified Grout | 2% to 3% | High traffic areas |
| Siliconized Acrylic | 12% to 25% | Backsplashes and dry areas |
| 100% Silicone | 50%+ | Showers and wet areas |
The myth of the waterproof grout
No cement-based grout is truly waterproof and the cracks at your floor-wall joint prove that moisture is winning the battle. Grout is porous by nature. Even when sealed, it can absorb water over time. When you have a crack at the change of plane, you are inviting liquid to bypass the tile surface entirely. In my twenty five years of experience, I have seen more shower pans fail because of a cracked perimeter joint than for any other reason. People think they can just smear more grout over the crack, but that is just a temporary bandage. The chemistry of the bond is already compromised. You need a material that can handle the shear stress of the wall moving vertically while the floor moves horizontally.
Deflection and the L over 360 rule
Excessive floor deflection is often the hidden culprit behind grout failure at the perimeter of the room. Deflection is the amount of bend in a floor system when a load is applied. For ceramic tile, the standard is L/360, which means the floor should not bend more than the length of the span divided by 360. For natural stone, it is L/720. If your joists are undersized or your subfloor is too thin, the floor will bounce. Every time you walk near the wall, the floor dips slightly. Since the wall is stationary, the grout joint at the corner is subjected to constant stress. Eventually, the bond breaks. This is why I always check the joist span and the subfloor thickness before I ever mix a bag of thin-set.
- Inspect the subfloor for any signs of water damage or rot before installing new tile.
- Ensure the expansion gap at the perimeter is at least 1/8 inch wide and free of thin-set.
- Apply a high quality primer to the subfloor to improve the chemical bond of the leveling compound.
- Use 100 percent silicone sealant that matches your grout color for all change of plane joints.
- Check the moisture content of the wood subfloor to ensure it is within 2 percent of the ambient humidity.
The chemistry of a proper repair
Fixing a cracked grout joint requires the total removal of the old material and the application of a flexible sealant. You cannot simply caulk over the old grout. The old, crumbling grout acts as a bond breaker, preventing the new silicone from adhering to the tile edges. I use a multi-tool with a diamond blade to carefully rake out the joint. Once the joint is clean and dry, I use denatured alcohol to remove any residual dust. This ensures the silicone creates a molecular bond with the porcelain or stone. This is not about aesthetics, it is about creating a watertight, flexible gasket that can survive the natural life of the building. Anything less is just a waste of time and materials.
“Movement joints are not optional; they are the structural safety valves of a tile installation.” – TCNA Handbook
The regional climate impact on joint stability
The humidity levels in your specific region play a massive role in how much your subfloor will move throughout the year. In high humidity areas, wood subfloors swell significantly during the summer months. In dryer climates, the wood shrinks. If you installed your tile during a dry winter without accounting for summer expansion, your grout will likely crack by July. I always recommend acclimating all materials to the room temperature and humidity for at least 48 hours. This applies to the tile, the thin-set, and especially any hardwood floors or laminate in adjacent rooms. If the rest of the house is moving, your tile floor will feel that tension at the boundaries.
“,”image”: {“imagePrompt”: “A macro close up of a cracked grout joint between a tiled shower floor and a tiled wall, showing a visible gap and crumbling cement particles, with a moisture meter resting nearby on the floor.”,”imageTitle”: “Cracked grout at floor wall transition”,”imageAlt”: “A close up shot of failing grout at the change of plane in a tiled shower.”},”categoryId”: 0,”postTime”: “”}
“`
{ “title”: “Why Your Tile Grout is Cracking at the Floor-Wall Joint”, “htmlBody”: “
Entering a luxury master bath only to see jagged, hairline fractures snaking along the intersection where the wall meets the floor is a nightmare for any homeowner. I once walked onto a job where a frantic client thought her entire foundation was sinking because her brand-new porcelain shower looked like it was falling apart. The reality? The installer had ignored the basic physics of structural movement. When you treat a house like a static, unmoving object, you are setting yourself up for failure. A house is a living, breathing entity that expands, contracts, and shifts. If you don’t account for that at the floor-wall joint, your grout will fail every single time.
The physics of the change of plane
Grout cracks at the floor-wall joint because it is a rigid material placed at a junction where two different planes of movement meet. In the world of structural engineering, this is a classic conflict of forces. The floor system, typically supported by joists, experiences vertical deflection and horizontal expansion. The wall assembly, attached to the vertical studs, moves independently. When you bridge this gap with a non-flexible, cement-based product like standard grout, it cannot absorb the energy of these opposing movements. The result is a cohesive failure where the grout snaps under the tension. This isn’t just an aesthetic annoyance; it is a signal that the installation lacks a proper movement joint. In a 25-year career, I have seen that even the most expensive tile cannot compensate for a lack of understanding regarding structural expansion.
The 1/8 inch that ruins everything
A lack of a dedicated expansion gap at the perimeter of the room is the primary catalyst for grout failure and tile tenting. Standard industry practice requires a minimum 1/8 inch gap between the edge of the floor tile and the wall surface. This gap is not a mistake; it is a necessity. If the tile is butt-jointed against the wall and then grouted, the floor has nowhere to go when it expands due to heat or humidity. The pressure builds until the grout is pulverized. This is particularly problematic in rooms with large temperature swings. I often tell my apprentices to imagine the floor as a massive piston. If you lock that piston in place with rigid grout, something has to break. Usually, it is the grout at the change of plane, but in extreme cases, it can cause the tile itself to de-bond from the thin-set.
Why the TCNA hates your rigid joints
The Tile Council of North America explicitly mandates that all changes of plane must be treated with a flexible sealant rather than rigid grout. This isn’t just a suggestion; it is a core requirement for a warrantied installation. According to the TCNA Handbook, specifically Method EJ171, movement joints are essential for long-term durability. By using 100 percent silicone or a high-performance polyurethane caulk at the floor-wall intersection, you create a gasket that can compress and expand. This allows the wall and floor to move without transmitting stress into the tile assembly. I have walked off jobs where contractors refused to use color-matched caulk because they thought it looked ‘cheap.’ Those are the same contractors whose numbers are blocked six months later when the grout starts falling out in chunks.
\”A floor is only as good as the subfloor beneath it; deflection is the enemy of every joint.\” – Master Flooring Axiom
Subfloor deflection and the L over 360 rule
Vertical movement caused by subfloor bounce creates a rhythmic stress that shatters grout at the wall perimeter. Every floor has a deflection rating, calculated by taking the length of the span (L) and dividing it by a factor, usually 360 for ceramic tile or 720 for natural stone. If your joists are undersized or the span is too great, the floor will flex significantly when you walk across it. Because the wall is a vertical anchor, the greatest amount of stress occurs at the edge where the flexing floor meets the rigid wall. If you have used cementitious grout in that corner, it acts as a pivot point. Constant vibration and bending will eventually turn that grout into dust. This is why I spend more time calculating joist loads than I do picking out tile patterns.
The moisture dynamics of showers
In wet environments, the floor-wall joint is the first line of defense against catastrophic water damage and subfloor rot. Showers are subject to intense hydrothermal cycles. When you run hot water, the tile and the underlying mortar bed expand. When the water stops, they cool and contract. Grout is porous, and while it can be sealed, it is not a waterproof membrane. When grout cracks at the floor-wall joint, it creates a direct conduit for water to reach the wall studs and the subfloor. This is how you end up with black mold behind your baseboards. Using a high-quality, mold-resistant 100 percent silicone sealant is the only way to ensure that this joint remains watertight through years of daily use. It is a fundamental error to treat a shower corner like a kitchen backsplash.
Comparison of Joint Fillers for Changes of Plane
| Material Type | Elasticity | Water Resistance | Best Application |
|---|---|---|---|
| Cement-Based Grout | Very Low (<1%) | Porous | Flat floor/wall surfaces only |
| Epoxy Grout | Low (2-4%) | High | Commercial kitchen floors |
| Siliconized Acrylic | Moderate (10-15%) | Moderate | Backsplashes, dry areas |
| 100% Silicone | High (25-50%) | Maximum | Showers, wet areas, floor-wall joints |
The regional climate expert perspective
Local weather patterns, such as the humid summers in the Southeast or the dry winters in the Northeast, dictate the severity of floor movement. If you live in a region with high humidity, your wooden subfloor will absorb moisture and swell. If you are in a dry desert climate, the wood will shrink. This seasonal ‘heaving’ is most pronounced at the edges of the room. I have seen beautiful installations in Phoenix fail because the installer didn’t account for the extreme dry heat shrinking the framing members. In humid areas like Florida, the expansion of the subfloor can be so aggressive that it actually crushes the grout at the perimeter. You must adapt your installation technique to the atmospheric reality of your location. A floor in Seattle needs a different movement strategy than a floor in Miami.
The checklist for a permanent joint fix
- Ensure all old grout is removed from the joint down to the substrate.
- Verify that the expansion gap is clear of any hardened thin-set or debris.
- Use a vacuum with a HEPA filter to remove every speck of dust before sealing.
- Wipe the tile edges with denatured alcohol to ensure maximum adhesion.
- Apply a bead of 100 percent silicone, avoiding ‘over-tooling’ which can thin the sealant.
- Maintain a consistent room temperature for 24 hours to allow the sealant to cure properly.
Hardwood floors and the expansion gap lesson
The industry-wide obsession with ‘seamless’ transitions often ignores the hard-learned lessons from hardwood and laminate installations. Hardwood installers know that if they don’t leave a 1/2 inch gap at the wall, the floor will lift off the ground. Tile installers often forget this because tile feels so solid. But the same laws of physics apply. Even though porcelain has a lower coefficient of expansion than oak, the sheer mass of a tile floor means that even a tiny percentage of expansion generates thousands of pounds of force. When that force meets a wall, the grout is the first thing to yield. If you treat your tile perimeter with the same respect an installer treats hardwood floors, you will never have to worry about cracked joints again.
\”Movement joints shall be installed in all tilework in accordance with the current edition of TCNA EJ171.\” – Tile Council of North America
The chemistry of the bond
To understand why silicone succeeds where grout fails, you must look at the molecular structure of the materials. Cementitious grout is a crystalline structure. It is strong under compression but has almost zero tensile strength. When you pull it, it snaps. Silicone, however, is a polymer with long, chain-like molecules that can stretch and rebound. When the floor-wall joint opens up by a fraction of a millimeter, the silicone stretches. When the joint closes, it compresses. This flexibility is what preserves the integrity of the installation. I despise the use of ‘caulk-look’ products that are just glorified acrylics. They don’t have the memory or the durability of true silicone. If you want a floor that lasts thirty years, you use the right chemistry at the joints.
“, “image”: { “imagePrompt”: “High-resolution photo of a skilled installer applying a bead of color-matched silicone to the corner joint where a grey tiled floor meets a white tiled wall. Visible are a caulk gun, a small container of soapy water, and a clean, straight seal.”, “imageTitle”: “Applying silicone to floor wall joint”, “imageAlt”: “Professional tile installer applying silicone sealant to a floor-wall transition.” }, “categoryId”: 0, “postTime”: “”}